10 Gigabit Ethernet For The Pi

When people like Bell and Marconi invented telephones and radios, you have to wonder who they talked to for testing. After all, they had the first device. [Jeff] had a similar problem. He got a 10 gigabit network card working with the Raspberry Pi Compute Module. But he didn’t have any other fast devices to talk to. Simple, right? Just get a router and another network card. [Jeff] thought so too, but as you can see in the video below, it wasn’t quite that easy.

Granted, some — but not all — of the hold-ups were self-inflicted. For example, doing some metalwork to get some gear put in a 19-inch rack. However, some of the problems were unavoidable, such as the router that has 10 Gbps ports, but not enough throughput to actually move traffic at that speed. Recabling was also a big task.

Continue reading “10 Gigabit Ethernet For The Pi”

EMOJO Chatbot Will Be There For You

We all need someone to talk to sometimes, and the pandemic has only made matters worse when it comes to the number of people living with anxiety and depression. Exchanging the simplest of pleasantries can make you feel whole again, but the masks make it hard to engage with strangers and judge their emotions, so your big trip to the grocery store can make you feel lonely in a crowd.

So you go back home, still feeling lonely, and maybe you turn on the TV. Watching people interact is probably the next best thing to actual interaction, and it might even make you laugh. But have you ever wished you could talk to the people on TV? With [aniketdhole]’s EMOJO chatbot, you’ll feel as though you’re among friends. And technically you are — all the dialogue is from the TV show Friends.

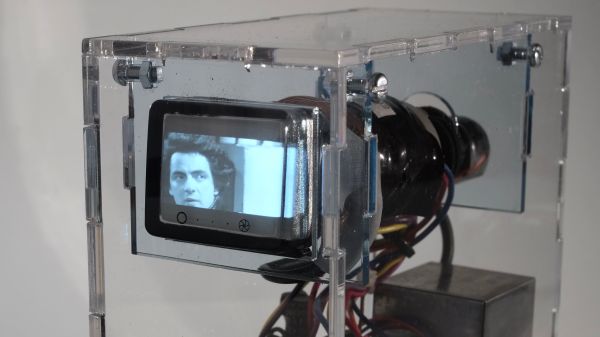
In Castaway, Tom Hanks didn’t give that volleyball a frowny face, now did he? Nor does he have a dopey grin. Instead, he wears a wry smile that suggests depth of character and a grasp of the dire situation at hand. But now we have emoji, and they do a pretty good job of conveying and evoking emotion. EMOJO is a visual chatbot that uses voice and emoji to make easy, two-way conversation to help chase the loneliness away. It uses a Raspberry Pi and a TFT display to take voice input from a Bluetooth headset, convert it to text, and then respond in kind with both voice and text. It was a finalist in the rethink displays round of the Hackaday Prize, and we can’t wait to see how its character develops. Be sure to check out the demo after the break.

Continue reading “EMOJO Chatbot Will Be There For You”

A Custom Raspberry Pi Spotted In The Wild

Since the first Raspberry Pi came to market back in 2012 there have been a variety of models released. Some of them are rarer than others, and unusual boards can even be rather sought-after. This one spotted at a Thai junk vendor won’t be in the hands of many collectors though, and investigating it sheds a bit of light on some of the most unusual boards from the company.

The board is recognisably very similar to a Pi 3 with a BCM2837 SoC, but despite all that it has no Pi logo. On the underside there is an eMMC in place of the SD socket, and one pair of USB sockets has been replaced by a micro USB socket and a header. The source is reported to have been a washing machine, but given that this SoC is exclusive to the the Pi Foundation there’s no way it could easily have been manufactured by anyone else. The answer comes in the 2015 launch of a customisation service for industrial customers, which allowed manufacturers to have their own versions made of the fruity SBC.

From the point of view of an experimenter this board offers nothing that a standard device can’t do. But it’s an interesting glimpse of an unseen side to the Pi story, and it holds the prospect of other special versions being unearthed. If you find one on your travels, let us know!

This Horrifying Robot Is Here To Teach You A Lesson

No, despite what it might look like, this isn’t some early Halloween project. The creepy creation before you is actually a tongue-in-cheek “robot” created by the prolific [Nick Bild], a topical statement about companies asking their remote workers to come back into the office now that COVID-19 restrictions are being lifted. Why commute every day when this ultra realistic avatar can sit in for you?

OK, so maybe it’s not the most impressive humanoid creation to ever grace the pages of Hackaday. But if you’re looking to spin up a simple telepresence system, you could do worse than browsing through the Python source code [Nick] has provided. Using a Raspberry Pi 4, a webcam, and a microphone, his client-server architecture combines everything the bot sees and hears into a simple page that can be remotely accessed with a web browser.

Naturally this work from home (WFH) bot wouldn’t be much good if it was just a one-way street, so [Nick] has also added a loudspeaker that replays whatever he says on the client side. To prevent a feedback loop, his software includes a function that toggles which direction the audio stream goes in by passing the appropriate commands to the bot over SSH; a neat trick to keep in mind for your own, less nightmarish, creations.

If you’re looking for something a bit more capable and have some cardboard laying around, this DIY telepresence mount for your phone might be a good place to start.

Continue reading “This Horrifying Robot Is Here To Teach You A Lesson”

Installing Linux Like It’s 1989

A common example of the sheer amount of computing power available to almost anyone today is comparing a smartphone to the Apollo guidance computer. This classic computer was the first to use integrated circuits so it’s fairly obvious that most modern technology would be orders of magnitude more powerful, but we don’t need to go back to the 1960s to see this disparity. Simply going back to 1989 and getting a Compaq laptop from that era running again, while using a Raspberry Pi Zero to help it along, illustrates this point well enough.

[befinitiv] was able to get a Raspberry Pi installed inside of the original computer case, and didn’t simply connect the original keyboard and display and then call it a completed build. The original 286 processor is connected to the Pi with a serial link, so both devices can communicate with each other. Booting up the computer into DOS and running a small piece of software allows the computer into a Linux terminal emulator hosted on the Raspberry Pi. The terminal can be exited and the computer will return back to its original DOS setup. This also helps to bypass the floppy disk drive for transferring files to the 286 as well, since files can be retrieved wirelessly on the Pi and then sent to the 286.

This is quite an interesting mashup of new and old technology, and with the Pi being around two orders of magnitude more powerful than the 286 and wedged into vacant space inside the original case, [befinitiv] points out that this amalgamation of computers is “borderline useful”. It’s certainly an upgrade for the Compaq, and for others attempting to get ancient hardware on the internet, don’t forget that you can always use hardware like this to access Hackaday’s retro site.

Continue reading “Installing Linux Like It’s 1989”

Raspberry Pi Pico Oscilloscope

As you dive deeper into the world of electronics, a good oscilloscope quickly is an indispensable tool. However, for many use cases where you’re debugging low voltage, low speed circuits, that expensive oscilloscope is using only a fraction of its capabilities. As a minimalist alternative for these use cases [fhdm-dev] created Scoppy, a combination of firmware for the Raspberry Pi Pico and an Android app to create a functional oscilloscope.

As you would expect, the specifications are rather limited, capturing a maximum of 100 kpts at a speed of 500 kS/s shared between the two channels. Without some additional front end circuitry to protect the Pico, the input voltage is limited to 0-3.3 V. Neither the app nor the firmware is open source, and getting access to the second channel and removing ads requires a ~$3 in-app purchase. Even so, we can still think of plenty of practical uses for a ~$7 oscilloscope. If you do decide to add some front-end circuitry to change to voltage range, you can set them in the app, and switch between them by pulling certain GPIO pins high or low. The app has most of the basic oscilloscope features covered, continuous and single shot capture, adjustable trigger settings and a scalable waveform display.

Simple, cheap oscilloscopes like these have their place, but you start to understand why the “real” ones are so expensive when you see what goes into developing a high performance oscilloscope.

A Pi USB Webcam That Was Born To Boot Quick

In the age of business Zoom rooms, having a crisp webcam is key for introducing fellow executives to your pet cat. Unfortunately, quality webcams are out of stock and building your own is out of the question. Or is it? [Dave Hunt] thought otherwise and cooked up the idea of using the Raspberry Pi’s USB on-the-go mode to stream video camera data over USB. [Huan Trong] then took it one step further, reimagining the project as a bootable system image. The result is showmewebcam, a Raspberry Pi image that transforms your Pi with an attached HQ camera module into a quality usb camera that boots in under 5 seconds.

Some of the project offerings on showmewebcam are truly stunning. Not only does the setup boot quickly, the current version requires a mere 64MB micro SD card for operations. What’s more, the project exposes camera settings like brightness, contrast, etc. via UVC, a standard USB protocol such that they can be controlled via typical software applications.

What’s truly exciting about this project is to see it take shape as different people tackle the same concept whilst referencing the prior milestone. [Dave Hunt] landed early to the scene with a blog post that established that the Pi could indeed be used as a USB webcam. [Huang Truong] built on that starting point, maturing it into an uploadable system image with notes to follow. Now, with showmewebcam on Github, it has seen contributions from over a dozen folks. Its performance specs are gradually improving. And it has a detailed wiki complete with suggested lenses and user-contributed cases to make your first webcam building experience a success.

And that’s not to say that others aren’t tackling this project from their own perspective either! For an alternate encapsulated solution, have a look at [Jeff Geerling’s] take on Pi-based USB webcams.


Continue reading “A Pi USB Webcam That Was Born To Boot Quick”