Soldering The Elusive USB C Port

Many SMD components, including some USB C ports, have their terminals under the component. When installed, the pins are totally hidden. So, how do you solder or unsolder them? That’s the problem [Learn Electronics Repair] encountered when fixing a Lenovo Yoga, and he shows us his solution in the video below.

He showed the removal in a previous video, but removal is a bit easier since you can just heat up the area, yank the connector, and then clean up the resulting mess at your leisure. Installation is harder because once the socket is down, you no longer have access to the pads.

Continue reading “Soldering The Elusive USB C Port”

Royal Typewriter Gets A Second (or Third) Life

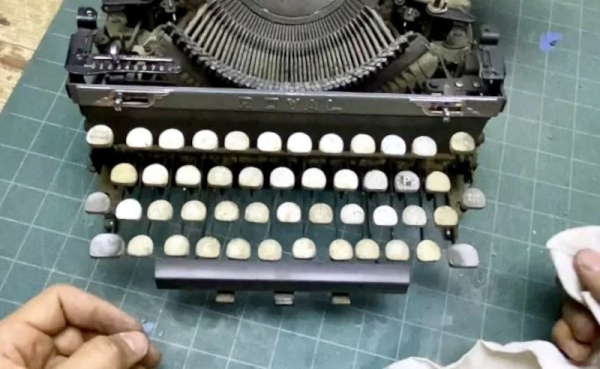
Usually when we are restoring something with a keyboard, it is some kind of old computer or terminal. But [Make it Kozi] wanted an old-fashioned typewriter. The problem is, as he notes, they are nostalgically popular these days, so picking up a working model can be pricey. The answer? Buy a junker and restore it. You can watch the whole process in the video below, too, but nearly the only sound you’ll hear is the clacking of the keys. He doesn’t say a word until around the 14-minute mark. Just warning you if you have it playing in the background!

Of course, even if you can find a $10 typewriter, it probably won’t be the same kind, nor will it have the same problems. However, it is a good bet that any old mechanical typewriter will need many of the same steps.

Continue reading “Royal Typewriter Gets A Second (or Third) Life”

1950s Switching Power Supply Does It Mechanically

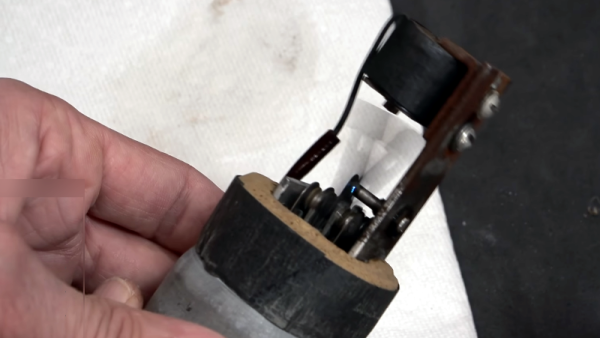
When you hear about a switching power supply, you think of a system that uses an inductor and a switch to redistribute energy from the input to the output. But the original switching power supply was the vibrator supply, which was common in automotive applications back in the middle part of the last century. [Mr. Carlson] has a 1950s-era example of one of these, and he invites us to watch him repair it in the video below.

Most of the vibrator supplies we’ve seen have been built into car radios, but this one is in a box by itself. The theory is simple. A DC voltage enters the vibrator, which is essentially a relay that has a normally-closed contact in series with its coil. When current flows, the relay operates, breaking the contact. With no magnetic field, the springy contact returns to its original position, allowing the whole cycle to repeat.

Continue reading “1950s Switching Power Supply Does It Mechanically”

Fixing An Expensive Smart Toaster Is Worth The Time

There was a time when the simplest and cheapest kitchen appliance you could think of was a toaster. Some nichrome wire, a spring, and a mechanical thermostat were all you needed. Those days are gone and today’s toasters are full of special features, network connections, and fancy cases.

Take [boilerbot]’s Breville die-cast smart toaster. The four-slice model is upwards of $200. As Star Trek’s [Mr. Scott] said, “The more they overthink the plumbing, the easier it is to stop up the drain.” That seems to be the case here. The toaster failed and while [boilerbot] did fix it, he got lucky. He mentions that if the damage had been lower in the toaster, getting to it would have been nearly impossible.

Continue reading “Fixing An Expensive Smart Toaster Is Worth The Time”

Emergency DIP Pin Repair For Anyone

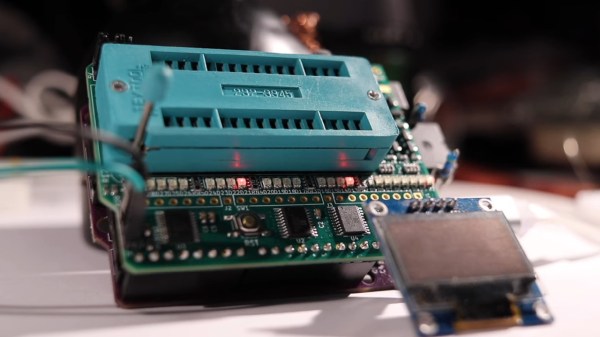
Who has not at some point in their lives experienced the horror of a pin on a DIP package breaking off? It’s generally game over, but what if you don’t have another chip handy to substitute? It’s time to carefully grind away some of the epoxy and solder on a new pin, as [Zafer Yildiz] has done in the video below the break.

The technique relies on the pins continuing horizontally inside the package , such that they provide a flat surface. He’s grinding with the disk on a rotary tool, we have to say we’d use one of the more delicate grinding heads for something more akin to a miniature die grinder.

Once the flat metal surface is exposed, the chip is placed in a socket, and a new pin is cut from the leg of a TO-220 power device. This is carefully bent over, inserted in the socket, and soldered into place. The whole socket and chip arrangement is then used in place of the chip, making for something a little bulky but one infinitely preferable to having to junk the device.

There are many useful skills to be learned when it comes to reworking, and we’ve covered a few in our time. Most recently we saw a guide to lifting SMD pins.

Continue reading “Emergency DIP Pin Repair For Anyone”

Inside A Hisense TV Repair Attempt

Many of us misspent our youth fixing televisions. But fixing a 1970s TV is a lot different than today — the parts were big and tubes were made to be replaced. Have you torn into a big flat screen lately? It is a different world, as [The Fixologist] shows us in the video below.

The TV in question was rescued from a neighbor who was about to throw it away. If you are like us, you’ll watch the first few minutes and see it powers up, but the screen is very dark. Back light problem, right? No problem. But it turned out to be more than we thought.

Honestly, we assumed it might be the power supply, and we would have put a power supply on the LED leads to test that first. That would have been smart because taking the panel off to reveal the LEDs was very difficult! There were two bad LEDs, though, so in the end you’d have had to do it anyway.

We were disappointed that after fixing the LED, he cracked the LCD panel during the reinstallation. So, in the end, this was more of a teardown video and not a repair video. He seemed to think a lot of the tape in the unit was to thwart repairs. That could be, but we wondered if it made manufacturing the TV easier which, after all, is mostly what they care about.

This isn’t the first time we’ve heard people tearing into a TV and wondering if the factory was against them. We’ve considered it, but we are pretty sure it isn’t the case.

Continue reading “Inside A Hisense TV Repair Attempt”

Recovering A Physically Broken SD Card

There is much to be found online about recovering data from corrupt SD cards, but [StezStix Mix] had an entirely different problem with his card. He’d filmed an important video to it, then dropped it and ran his office chair over it, snapping it almost in half. He’s put up a couple of videos showing how he recovered the data, and we’ve put them below the break.

A modern SD card is mostly just plastic, as in the decades since the format was created, the size of the circuitry on it has decreased dramatically. So his stroke of luck was that the card circuitry was a tiny PCB little bigger than the contact pad area on a full size SD card. There was a problem though, it wouldn’t be easy to fit in an SD card socket. So in the first video he goes through physically wiring it to a USB card reader, which results in reading the data after a false start in remembering that an SD card activates a switch.

This however is not the end of the story, because he had viewers asking why he didn’t simply attach an SD card shaped bit of cardboard. So the second video below goes through this, trying both card, and an SD to micro SD adapter. We find that making something to fit an SD socket is a lot less easy than it looks, but eventually he manages it.

Meanwhile those of you with long memories may recall this isn’t the first SD surgery we’ve brought you.

Continue reading “Recovering A Physically Broken SD Card”