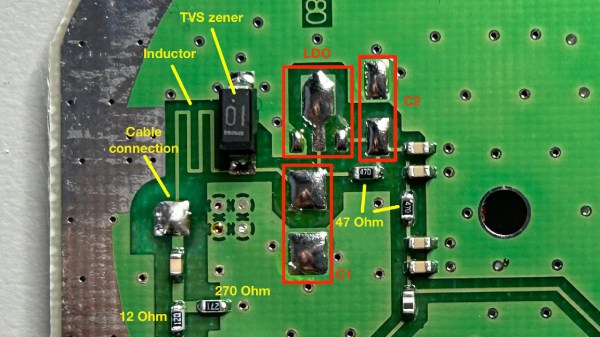
PCB of the antenna about to be modded, with components desoldered and different parts of the circuit highlighted

Make A GPS Antenna Compatible With Same Manufacturer’s Receiver

GPS can be a bit complex of a technology – you have to receive a signal below the noise floor, do quite a bit of math that relies on the theory of relativity, and, adding insult to injury, you also have to go outside to test it. Have you ever wondered how GPS antennas work? In particular, how do active GPS antennas get power down the same wire that they use to send signal to the receiver? Wonder not, because [Tom Verbeure] gifts us a post detailing a mod letting a fancy active GPS antenna use a higher-than-expected input voltage.

[Tom]’s post has the perfect amount of detail – enough pictures to illustrate the entire journey, and explanations to go with all of it. The specific task is modifying a Symmetricom antenna to work with a Symmetricom GPS receiver, which has a puzzling attribute of supplying 12V to the antenna instead of more common 3.3V or 5V. There’s a few possible options detailed, and [Tom] goes for the cleanest possible one – replacing the voltage regulator used inside of the antenna.

With a suitable replacement regulator installed and a protection diode replaced, the antenna no longer registers as a short circuit, and gets [Tom] a fix – you, in turn, get a stellar primer on how exactly active GPS antennas work. If your device isn’t ready to use active GPS antennas, [Tom]’s post will help you understand another GPS antenna hack we covered recently – modifying the Starlink dish to use an active antenna to avoid jamming on the frontlines.

A NanoVNA As A Dip Meter

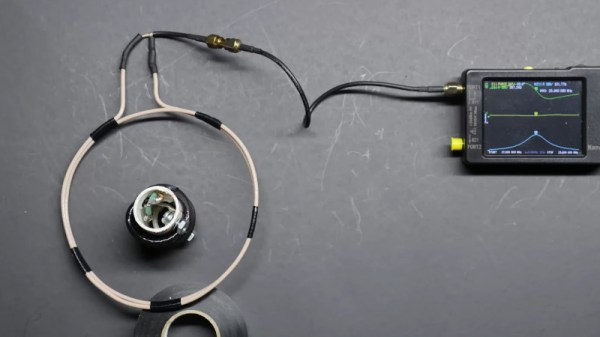
A staple of the radio amateur’s arsenal of test equipment in previous decades was the dip meter. This was a variable frequency oscillator whose coil would be placed near the circuit to be tested, and which would show an abrupt current dip on a moving coil meter when its frequency matched the resonant frequency of what it was testing. For some reason the extremely useful devices seem hard to come by in 2024, so [Rick’s Ham Shack] has come along with a guide to using a nanoVNA in their place.

It’s a simple enough technique, indeed it’s a basic part of using these instruments, with a large sensor coil connected to the output port and a frequency sweep set up on the VNA. The reactance graph then shows any resonant peaks it finds in the frequency range, something easily demonstrated in the video below the break by putting a 20 meter (14 MHz) trap in the coil and seeing an immediate clear peak.

For many readers this will not be news, but for those who’ve not used a VNA before it’s a quick and easy demo of an immediate use for these extremely versatile instruments. For those of us who received our callsigns long ago it’s nothing short of miraculous that a functional VNA can be picked up at such a reasonable price, and we’d go as far as to suggest that non radio amateurs might find one useful, too. Read our review, if you’re interested.

Continue reading “A NanoVNA As A Dip Meter”

FLOSS Weekly Episode 777: Asterisk — Wait, Faxes?

This week Jonathan Bennett and David Ruggles sit down with Joshua Colp to talk about Asterisk! That’s the Open Source phone system software you already interact with without realizing it. It started as a side project to run the phones for Linux Support Services, and it turned out working on phone systems was more fun than supporting Linux. The project grew, and in the years since has landed at Sangoma, where Joshua holds the title of Asterisk Project Lead.

Asterisk is used in call centers, business phone systems, and telecom appliances around the world. But how does it handle faxes, WebRTC, and stopping spam calls? Just kidding on that last one, still an unsolved problem.

Continue reading “FLOSS Weekly Episode 777: Asterisk — Wait, Faxes?”

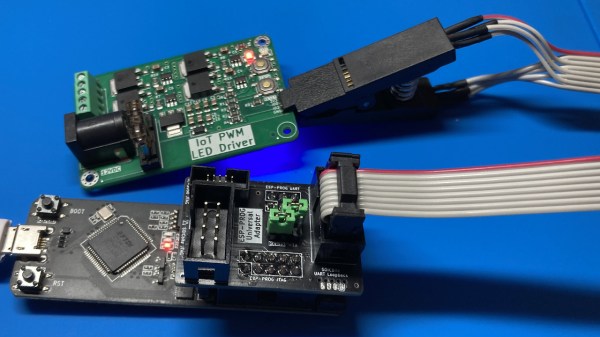
Showing the ESP-Prog-Adapter board plugged into the ESP-Prog adapter, wired to a SOIC clip, that then attaches to a PCB under test

ESP-Prog-Adapter Makes Your ESP32 Tinkering Seamless

Did you ever struggle with an ESP32 board of yours, wishing you had exposed that UART, or seriously lacking the JTAG port access? If so, you should seriously check out [0xjmux]’s ESP-PROG-Adapter project, because [0xjmux] has put a lot of love and care into making your ESP32 hardware interfacing a breeze. This project shows you how to add JTAG and UART headers with extra low board footprint impact, gives you a KiCad library to do so super quickly, and shares a simple and helpful adapter PCB you can directly use with the exceptionally cheap Espressif’s ESP-Prog dongle you should have bought months ago.

The hardware is perfect for ZIF no-soldering interfacing – first of all, both UART and JTAG can be connected through a SOICBite connection, a solderless connector idea that lets you use SPI flashing clips on specially designed pads at the edge of your board. For the fancy toolkit hackers among us, there’s also a Tag Connect symbol suggested and a connector available, but it carries JTAG that you will already get with the SOICBite, so it’s maybe not worth spending extra money on.

Everything is fully open-source, as one could hope! If you’re doing ESP32 hacking, you simply have to order this board and a SOIC clip to go with it, given just how much trouble [0xjmux]’s board will save you when programming or debugging your ESP32 devices. Now, you don’t strictly need the ESP-Prog dongle – you could remix this into an adapter for the Pi Pico board instead. Oh, and if designing boards with ARM CPUs are your thing, you might benefit from being reminded about the Debug Edge standard!

The BR55 battle rifle held in its creator's hands during test firing

Making The Halo 2 Battle Rifle Real

We’ve just been shown a creation that definitely belongs on the list of impressive videogame replicas. This BR55 rifle built by [B Squared Mfg] not only looks exactly like its in-game Halo 2 counterpart, it’s also a fully functional firearm chambered in 5.56. The attention to detail even brings us a game-accurate electronic ammo counter.

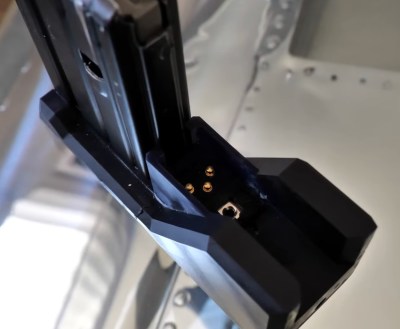
The rifle and magazine communicate over three pins.

Unfortunately, the only information we have on the weapon currently is the video below. But he does at least go into detail about the practical aspects: caliber choice, the arduous journey of bolt carrier sourcing, and how the ammo counter works.

Each magazine has a potentiometer built into it to detect the number of rounds loaded, but there’s a bit of trickery involved. In the real world, there’s no way a magazine this size could hold the 36 rounds of ammunition depicted in the game, so for each shot fired, the counter subtracts three. It takes a little imagination, but this way it looks as close to the game version as possible.

There will be no published files due to legal concerns, but there’s nothing you couldn’t build yourself, as long as said legal concerns are sorted out for yourself. Depending on where you live, you might have to settle for building a Gauss gun in the same frame, we’ve even seen slimmer ones done commercially. Whatever you build, make sure you store it in a way others can’t access it easily — not all gun safes pass this test.

Continue reading “Making The Halo 2 Battle Rifle Real”

PCB Design Review: Tinysparrow, A Module For CAN Hacking Needs

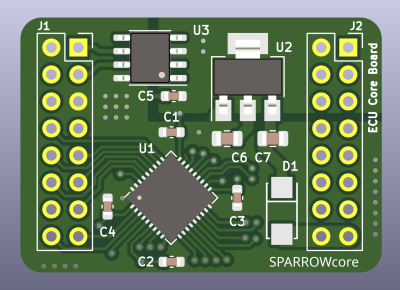
I enjoy seeing modules that can make designing other devices easier, and when I did a call for design reviews, [enp6s0] has submitted one such board to us. It’s a module called TinySparrow (GitHub), that helps you build your own vehicle ECUs and any other CAN-enabled things. With a microcontroller, plenty of GPIOs, a linear regulator and a CAN transceiver already onboard, this board has more than enough kick for anyone in hobbyist-range automotive space – and it’s surprisingly tiny!

You could build a lot of things around this module – a CAN bus analyzer or sniffer, a custom peripheral for car dashes, or even a full-blown ECU. You can even design any hardware for a robot or a piece of industrial technology that uses CAN for its backbone – we’ve all seen a few of those! It’s a great board, but it uses six layers. We’ll see if we can do something about that here.

Modules like TinySparrow will make your PCBs cheaper while ordering, too! Thanks to the carefully routed microcontroller and the CAN transmitter, whatever board you design around this chip definitely wouldn’t need six layers like this one does – and, unlike designing your own board, you can use someone’s well-tested and tailored libraries and reference circuits!

With TinySparrow, you save a lot of time, effort and money whenever you want to design a car or industrial accessory. After looking at the board files, my proposal for helping today’s board is – like last time – to make its production cheaper, so that more people can get this board into their hands if the creator ever does try and manufacture it. I also have some tips to make future improvements on this design easier, and make it more friendly for its userbase.

Continue reading “PCB Design Review: Tinysparrow, A Module For CAN Hacking Needs”

Recovering A Physically Broken SD Card

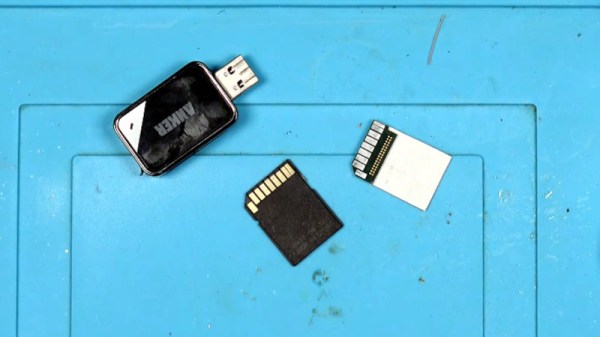
There is much to be found online about recovering data from corrupt SD cards, but [StezStix Mix] had an entirely different problem with his card. He’d filmed an important video to it, then dropped it and ran his office chair over it, snapping it almost in half. He’s put up a couple of videos showing how he recovered the data, and we’ve put them below the break.

A modern SD card is mostly just plastic, as in the decades since the format was created, the size of the circuitry on it has decreased dramatically. So his stroke of luck was that the card circuitry was a tiny PCB little bigger than the contact pad area on a full size SD card. There was a problem though, it wouldn’t be easy to fit in an SD card socket. So in the first video he goes through physically wiring it to a USB card reader, which results in reading the data after a false start in remembering that an SD card activates a switch.

This however is not the end of the story, because he had viewers asking why he didn’t simply attach an SD card shaped bit of cardboard. So the second video below goes through this, trying both card, and an SD to micro SD adapter. We find that making something to fit an SD socket is a lot less easy than it looks, but eventually he manages it.

Meanwhile those of you with long memories may recall this isn’t the first SD surgery we’ve brought you.

Continue reading “Recovering A Physically Broken SD Card”