There are a lot of oscilloscopes from around the 1990s which are still very much desirable today, such as the Tektronix TDS 744A which [DiodesGoneWild] got his grubby mitts on. This is a 500 MHz, 4-channel scope, with a capture rate of 500 MS/s (4 channels) to 2 GS/s (1 channel). It also has a color display and even comes with a high-density (1.44 MB) floppy drive. Unfortunately this particular unit was having trouble with its fourth channel, and its NuColor display had degraded, something that’s all too common with this type of hybrid CRT/LCD (LCCS) technology.
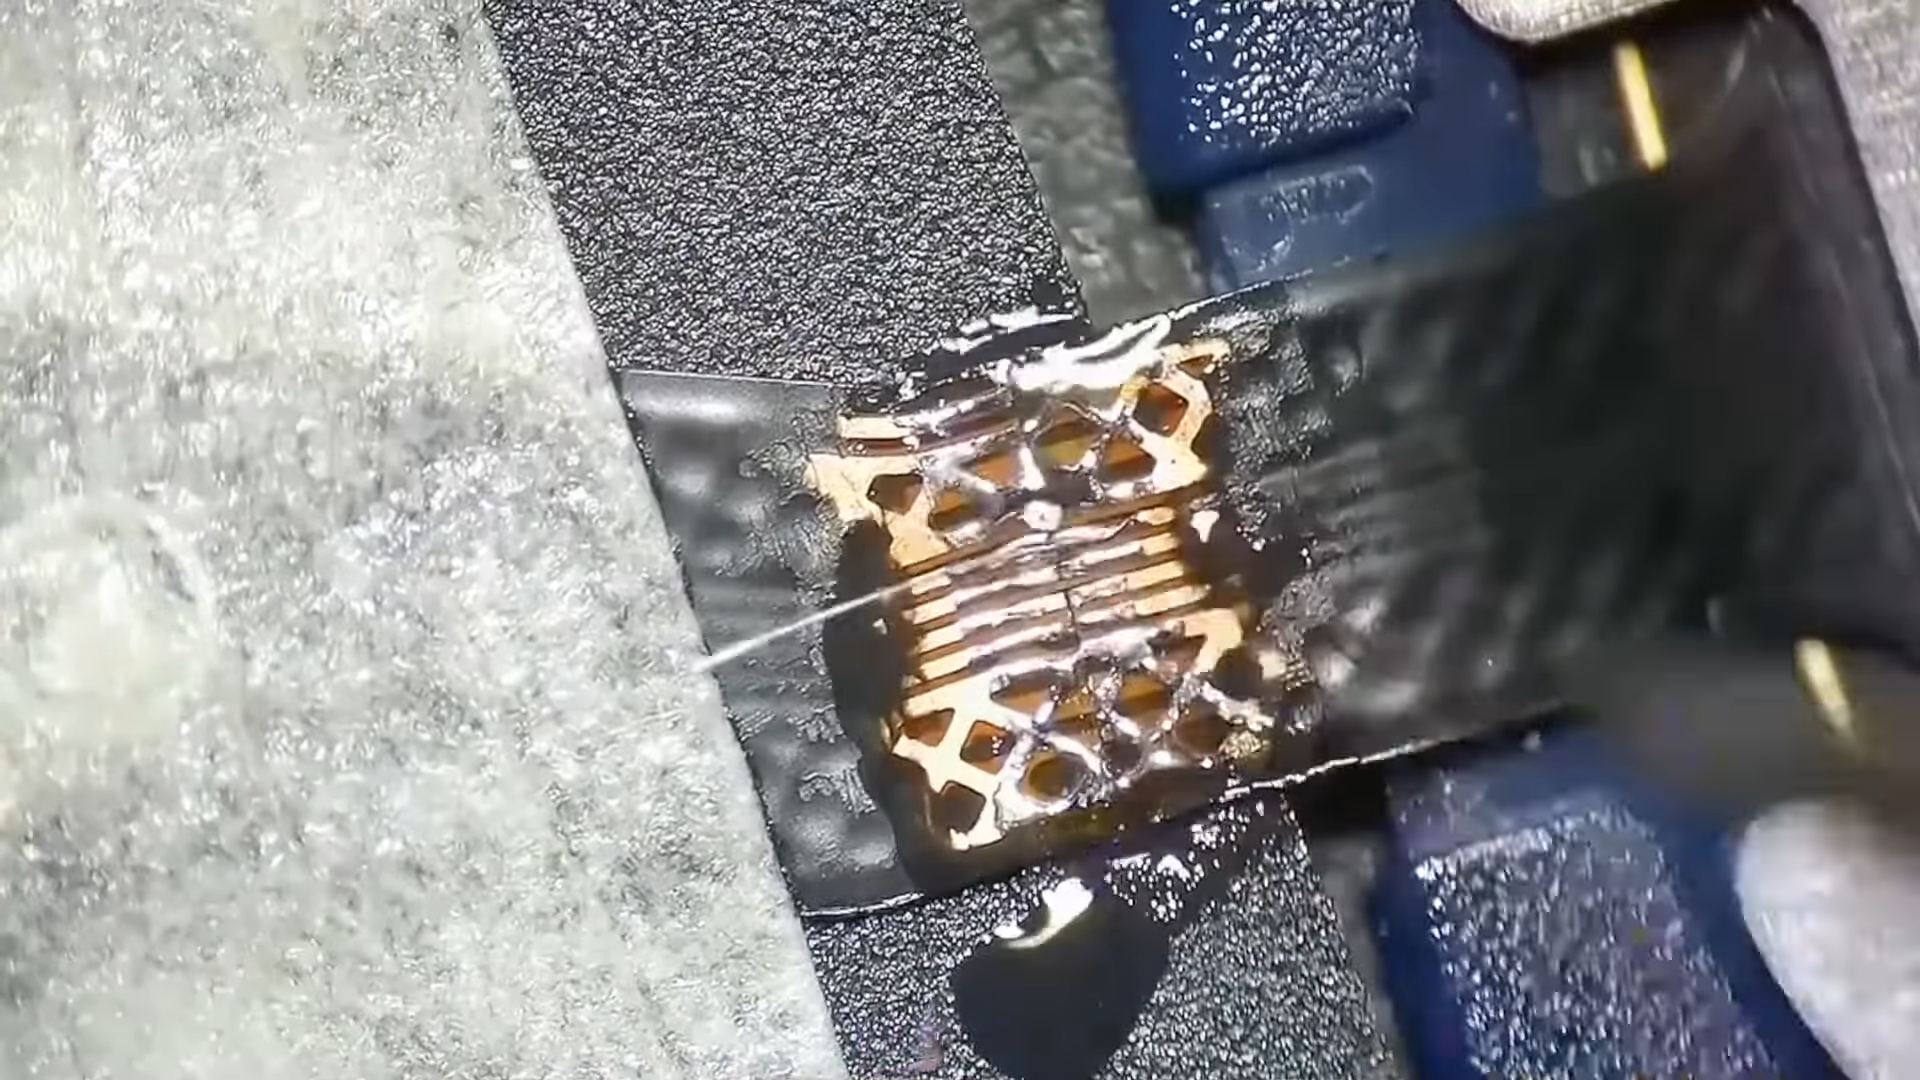
Starting with a teardown of the unit to inspect the guts, there was no obvious damage on the PCBs, nor on the acquisition board which would explain the weird DC offset on the fourth channel. After cleaning and inspecting the capture module and putting the unit back together, the bias seen on channel four seemed to disappear. A reminder that the best problems are the ones that solve themselves. As for the NuColor display, this uses a monochrome CRT (which works fine) and an LCD with color filters. It’s the latter which seems degraded on this unit, with a repair still being planned.
We covered NuColor-based devices before, which offer super-sharp details that are hard to capture even with modern-day LCDs, never mind the ones of the 90s. Fixing these NuColor displays can be easy-ish sometimes, as [JVG] found when tearing apart a very similar Tektronix TDX-524A which required a power supply fix and the removal of goopy gel between the CRT and LCD to restore it.
Continue reading “TDS 744A Scope Teardown Fixes Dodgy Channel”