TDS 744A Scope Teardown Fixes Dodgy Channel

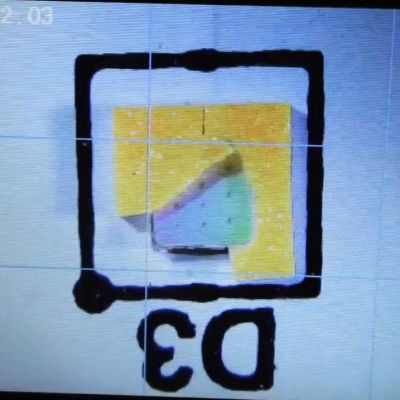
There are a lot of oscilloscopes from around the 1990s which are still very much desirable today, such as the Tektronix TDS 744A which [DiodesGoneWild] got his grubby mitts on. This is a 500 MHz, 4-channel scope, with a capture rate of 500 MS/s (4 channels) to 2 GS/s (1 channel). It also has a color display and even comes with a high-density (1.44 MB) floppy drive. Unfortunately this particular unit was having trouble with its fourth channel, and its NuColor display had degraded, something that’s all too common with this type of hybrid CRT/LCD (LCCS) technology.

Starting with a teardown of the unit to inspect the guts, there was no obvious damage on the PCBs, nor on the acquisition board which would explain the weird DC offset on the fourth channel. After cleaning and inspecting the capture module and putting the unit back together, the bias seen on channel four seemed to disappear. A reminder that the best problems are the ones that solve themselves. As for the NuColor display, this uses a monochrome CRT (which works fine) and an LCD with color filters. It’s the latter which seems degraded on this unit, with a repair still being planned.

We covered NuColor-based devices before, which offer super-sharp details that are hard to capture even with modern-day LCDs, never mind the ones of the 90s. Fixing these NuColor displays can be easy-ish sometimes, as [JVG] found when tearing apart a very similar Tektronix TDX-524A which required a power supply fix and the removal of goopy gel between the CRT and LCD to restore it.

Continue reading “TDS 744A Scope Teardown Fixes Dodgy Channel”

8-Tracks Are Back? They Are In My House

What was the worst thing about the 70s? Some might say the oil crisis, inflation, or even disco. Others might tell you it was 8-track tapes, no matter what was on them. I’ve heard that the side of the road was littered with dead 8-tracks. But for a while, they were the only practical way to have music in the car that didn’t come from the AM/FM radio.

If you know me at all, you know that I can’t live without music. I’m always trying to expand my collection by any means necessary, and that includes any format I can play at home. Until recently, that list included vinyl, cassettes, mini-discs, and CDs. I had an 8-track player about 20 years ago — a portable Toyo that stopped working or something. Since then, I’ve wanted another one so I can collect tapes again. Only this time around, I’m trying to do it right by cleaning and restoring them instead of just shoving them in the player willy-nilly.

Update: I Found a Player

A small 8-track player and equally small speakers, plus a stack of VHS tapes.
I have since cleaned it.

A couple of weeks ago, I was at an estate sale and I found a little stereo component player and speakers. There was no receiver in sight. I tested the player with the speakers and bought them for $15 total because it was 75% off day and they were overpriced originally. While I was still at the sale, I hooked it up to the little speakers and made sure it played and changed programs.

Well, I got it home and it no longer made sound or changed programs. I thought about the play head inside and how dirty it must be, based on the smoker residue on the front plate of the player. Sure enough, I blackened a few Q-tips and it started playing sweet tunes again. This is when I figured out it wouldn’t change programs anymore.

I found I couldn’t get very far into the player, but I was able to squirt some contact cleaner into the program selector switch. After many more desperate button presses, it finally started changing programs again. Hooray!

I feel I got lucky. If you want to read about an 8-track player teardown, check out Jenny List’s awesome article. Continue reading “8-Tracks Are Back? They Are In My House”

How To Find Replacement Parts When Model Numbers Don’t Match

[Sharad Shankar] repaired a broken TV by swapping out the cracked and malfunctioning image panel for a new one. Now, part-swapping is a great way to repair highly integrated modern electronics like televisions, but the real value here is something else. He documented his fix but the real useful part is his observations and guidance on how to effectively look for donor devices when the actual model of donor device can’t be found.

The usual approach to fixing a device by part swapping is to get one’s hands on two exact same models that are broken in different ways. But when it comes to consumer electronics with high turnovers — like televisions — it can be very difficult to actually locate any particular model once it’s no longer on shelves. [Sharad Shankar]’s broken TV was a 65″ TCL R646 purchased in 2021, and searching for a second 65″ TCL R646 was frankly like looking for a needle in a haystack. That’s when he got a visit from the good ideas fairy. Continue reading “How To Find Replacement Parts When Model Numbers Don’t Match”

Ribbon Cable Repair Saves Touch ID

Some might consider a broken ribbon cable to be unsalvagable. They’re delicate and fragile as can be, and sometimes just fussing with them further is enough to cause additional damage. However, with the right set of skills, it’s sometimes possible to achieve the unthinkable. As [Master Liu] demonstrates, you can indeed repair a broken ribbon cable, even a tiny one.

The video concerns a ribbon cable linked to a Touch ID fingerprint sensor from an Apple device. It’s common to break these ribbon cables when repairing a phone, and doing so causes major problems. The Touch ID device is paired with the host phone, and cannot easily be replaced. Thus, repair is justified if at all possible.

The repair involves scraping back the outer coating on the two sections of ribbon cable to reveal the copper pads underneath. The copper is then coated with flux and solder to prepare them to be rejoined. Ultra-fine strands of wire are used to join the individual traces. Then, the repaired section is coated in some kind of sealant or epoxy to hold the joint together and protect it from failing again. The theory is easy, it’s just the execution that’s hard.

Ribbon cable repair is becoming one of our favorite topics of late. Sometimes you just need a steady hand and the guts to have a go. Video after the break.

Continue reading “Ribbon Cable Repair Saves Touch ID”

Broken Lens Provides Deep Dive Into Camera Repair

While most of us are probably willing to pick up the tools and void the warranty on just about anything, often just to see what’s inside, many of us draw the line at camera gear. The tiny screws, the complex mechanisms, and the easily destroyed optical elements are all enough to scare off the average hacker. Not so for [Anthony Kouttron], who tore into a broken eBay Sigma lens and got it working again.

Now, to be fair, modern lenses tend to have a lot more in them that’s amenable to repair than back in the old days. And it seemed from the get-go that [Anthony]’s repair was going to be more electronic than optical or mechanical. The 45-mm lens was in fantastic shape physically, but wouldn’t respond to any controls when mounted to a camera body. Removing the lens bayonet mount exposed the main controller PCB, which is tightly packed with SMD components and connectors for the flex cables that burrow further into the lens to its many sensors and actuators. By probing traces with his multimeter, [Anthony] found a DC-DC converter on the main PCB with an unknown component nearby. This turned out to be an SMD fuse, and as luck would have it, it was open. Replacing the fuse got the lens working again, and while there’s always the nagging suspicion that whatever blew the fuse the first time could happen again, the repair seems to have worked.

Despite the simplicity of the fix, [Anthony] continued the teardown and shared a lot of tips and tricks for lens repairs, including where he would have looked next if the fuse had been good. One tip we loved was the use of double-sided tape to organize parts as they’re removed; this is particularly important with camera gear where screws or different lengths can make for a really bad day on reassembly.

Feeling the need to dive deeper into lens repair? This step-by-step repair should keep you satisfied.

The Impossible Repair: Ribbon Cables

It’s a problem that faces many a piece of older equipment that ribbon cables of the type used on membrane keyboards start to fail as they become older. These cables are extremely difficult to repair as they can’t be soldered to, and since they are usually custom to the device in question. All is not lost, though, as [Spare Time Repair] shows us with the cable on a Honeywell heating controller broken by a user attempting to remove the battery with a screwdriver.

The whole process can be seen in the video below the break, and it involves the use of a vinyl cutter to cut the pattern of tracks in aluminium tape stuck on a sheet of acetate. This makes a new piece of ribbon cable, however it’s still a step short of being part of the circuit. His challenge is to make a clip tight enough to attach it to the intact part of the broken cable and maintain contact, then to hope that the new piece of cable bent back on itself can make enough contact for the device to work.

At the end of it all, he has a working Honeywell controller, though as he points out, it’s a device he has little interest in. Instead, this opens a window on an extremely useful technique that should be of relevance far beyond the world of heating. There’s one machine close to home for us that could use this technique, for example.

Continue reading “The Impossible Repair: Ribbon Cables”

Screenshot of the YouTube channel videos list, showing a number of videos like the ones described in this article.

[DiyOtaku] Gives Old Devices A New Life

Sometimes we get sent a tip that isn’t just a single article or video, but an entire blog or YouTube channel. Today’s channel, [Diy Otaku], is absolutely worth a watch if you want someone see giving a second life to legendary handheld devices, and our creator has been going at it for a while. A common theme in most of the videos so far – taking an old phone or a weathered gaming console, and improving upon them in a meaningful way, whether it’s lovingly restoring them, turning them into a gaming console for your off days, upgrading the battery, or repairing a common fault.

The hacks here are as detailed as they are respectful to the technology they work on. The recent video about putting a laptop touchpad into a game controller, for instance, has the creator caringly replace the controller’s epoxy blob heart with a Pro Micro while preserving the original board for all its graphite-covered pads. The touchpad is the same used in an earlier video to restore a GPD Micro PC with a broken touchpad, a device that you can see our hacker use in a later video running FreeCAD, helping them design a 18650 battery shell for a PSP about to receive a 6000 mAh battery upgrade.

Continue reading “[DiyOtaku] Gives Old Devices A New Life”