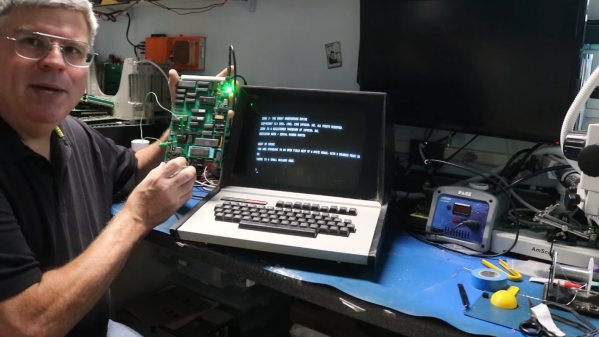
Scott and his Prompt 80

Restoring A Vintage Intel Prompt 80 8080 Microcomputer Trainer

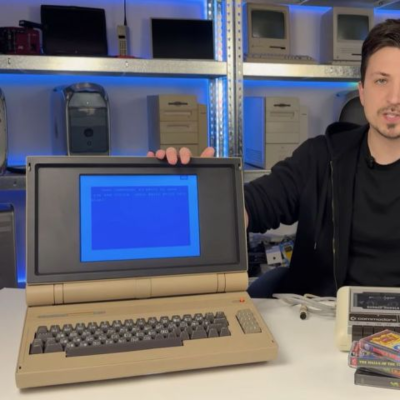
Over on his blog our hacker [Scott Baker] restores a Prompt 80, which was a development system for the 8-bit Intel 8080 CPU.

[Scott] acquired this broken trainer on eBay and then set about restoring it. The trainer provides I/O for programming, probing, and debugging an attached CPU. The first problem discovered when opening the case is that the CPU board is missing. The original board was an 80/10 but [Scott] ended up installing a newer 80/10A board he scored for fifty bucks. Later he upgraded to an 80/10B which increased the RAM and added a multimodule slot.

[Scott] has some luck fixing the failed power supply by recapping some of the smaller electrolytic capacitors which were showing high ESR. Once he had the board installed and the power supply functional he was able to input his first assembly program: a Cylon LED program! Making artistic use of the LEDs attached to the parallel port. You can see the results in the video embedded below.

Continue reading “Restoring A Vintage Intel Prompt 80 8080 Microcomputer Trainer”

CP/M Gently

If you are interested in retrocomputers, you might be like us and old enough to remember the old systems and still have some of the books. But what if you aren’t? No one is born knowing how to copy a file with PIP, for example, so [Kraileth] has the answer: A Gentle Introduction to CP/M.

Of course, by modern standards, CP/M isn’t very hard. You had disks and they had a single level of files in them. No subdirectories. We did eventually get user areas, and the post covers that near the end. It was a common mod to treat user 0 as a global user, but by default, no.

Continue reading “CP/M Gently”

A hand holding a One ROM with a Commodore 64 in the background

One ROM: The Latest Incarnation Of The Software Defined ROM

Retrocomputers need ROMs, but they’re just so read only. Enter the latest incarnation of [Piers]’s One ROM to rule them all, now built with a RP2350, because the newest version is 5V capable. This can replace the failing ROMs in your old Commodore gear with this sweet design on a two-layer PCB, using a cheap microcontroller.

[Piers] wanted to use the RP2350 from the beginning but there simply wasn’t space on the board for the 23 level shifters which would have been required. But now that the A4 stepping adds 5 V tolerance [Piers] has been able to reformulate his design.

The C64 in the demo has three different ROMs: the basic ROM, kernel ROM, and character ROM. A single One ROM can emulate all three. The firmware is performance critical, it needs to convert requests on the address pins to results on the data bus just as fast as it can and [Piers] employs a number of tricks to meet these requirements.

The PCB layout for the RP2350 required extensive changes from the larger STM32 in the previous version. Because the RP2350 uses large power and ground pads underneath the IC this area, which was originally used to drop vias to the other side of the board, was no longer available for signal routing. And of course [Piers] is constrained by the size of the board needing to fit in the original form factor used by the C64.

The One ROM code is available over on GitHub, and the accompanying video from [Piers] is an interesting look into the design process and how tradeoffs and compromises and hacks are made in order to meet functional requirements.

Continue reading “One ROM: The Latest Incarnation Of The Software Defined ROM”

An Amiga Demo With No CPU Involved

Of the machines from the 16-bit era, the Commodore Amiga arguably has the most active community decades later, and it’s a space which still has the power to surprise. Today we have a story which perhaps pushes the hardware farther than ever before: a demo challenge for the Amiga custom chips only, no CPU involved.

The Amiga was for a time around the end of the 1980s the most exciting multimedia platform, not because of the 68000 CPU it shared with other platforms, but because of its set of custom co-processors that handled tasks such as graphics manipulation, audio, and memory. Each one is a very powerful piece of silicon capable of many functions, but traditionally it would have been given its tasks by the CPU. The competition aims to find how possible it is to run an Amiga demo entirely on these chips, by using the CPU only for a loader application, with the custom chip programming coming entirely from a pre-configured memory map which forms the demo.

The demoscene is a part of our community known for pushing hardware to its limits, and we look forward to seeing just what they do with this one. If you have never been to a demo party before, you should, after all everyone should go to a demo party!


Amiga CD32 motherboard: Evan-Amos, Public domain.

Checking Out A TV Pattern Generator From 1981

The picture on a TV set used to be the combined product of multiple analog systems, and since TVs had no internal diagnostics, the only way to know things were adjusted properly was to see for yourself. While many people were more or less satisfied if their TV picture was reasonably recognizable and clear, meaningful diagnostic work or calibration required specialized tools. [Thomas Scherrer] provides a close look at one such tool, the Philips PM 5519 GX Color TV Pattern Generator from 1981.

This Casio handheld TV even picked up the test pattern once the cable was disconnected, the pattern generator acting like a miniature TV station.

The Philips PM 5519 was a serious piece of professional equipment for its time, and [Thomas] walks through how the unit works and even opens it up for a peek inside, before hooking it up to both an oscilloscope and a TV in order to demonstrate the different functions.

Tools like this were important because they could provide known-good test patterns that were useful not just for troubleshooting and repair, but also for tasks like fine-tuning TV settings, or verifying the quality of broadcast signals. Because TVs were complex analog systems, these different test patterns would help troubleshoot and isolate problems by revealing what a TV did (and didn’t) have trouble reproducing.

As mentioned, televisions at the time had no self-diagnostics nor any means of producing test patterns of their own, so a way to produce known-good reference patterns was deeply important.

TV stations used to broadcast test patterns after the day’s programming was at an end, and some dedicated folks have even reproduced the hardware that generated these patterns from scratch.

Continue reading “Checking Out A TV Pattern Generator From 1981”

Tiny Datasette Uses USB For The Modern Day

While you can still find tape being used for backup storage, it’s pretty safe to say that the humble audio cassette is about as out of date as a media format can be. Still, it has a certain retro charm we’re suckers for, particularly in the shape of a Commodore Datasette. We’re also suckers for miniaturization, so how could we not fall for [bitluni] ‘s tiny datasette replica?

Aesthetically, he’s copying the Commodore original to get those sweet nostalgia juices flowing, but to make things more interesting he’s not using compact cassette tapes. Instead, [bitluni] started with a micro cassette dictaphone, which he tore down to its essentials and rebuilt into the Commodore-shaped case.

The prototyping of this project was full of hacks — like building a resistor ladder DAC in an unpopulated part of a spare PCB from an unrelated project. The DAC is of course key to getting data onto the micro cassettes. After some playing around [bitluni] decided that encoding data with FSK (frequency-shift keying), as was done back on the C-64, was the way to go. (Almost like those old engineers knew what they were doing!) The dictaphone tape transport is inferior to the old Datasette, though, so as a cheap error-correction hack, [bitluni] needed to duplicate each byte to make sure it gets read correctly.

The micro cassettes only fit a laughable amount of data by modern standards this way (about 1 MB) but, of course that’s not the point. If you jump to 11:33 in the video embedded below, you can see the point: the shout of triumph when loading PacMan (all 8 kB of it) from tape via USB. That transfer was via serial console; eventually [bitluni] intends to turn this into the world’s least-practical mass storage device, but that wasn’t necessary for proof-of-concept. The code for what’s shown is available on GitHub.

If you have an old Datasette you want to use with a modern PC, you’d better believe that we’ve got you covered. We’ve seen other cassette-mass-storage interfaces over the years, too. It might be a dead medium, but there’s just something about “sticky tape and rust” that lives on in our imaginations.

Continue reading “Tiny Datasette Uses USB For The Modern Day”

[Linus] playing his instrument

The Qweremin Is A QWERTY Theremin With A C-64 Heart

While we have nothing against other 1980s 8-bit machines, the Commodore 64 has always been something special. A case in point: another new instrument using the C-64 and its beloved SID chip. Not just new to retrocomputing, either, but new entirely. [Linus Ã…kesson] has invented the QWERTY Theremin, and there’s a Commodore at its core.

If this project sounds vaguely familiar, it’s because it’s based off of the C-64 Theremin [Linus] built a couple of years back. According to [Linus], there were a few issues with the instrument. A real thereminist told him there were issues with the volume response; his own experience taught him that theremins are very, very hard to play for the uninitiated.

This model fixes both problems: first, the volume circuit now includes a pair of digital-analog-converters (DACs) connected to the Commodore’s user port, allowing smooth and responsive volume control.In this case the DAC is being used solely for volume control: SID provides the analog reference voltage, while the 12-bit digital input served as volume control. That proved noisy, however, thanks to the DC bias voltage of the audio output being scaled by the DAC even when the SID was silent. A second DAC was the answer, providing a signal to cancel out the scaled bias voltage. That in and of itself is a clever hack.

The biggest change is that this instrument no longer plays like a theremin. Pitch has been taken out of the 555-based antenna circuit entirely; while vertical distance from the spoon-antenna still controls volume as in a regular theremin and the last version, the horizontal distance from the second antenna (still a clamp) now controls vibrato. Pitch is now controlled by the QWERTY keyboard. That’s a much easier arrangement for [Linus] — this isn’t his first chiptune QWERTY instrument, after all.

Continue reading “The Qweremin Is A QWERTY Theremin With A C-64 Heart”