Hands-On Review: TCam-Mini WiFi Thermal Imager

A thermal camera is a tool I have been wanting to add to my workbench for quite a while, so when I learned about the tCam-Mini, a wireless thermal camera by Dan Julio, I placed an order. A thermal imager is a camera whose images represent temperatures, making it easy to see things like hot and cold spots, or read the temperature of any point within the camera’s view. The main (and most expensive) component of the tCam-Mini is the Lepton 3.5 sensor, which sits in a socket in the middle of the board. The sensor is sold separately, but the campaign made it available as an add-on.

Want to see how evenly a 3D printer’s heat bed is warming up, or check whether a hot plate is actually reflowing PCBs at the optimal temperature? How about just seeing how weird your pets would look if you had heat vision instead of normal eyes? A thermal imager like the tCam-mini is the tool for that, but it’s important to understand exactly how the tCam-mini works. While it may look like a webcam, it does not work like one.

Continue reading “Hands-On Review: TCam-Mini WiFi Thermal Imager”

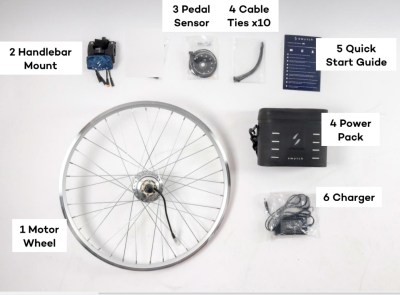
Hands On With The Raspberry Pi POE+ HAT

There’s a lot happening in the world of Pi. Just when we thought the Raspberry Pi Foundation were going to take a break, they announced a new PoE+ HAT (Hardware Attached on Top) for the Pi B3+ and Pi 4, and just as soon as preorders opened up I placed my order.

Now I know what you’re thinking, don’t we already have PoE HATs for the Pis that support it? Well yes, the Pi PoE HAT was released back in 2018, and while there were some problems with it, those issues got cleared up through a recall and minor redesign. Since then, we’ve all happily used those HATs to provide up to 2.5 amps at 5 volts to the Pi, with the caveat that the USB ports are limited to a combined 1.2 amps of current.

PoE vs PoE+
$20 for either of them. Choose wisely.

The Raspberry Pi 4 came along, and suddenly the board itself can pull over 7 watts at load. Combined with 6 watts of power for a hungry USB device or two, and we’ve exceeded the nominal 12.5 watt power budget. As a result, a handful of users that were trying to use the Pi 4 with POE were hitting power issues when powering something like dual SSD drives over USB. The obvious solution is to make the PoE HAT provide more power, but the original HAT was already at the limit of 802.3af PoE could provide, with a maximum power output of 12.95 watts.

The solution the Raspberry Pi Foundation came up with was to produce a new product, the PoE+ HAT, and sell it along side the older HAT for the same $20. The common name for 802.3at is “PoE+”, which was designed specifically for higher power devices, maxing out at 30 watts. The PoE+ HAT is officially rated to output 20 watts of power, 5 volts at 4 amps. These are the output stats, so the efficiency numbers don’t count against your power budget, and neither does the built-in fan.

Continue reading “Hands On With The Raspberry Pi POE+ HAT”

AD409 Microscope Review

It wasn’t that long ago that if you had an optical microscope in your electronics shop, you had a very well-supplied shop indeed. Today, though, a microscope is almost a necessity since parts have shrunk to flyspeck-size. [Maker Mashup] recently picked up an AD409 and posted a video review of the device that you can see below.

The microscope in question has a 10-inch screen so it is a step up from the usual cheap microscope we’ve seen on a lot of benches. Of course, that size comes at a price. The going rate for a new on is about $400.

Continue reading “AD409 Microscope Review”

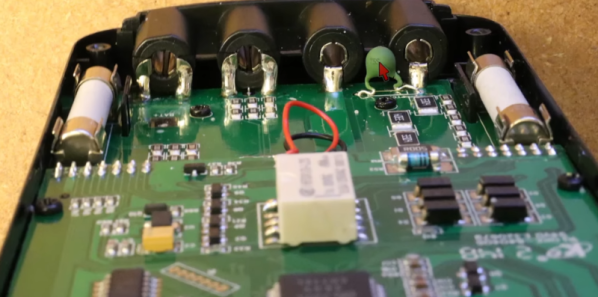
Review And Teardown Of Economical Programmable DC Power Supply

[Kerry Wong] isn’t afraid to get his hands dirty, and is always more than willing to open things up and see what makes them tick. This time, he reviews and tears down the Topshak LW-3010EC programmable DC power supply, first putting the unit through its paces, then opens it up to see how it looks on the inside.

The Topshak LW-3010EC is in a family of reasonably economical power supplies made by a wide variety of manufacturers, which all share many of the same internals and basic construction. This one is both programmable as well as nice and compact, and [Kerry] compares and contrasts it with other power supplies in the same range as he tests the functions and  checks over the internals.

Overall, [Kerry] seems pleased with the unit. You can watch him put the device through its paces in the video embedded below, which ends with him opening it up and explaining what’s inside. If you’ve ever been curious about what’s inside one of these power supplies and how they can be expected to perform, be sure to fire up the video below the page break.

Speaking of power supplies, most of us have ready access to ATX power supplies. They are awfully capable pieces of hardware, and hackable in their own way. Our own Jenny List will tell you everything you need to know about the ATX power supply, and how to put it to new uses.

Continue reading “Review And Teardown Of Economical Programmable DC Power Supply”

Review: Inkplate 6PLUS

While the price of electronic paper has dropped considerably over the last few years, it’s still relatively expensive when compared to more traditional display technology. Accordingly, we’ve seen a lot of interest in recovering the e-paper displays used in electronic shelf labels and consumer e-readers from the likes of Amazon, Barnes & Noble, and Kobo. Unfortunately, while these devices can usually be purchased cheaply on the second hand market, liberating their displays is often too complex a task for the average tinkerer.

Enter the Inkplate. With their open hardware ESP32 development board that plugs into the e-paper displays salvaged from old e-readers, the team at e-radionica is able to turn what was essentially electronic waste into a WiFi-enabled multipurpose display that can be easily programmed using either the Arduino IDE or MicroPython. The $99 Inkplate 6 clearly struck a chord with the maker community, rocketing to 926% of its funding goal on Crowd Supply back in 2020. A year later e-radionica released the larger and more refined Inkplate 10, which managed to break 1,000% of its goal.

For 2021, the team is back with the Inkplate 6PLUS. This updated version of the original Inkplate incorporates the design additions from the Inkplate 10, such as the Real-Time-Clock, expanded GPIO, and USB-C port, and uses a display recycled from newer readers such as the Kindle Paperwhite. These e-paper panels are not only sharper and faster than their predecessors, but also feature touch support and LED front lighting; capabilities which e-radionica has taken full advantage of in the latest version of their software library.

With its Crowd Supply campaign recently crossing over the 100% mark, we got a chance to go hands-on with a prototype of the Inkplate 6PLUS to see how e-radionica’s latest hacker friendly e-paper development platform holds up.

Continue reading “Review: Inkplate 6PLUS”

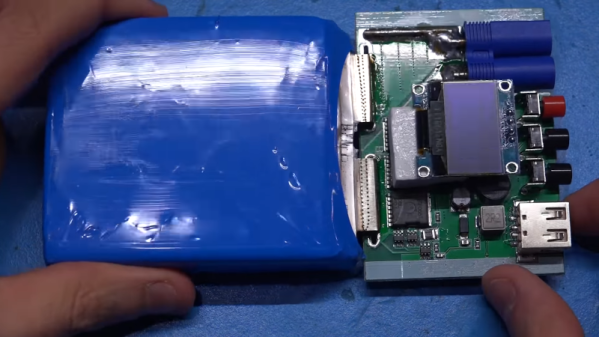
Review: Battery Spot Welders, Why You Should Buy A Proper Spot Welder

Making battery packs is a common pursuit in our community, involving spot-welding nickel strips to the terminals on individual cells. Many a pack has been made in this way, using reclaimed 18650 cells taken from discarded laptops. Commercial battery spot welders do a good job but have a huge inrush current and aren’t cheap, so it’s not uncommon to see improvised solutions such as rewound transformers taken out of microwave ovens. There’s another possibility though, in the form of cheap modules that promise the same results using a battery pack as a power supply.

With a love of putting the cheaper end of the global electronic marketplace through its paces for the entertainment of Hackaday readers I couldn’t resist, so I parted with £15 (about $20), for a “Mini Spot Welder”, and sat down to wait for the mailman to bring me the usual anonymous grey package.

Continue reading “Review: Battery Spot Welders, Why You Should Buy A Proper Spot Welder”

Starlink: A Review And Some Hacks

I could probably be described as a SpaceX enthusiast. I catch their launches when I can, and I’ve watched the development of Starship with great interest. But the side-effect of SpaceX’s reusable launch system is that getting to space has become a lot cheaper. Having excess launch capacity means that space projects that were previously infeasible become suddenly at least plausible. One of those is Starlink.

Starlink is SpaceX’s satellite Internet service. Wireless and cellular internet have helped in some places, but if you really live out in the sticks, satellite internet is your only option. And while satellite Internet isn’t exactly new, Starlink is a bit different. Hughesnet, another provider, has a handful of satellites in geostationary orbit, which is about 22,000 miles above the earth. To quote Grace Hopper, holding a nearly foot-long length of wire representing a nanosecond, “Between here and the satellite, there are a very large number nanoseconds.”

SpaceX opted to do something a bit different. In what seemed like an insane pipe dream at the time, they planned to launch a satellite constellation of 12,000 birds, some of them flying as low as 214 mile altitude. The downside of flying so low is that they won’t stay in orbit as long, but SpaceX is launching them significantly faster than they’re coming down. So far, nearly 1,600 Starlink satellites are in orbit, in a criss-crossing pattern at 342 miles (550 km) up.

This hundred-fold difference in altitude matters. A Hughesnet connection has a minimum theoretical latency of 480 ms, and in reality runs closer to 600 ms. Starlink predicts a theoretical minimum of under 10 ms, though real-world performance isn’t quite that low yet. In the few weeks I’ve had the service, ping times have fallen from mid-60s down to 20s and 30s. The way Starlink works right now, data goes up to the closest satellite and directly back to the connected ground station. The long-term plan is to allow the satellites to talk directly to each other over laser links, skipping over the ground stations. Since the speed of light is higher in a vacuum than in a fiber-optic cable, the fully deployed system could potentially have lower latency than even fiber Internet, depending on the location of the endpoint and how many hops need to be made.

I got a Starlink setup, and have been trying out the beta service. Here’s my experience, and a bonus hack to boot.

Continue reading “Starlink: A Review And Some Hacks”