Running Modern Linux From A Single Floppy Disk

There was a time when booting Linux from a floppy disk was the norm, but of course, those days are long gone. Even if you still had a working 3.5 inch drive, surely the size of the modern kernel alone would far exceed the 1.44 MB capacity of the disks, to say nothing of all the support software required to create a usable operating system. Well that’s what we thought, anyway.

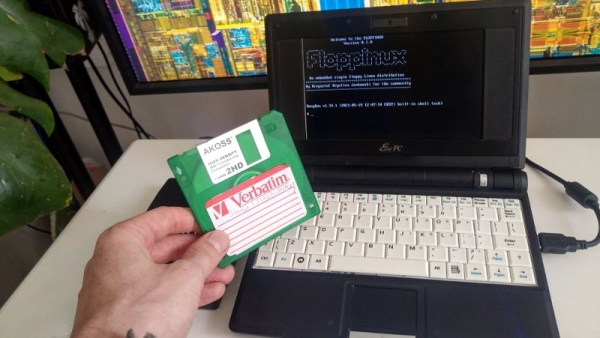
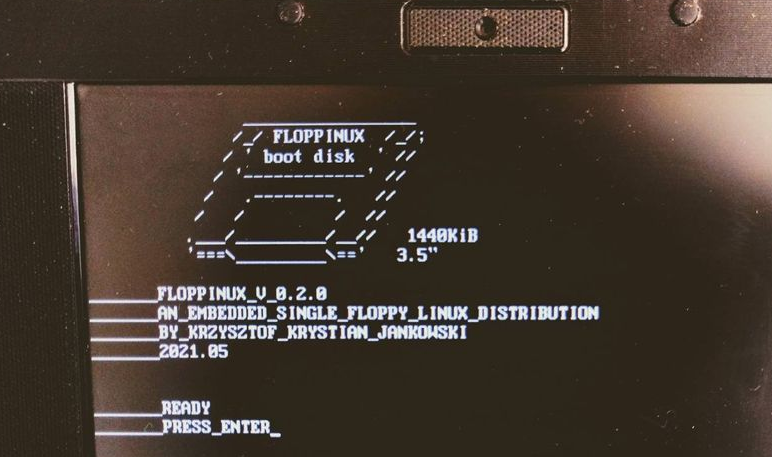
But then [Krzysztof Krystian Jankowski] dropped Floppinux, a live Linux OS that boots from just a single floppy. There’s even a few hundred KB left over on the disk, allowing the user to tuck a few of their own programs and scripts onboard before booting it up. But most impressively, the project doesn’t rely on ancient software releases like so many other embedded systems do. Every component of Floppinux is pulled directly from the cutting edge, including version 5.13.0-rc2 of the Linux kernel which is literally just a few days old.

Floppinux running on the Asus Eee PC

Of course some concessions had to made in order cram the latest Linux kernel and build of BusyBox into slightly north of 1 MB, so Floppinux certainly isn’t what anyone would call a daily driver. The kernel is stripped down the absolute minimum, and is targeted for the decidedly poky i486. [Krzysztof] had to be very selective about which programs actually made the cut as well, so once the system is booted, there’s not a whole lot you can do with it outside of writing some shell scripts. But then, that was sort of the goal to begin with.

If you’re wondering how [Krzysztof] pulled it off, you don’t have to. He walks you though the entire process, down to the commands he used to do everything from pull down and compile the source code to creating the final disk image. Even if you don’t own a floppy drive, it’s well worth following his guide and booting the image up in QEMU just to say you’ve officially built a Linux system from scratch. It’s good for more than just bragging rights; learning how all the components of a minimal install like this fits together will no doubt come in handy the next time you find yourself poking around inside an embedded Linux device.

Self-Driving Or Mind Control? Which Do You Prefer?

We know you love a good biohack as much as we do, so we thought you would like [Tony’s] brainwave-controlled RC truck. Instead of building his own electroencephalogram (EEG), he thought he would use NeuroSky’s MindWave. EEGs are pretty complex, multi-frequency waves that require some fairly sophisticated circuitry and even more sophisticated signal processing to interpret. So, [Tony] thought it would be nice to off-load a bit of that heavy-lifting, and luckily for him, the MindWave headset is fairly hacker-friendly.

EEGs are a very active area of research, so some of the finer details of the signal are still being debated. However, It appears that attention can be quantified by measuring alpha waves which are EEG content between 8-10 Hz. And it seems as though eye blinks can be picked from the EEG as well. Conveniently, the MindWave exports these energy levels to an accompanying smartphone application which [Tony] then links to his Arduino over Bluetooth using the ever-so-popular HC-05 module.

To control the car, he utilized the existing remote control instead of making his own. Like most people, [Tony] thought about hooking up the Arduino pins to the buttons on the remote control, thereby bypassing the physical buttons, but he noticed the buttons were a bit smaller than he was comfortable soldering to and he didn’t want to risk damaging the circuit board. [Tony’s] RC truck has a pistol grip transmitter, which inspired a slightly different approach. He mounted the servo onto the controller’s wheel mechanism, allowing him to control the direction of the truck by rotating the wheel using the servo. He then fashioned another servo onto the transmitter such that the servo could depress the throttle when it rotates. We thought that was a pretty nifty workaround.

Cool project, [Tony]! We’ve seen some cool EEG Hackaday Prize entries before. Maybe this could be the next big one.

Continue reading “Self-Driving Or Mind Control? Which Do You Prefer?”

Ground Effect Drone Flies Autonomously

There are a number of famous (yet fictional) sea monsters in the lakes and oceans around the world, but in the Caspian Sea one turned out to be real. This is where the first vehicles specifically built to take advantage of the ground effect were built by the Soviet Union, and one of the first was known as the Caspian Sea Monster due to the mystery surrounding its discovery. While these unique airplane/boat hybrids were eventually abandoned after several were built for military use, the style of aircraft still has some niche uses and can even be used as a platform for autonomous drones.

This build from [Think Flight] started off as a simple foam model of just such a ground effect vehicle (or “ekranoplan”) in his driveway. With a few test flights the model was refined enough to attach a small propeller and battery. The location of the propeller changed from rear-mounted to front-mounted and then back to rear-mounted for the final version, with each configuration having different advantages and disadvantages. The final model includes an Arudino running an autopilot program called Ardupilot, and with an air speed sensor installed the drone is able to maintain flight in the ground effect and autonomously navigate pre-programmed waypoints around a lake at high speed.

For a Cold War technology that’s been largely abandoned by militaries in favor of other modes of transportation due to its limited use case and extremely narrow flight tolerances, ground effect vehicles are relatively popular as remote controlled vehicles. This RC ekranoplan used the same Ardupilot software but paired with a LIDAR system instead of GPS to navigate its way around its environment.

Thanks to [TTN] for the tip!

Continue reading “Ground Effect Drone Flies Autonomously”

Optical Sensor Keeps Eye On Wandering Saw Blade

Over the last year or so, we’ve been checking in on the progress [Andrew Consroe] has been making with his incredible CNC scroll saw project. While we were already impressed with his first prototype version, he somehow manages to keep pushing the envelope forward with each new upgrade, and we’re always excited when one of his progress reports hits the inbox.

Recently he’s been struggling with the fact that the considerable flexing of the scroll saw’s ultra-thin blade introduces positional errors while cutting. To combat this, he’s developed an ingenious sensor that can track the movement of the blade in two dimensions without actually touching it. Utilizing the Raspberry Pi HQ camera, a 3D printed framework, and some precisely placed mirrors, [Andrew] says his optical sensor is able to determine the blade’s position to within 10 microns.

In the video below [Andrew] goes over how his “Split Vision Periscope” works, complete with some ray traced simulations of what the Pi camera actually sees when it looks through the device. After experimenting with different lighting setups, the final optical configuration presents the camera with two different perspectives of the saw blade set on a black background. That makes it relatively easy to pick out the blade using computer vision, and turn that into positional information.

The periscope arrangement is particularly advantageous here as it allows the camera and lens to be placed under the work surface and well away from the actual cutting, though we’re interested in seeing how it fares against the dust and debris that will inevitably be produced as the saw cuts. While he hit all of his design goals, [Andrew] does note that his mirrors do leave some room for improvement; but considering he hand cut them out of old hard drive platters we think the results are more than acceptable.

An incredible amount of progress has been made since the first time we saw the CNC scroll saw, and we’re eager to see this new sensor fully integrated into the next version of [Andrew]’s impressive long-term project.

Continue reading “Optical Sensor Keeps Eye On Wandering Saw Blade”

Persistent Displays With UV Light

This year’s Hackaday Prize has “Rethink Displays” as one of its first theme, and [Tucker Shannon] has given us his best shot on that subject with a set of impressive displays that “write” on glow-in-the-dark material using ultra-violet light. These materials glow for a while after UV illumination, so moving a light source like a UV LED over the surface draws glowing text or simple graphics which can be readily consumed.

One of the examples this a clock we were first smitten with back in 2018. It is a rather attractive 3D-printed affair with those servos mounted below the screen that moves a UV LED through a pair of linkages. Other offerings that play on the same UV stylus medium include a laser on an az-el mount controlled by a Raspberry Pi Zero. It’s a neat idea very effectively done, and we can see it has a lot of potential.

But the most impressively advanced so far is the model shown in the image at the top of the article and the demo video at the bottom. A loop of phosphorescent material is the display surface itself. This one moves that loop with two rollers to make up the X axis, and moves the UV source up and down for the Y axis. As with all of these designs, whatever is written will soon fade, leaving the surface ready for the next bit of information.

Interested in this project and think you could do a display of your own? The Hackaday Prize 2021 is live, and we’d love to see you enter it!

Continue reading “Persistent Displays With UV Light”

Starlink: A Review And Some Hacks

I could probably be described as a SpaceX enthusiast. I catch their launches when I can, and I’ve watched the development of Starship with great interest. But the side-effect of SpaceX’s reusable launch system is that getting to space has become a lot cheaper. Having excess launch capacity means that space projects that were previously infeasible become suddenly at least plausible. One of those is Starlink.

Starlink is SpaceX’s satellite Internet service. Wireless and cellular internet have helped in some places, but if you really live out in the sticks, satellite internet is your only option. And while satellite Internet isn’t exactly new, Starlink is a bit different. Hughesnet, another provider, has a handful of satellites in geostationary orbit, which is about 22,000 miles above the earth. To quote Grace Hopper, holding a nearly foot-long length of wire representing a nanosecond, “Between here and the satellite, there are a very large number nanoseconds.”

SpaceX opted to do something a bit different. In what seemed like an insane pipe dream at the time, they planned to launch a satellite constellation of 12,000 birds, some of them flying as low as 214 mile altitude. The downside of flying so low is that they won’t stay in orbit as long, but SpaceX is launching them significantly faster than they’re coming down. So far, nearly 1,600 Starlink satellites are in orbit, in a criss-crossing pattern at 342 miles (550 km) up.

This hundred-fold difference in altitude matters. A Hughesnet connection has a minimum theoretical latency of 480 ms, and in reality runs closer to 600 ms. Starlink predicts a theoretical minimum of under 10 ms, though real-world performance isn’t quite that low yet. In the few weeks I’ve had the service, ping times have fallen from mid-60s down to 20s and 30s. The way Starlink works right now, data goes up to the closest satellite and directly back to the connected ground station. The long-term plan is to allow the satellites to talk directly to each other over laser links, skipping over the ground stations. Since the speed of light is higher in a vacuum than in a fiber-optic cable, the fully deployed system could potentially have lower latency than even fiber Internet, depending on the location of the endpoint and how many hops need to be made.

I got a Starlink setup, and have been trying out the beta service. Here’s my experience, and a bonus hack to boot.

Continue reading “Starlink: A Review And Some Hacks”

A High Torque 3D Printed Harmonic Drive

Actuators that are powerful, accurate, compact, and cheap are like unicorns. They don’t exist. Yet this is what [3DprintedLife] needed for a robotic camera arm, so he developed a custom 3D printed high torque strain wave gearbox to be powered by a cheap NEMA23 stepper motor.

Strain wave gears, otherwise known as harmonic drives, are not an uncommon topic here on Hackaday. The work by deforming a flexible toothed spline with a rotating elliptical part, which engages with the internal teeth of an outer spline. The outer spline has a few more teeth, causing the inner spline to rotate slowly compared to the input, achieving very high gear ratios. Usually, the flexible spline is quite long to allow it to flex at one end while still having a rigid mounting surface at the other end. [3DprintedLife] got around this by creating a separate rigid output spline, which also meshes with the flexible spline. Continue reading “A High Torque 3D Printed Harmonic Drive”