Even the most safety-conscious hackers among us might overlook protective gear when we’re just doing a quick bit of soldering. Honestly, though, eye protection is always a necessity. And those wisps of smoke, which drift so elegantly off the hot part of the iron, really shouldn’t drift directly into our nostrils. This is especially true if soldering you make a daily habit, or if you use lead-based solder.
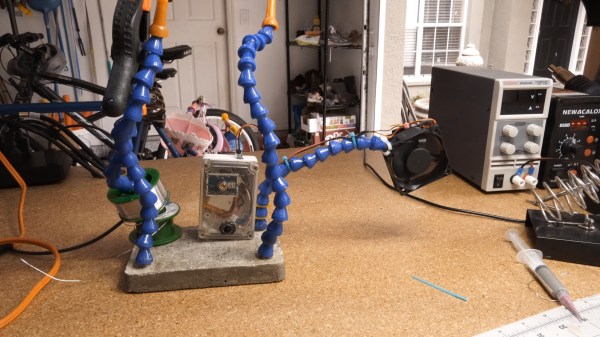
And so, in defense of his lungs, [Jeremy S Cook] added a battery-powered fume extraction fan to his custom, concrete-based solder squid. Without proper power controls, though, the fan could easily drain its battery while no actual solder activity was occurring. To tackle that problem, he recently upgraded his system with a passive infrared (PIR) sensor to control when the fan turns on and off. The PIR sensor detects motion, enabling the fan only when it sees busy hands in its view, so he no longer needs to muck around with manual controls.
Despite a large increase in functionality, the design is relatively straightforward and uses off-the-shelf components, making it an accessible project for anyone who knows their way around an iron. [Jeremy] also upgraded his power source to a LiPo battery with onboard charger, which keeps the build light, maneuverable, and easy to get close to whatever he’s working on.
Whether you build or buy, a fume extractor will help fight off the famously face-seeking solder smoke on your workbench. Which is a good thing, too, because that smoke carries more than just the alluring aromas of making.
Continue reading “An Infrared-Activated Solder Fume Extraction Fan”
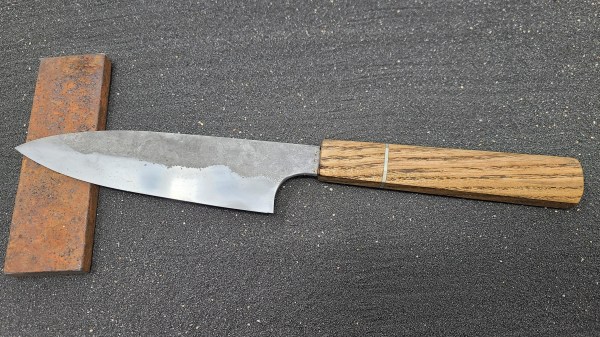
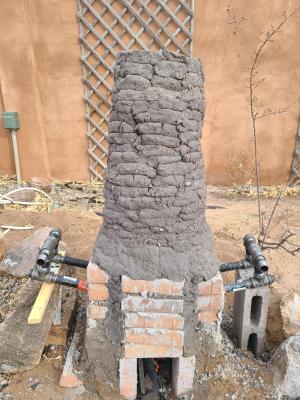 This began by collecting 150 pounds (!) of magnetic dirt from dry lake beds while hiking using a magnet pickup tool with release lever that he got from Harbor Freight. Several repeated magnetic refining passes separated the black ore from non-metallic sands ready for the furnace that he built. That is used to fire up the raw materials using 150 pounds of charcoal, changing the chemical composition by adding carbon and resulting in a gnarly lump of iron