Some Strings Attached: Electric Tenor Guitar Built From Scratch

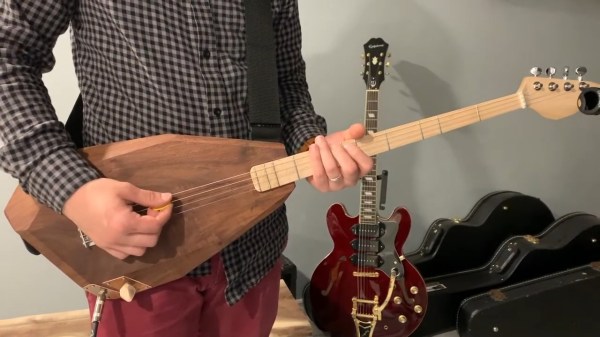
It’s no secret that we have a soft spot for musical instruments here at Hackaday, especially for the weird and unusual ones. An instrument that definitely fits the unusual category is the four-string tenor guitar, which — as legend has it — originated back in the 1920s by frankensteining a banjo neck and a guitar body together. Despite being around for almost a century, they’re still rarely found outside some niche genres, which makes them an excellent choice when pursuing a unique sound experience. As someone looking for exactly that, [Ham-made] decided to build an electric tenor guitar entirely from scratch, and documented every step of it at great length.

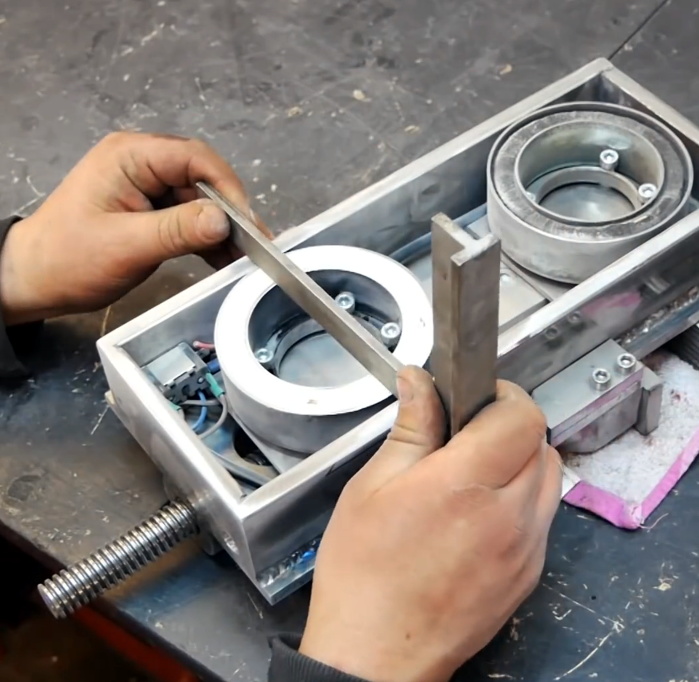
Built from two random chunks of wood, a dissected single coil pickup, and a leftover piece of elk antlers, the result is even more unique than the sound experience itself. While the rather unorthodox, faceted body shape leaves no doubt that this is a handmade instrument, the real eye-catcher has to be the neck and its oddly spaced frets. Counting the frets, the math doesn’t seem to add up either, as the twelfth fret usually creates the octave, and as such should be at half the scale length (i.e. half the string’s length from the bridge at the body’s end to the nut at the neck’s end). Turns out that [Ham-made] went for a diatonic scale instead of the usual chromatic one, essentially leaving out the notes you anyway wouldn’t play in a standard Pop or Rock setup. Using an all-fifths tuning akin to cellos and mandolins, this will work nicely over all four strings.

Aesthetics are certainly a subjective matter, and [Ham-Made] is fully aware that people might feel downright offended by his creation, but as he also wants to “embrace mistakes and promote experimentation”, he encourages everyone with similar aspiration to simply go for it — and he’s certainly no stranger to unconventional instruments and recording equipment. But before the never-tiring tonewood debate sparks up, check out this scrap metal guitar.

Continue reading “Some Strings Attached: Electric Tenor Guitar Built From Scratch”

Linux Command Line Productivity With Tmux

It is no secret that most Linux power users use the shell for many tasks, as for people who know what they are doing, it can be quite efficient. In addition, there are some tasks that can only be carried out from the command line, although their number shrinks every year. However, these days we are spoiled because you can have one X session running lots of terminals at once. If you log into a server, it might not have X. Or you might log into a computer over a slow connection where X is painful to use. What then? The modern answer is the tmux terminal multiplexer, and [zserge] has a thoughtful introduction to how you can use tmux for improved productivity at the command line.

In particular, he shares some configuration and offers sound advice. For example, do you really need a status bar that shows you CPU load at all times? Cool, yes, but not always a practical win.

Continue reading “Linux Command Line Productivity With Tmux”

New Part Day: Raspberry Pi Camera Gets Serious With 12 Megapixels & Proper Lenses

The Raspberry Pi Foundation have slipped out a new product, a $50 camera module with a larger sensor that increases the resolution from the 8 megapixels of its predecessor to a Sony IMX477R stacked, back-illuminated 12.3 megapixel sensor, and most interestingly adds a mounting ring for a C mount lens (the kind used with CCTV equipment) in place of the tiny fixed focus lenses of past Pi cameras. In addition there is a standard threaded tripod mount on the module, and an adapter ring for CS mount lens types. The camera cannot be used without a lens, but there are a few options available when ordering, like 16mm telephoto or 6mm wide angle lenses, if you do not already have a suitable lens on hand.

It’s an exciting move for photography experimenters, because for the first time it offers an affordable way into building custom cameras with both a higher quality sensor and a comprehensive selection of interchangeable lenses. We can imagine that the astronomers and microscopists among us will be enthusiastic about this development, as will those building automated wildlife cameras. For us though the excitement comes in the prospect of building decent quality cameras with custom form factors that break away from the conventional, because aside from a period when consumer digital cameras were in their infancy they have stuck rigidly to the same form factor dictated by a 35mm film canister. It’s clear that this module will be made into many different projects, and we are looking forward to featuring them.

At the time of writing the camera is sold out from all the usual suppliers, which follows the trend for Raspberry Pi products on their launch day. We didn’t manage to snag one, but perhaps with such an expensive module it’s best to step back for a moment and consider the project it will become part of rather than risking it joining the unfinished pile. While waiting for stock then perhaps the next best thing is to 3D print a C mount adapter for your existing Pi camera, or maybe even hook it up to a full-sized SLR lens.

Putting An Arcade Cabinet Inside Of An NES Controller

The arcade game shoehorned into an original Nintendo Entertainment System controller from [Taylor Burley] is certainly made slightly easier by its starting with one of those miniature cabinets that are all the rage now, but since he’s still achieved the feat of an entire arcade game in a controller we still stand by the assessment in our title.

In fact, he’s put not one but four arcade games into the controller. The board that [Taylor] liberated from the miniature game system can actually be switched between the onboard games by shorting out different pads on the PCB. Normally this would be done during manufacture with a zero-ohm resistor, but in this case, he’s wired the pads out to a strip of membrane keypad liberated from an LED remote control. By holding a different button while powering on the system, the user can select which of the games they want to boot into.

The original buttons and directional pad have been preserved, and in the video after the break, [Taylor] shows how he wires them into the arcade PCB. The Start and Select buttons had to go since that’s where the tiny color LCD goes now, but they wouldn’t have been used in any of these games anyway. With the addition of a small battery pack and charge controller, this build is a clever way to take several classic arcade titles with you on the go.

With the growing popularity of these tiny arcade cabinets, we’ve seen a number of hackers tearing into them. The work that [wrongbaud] has done in modifying them to run other ROMs is not to be missed if you’re looking at building a project using one of these little bundles of nostalgia.

Continue reading “Putting An Arcade Cabinet Inside Of An NES Controller”

Scratch Built Magnetic Vise Stays Where You Need It

For those who might not have run into one before, a magnetic vise is used when you want to quickly anchor something to a metal surface at an arbitrary position. They’re often used to hold the workpiece down when machining, and can be a real time saver if a lot of repositioning is involved.

[Workshop From Scratch] recently wanted to put together one of these handy pieces of gear, and as we’ve come to expect from his channel, the finished product is an absolute beast. Starting with little more than scraps of metal, the video after the break takes the viewer on a fascinating journey that ends with some demonstrations of the vise in action.

Conceptually, this build is relatively simple. Start with a vise, put a hollow base on it, and fit it with powerful electromagnets that will anchor it down once you flip the switch. Technically you could just build a magnetic base and bolt a commercially available vise onto it, but that’s not how [Workshop From Scratch] does things.

Every element of the build is done by hand, from the pattern cut into the jaws to the t-handle nut driver that gets adapted into a very slick crank. Of particular interest is how much effort is put into grinding down the surface of the electromagnets so they are perfectly flush with the base of the vise. Incidentally, these beefy electromagnets were salvaged from automotive air conditioning compressors, so you might want to add that to your junkyard shopping list.

Eagle-eyed readers might recognize the surface [Workshop From Scratch] uses the vise on as the custom drill press table he built a few months ago. These videos are not only reminders of what you can accomplish when you’ve mastered the use of a few common tools, but just how much design and thought goes into the hardware many of us take for granted.

Continue reading “Scratch Built Magnetic Vise Stays Where You Need It”

Oil Wells Done Rube-Goldberg Style: Flatrods And Jerk Lines

The news is full of the record low oil price due to the COVID-19-related drop in demand. The benchmark Brent crude dipped below $20 a barrel, while West Texas intermediate entered negative pricing. We’ve all become oil market watchers overnight, and for some of us that’s led down a rabbit hole of browsing to learn a bit about how oil is extracted.

Many of us will have seen offshore oil platforms or nodding pumpjacks, but how many of us outside the industry have much more than a very superficial knowledge of it? Of all the various technologies to provide enlightenment of the curious technologist there’s one curious survivor from the earliest days of the industry that is definitely worth investigation, the jerk line oil well pump. This is a means of powering a reciprocating pump in an oil well not through an individual engine or motor as in the pump jacks, but in a system of rods transmitting power over long distances from a central location by means of reciprocating motion. It’s gloriously simple, which has probably contributed to its survival in a few small-scale oil fields over a century and a half after its invention.

Continue reading “Oil Wells Done Rube-Goldberg Style: Flatrods And Jerk Lines”

FDA Approves Ventilator Designed By NASA’s Jet Propulsion Laboratory

Yesterday NASA’s Jet Propulsion Laboratory announced that their ventilator design has received Emergency Use Authorization from the US Food and Drug Administration. This paves the way for the design to be manufactured for use in the treatment of COVID-19 patients.

JPL, which is tightly partnered with the California Institute of Technology, designed the ventilator for rapid manufacturing to meet the current need for respiratory tools made scarce by the pandemic. The design process took only 37 days and was submitted for FDA approval around April 23rd. They call it VITAL — Ventilator Intervention Technology Accessible Locally — a nod to NASA’s proclivity for acronyms.

Continue reading “FDA Approves Ventilator Designed By NASA’s Jet Propulsion Laboratory”