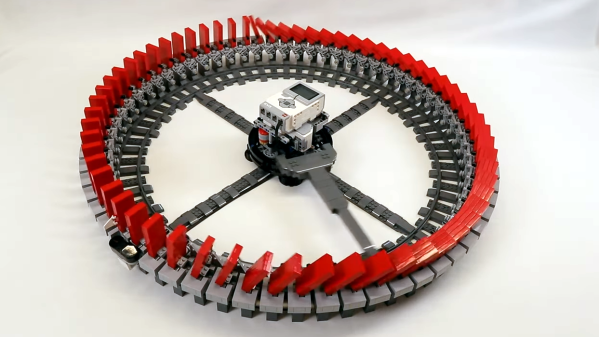
Like to see dominoes fall? [JK Brickworks] has got what you need, in the form of a never-ending ring of falling and resetting tiles. LEGO pieces are the star in this assembly, which uses a circular track and moving ramp to reset tiles after they have fallen. Timed just right, it’s like watching a kinetic sculpture harmoniously generating a soliton wave as tiles fall only to be endlessly reset in time to fall again.
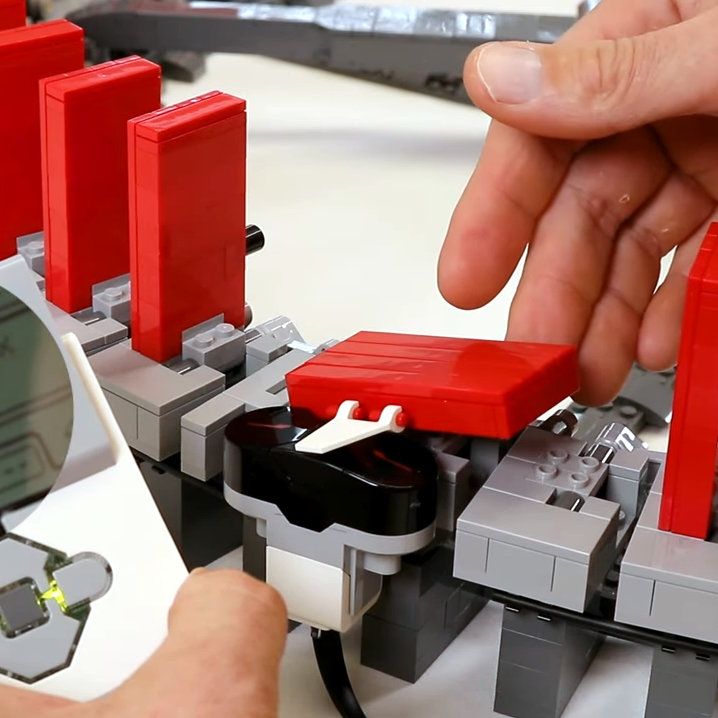
It’s true that these chunky tiles aren’t actually dominoes — not only are they made from LEGO pieces and hinged to their bases, they have a small peg to assist with the reset mechanism. [JK Brickworks] acknowledges that this does stretch the definition of “dominos”, but if you’re willing to look past that, it’s sure fun to see the whole assembly in action.
The central hub in particular is a thing of beauty. For speed control, an IR sensor monitors a single domino’s up/down state and a LEGO Mindstorms EV3 with two large motors takes care of automation.
The video does a great job of showing the whole design process, especially the refinements and tweaks, that demonstrate the truly fun part of prototyping. [JK Brickworks] suggests turning on subtitles for some added details and technical commentary, but if you’re in a hurry skip directly to 4:55 to see it in action.
Want to see more automated domino action? This domino-laying robot sets them up for you to knock down at your leisure, and this entirely different robot lays out big (and we do mean BIG) domino art displays.
Continue reading “Domino Ring Machine Tips Tiles In A Never-ending Wave”