Adding LEDs To An Engagement Ring

ring

Once upon a time, a nerd met a girl. Things happen as they do, and eventually [Ben] wanted to create the be-all, end-all engagement ring. (here’s a cache) It’s a simple titanium affair with 23 stones around the perimeter. What makes this ring so cool, though, is that it lights up whenever [Ben] and his girl are holding hands.

The metalworking portion of the build was about as easy as you would expect machining titanium to be. After the ring was cut off its bar stock, [Ben] brought it over to a mill where 23 holes for each of the stones were drilled. The stones were affixed to the ring with  jewelers epoxy and the entire ring was buffed to an amazing shine.

The electronics are where this project really shines. Putting a battery of capacitor inside a ring is nigh impossible, so [Ben] decided to power the LEDs with an inductive charging circuit. A coil of wire wound around kapton tape serves as the inductor and a small SMD capacitor powers three very bright and very tiny LEDs.

The inductive charging unit itself is a masterpiece of hackery; [Ben] wanted the ring to light up whenever he and his ladyfriend were holding hands. To do this, [Ben]’s inductive charger is also a wearable device: a large coil of wire is the charger’s transformer and was would to fit around [Ben]’s wrist. The entire charging circuit can be easily hidden under a jacket sleeve, making for a nearly magical light-up ring.

An awesome piece of work, and one of the best jewelry builds we’ve seen in a long time. You can see the inductive coupling and shining LEDs in the video below.

Continue reading “Adding LEDs To An Engagement Ring”

Dermal Implants Means Strapless Watch

dermal

Google Glass is a year or so out, and even after that we’re still looking at about five years until we’re all upgraded at the behest of our robotic overlords. [justurn] simply can’t wait, so he decided to submit to the cybermen early with his Android-controlled wristwatch attached with dermal implants.

[justurn]’s got the inspiration for his project from this earlier Hackaday post involving dermal implants and an iPod nano. The iPod nano doesn’t have a whole lot of functionality, though, but the Sony SmartWatch does, and without the inevitable accusations of fanboyism.

To prep his arm for the hardware upgrade, [justurn] had four titanium dermal anchors placed in his wrist. After letting his anchors heal for a few months, [justurn] installed very strong neo magnets in the bases for his anchors and the clip for the SmartWatch’s strap.

The result is a magnetically mounted, Android-controlled watch semi-permanently attached to [justurn] at the wrist. We love it too.

Asteriods: The Belt Buckle

asteroids-video-game-belt-buckle

This is going to change the way you play with yourself. What if every time you got a little bored you reached for your belt rather than your smart phone? [Cunning_Fellow] may be doing that more often now that he finished this slick-looking video game belt buckle which plays the classic Asteroids game.

It isn’t just an intriguing concept. The build was pulled off at a very high level of quality… this thing should have no problem standing the test of time. First off he had to figure out if it was even possible to run the game at a respectable frame-rate. Cheap 320×240 LCD screens don’t have a frame marker (think of it as a vertical sync signal with can be used as an interrupt for the microcontroller). But he thought it was possible that the frame marker pin just wasn’t connected like on more expensive screens and he was right with at least one model he acquired.

With that out of the way he laid out and etched a beautiful double-sided board to house all of the electronics. But he still needed a case. To get a one-of-a-kind look he masked and etched a sheet of brass. Once cut out and folded ti gives a wonderful look and protects the electronics inside quite well. 

Snowboard Goggle HUD Displays Critical Data While Falling Down A Mountain

snowboard-google-hud

[Chris] has been hard at work building a Heads Up Display into some Snowboarding goggles. We’re used to seeing the components that went into the project, but the application is unexpected. His own warning that the display is too close to your face and could cause injury if you were to fall highlights the impractical nature of the build. But hey, you’ve got to start somewhere when it comes to prototyping. Perhaps the next iteration will be something safe to use.

A set of MyVu glasses were added to the top portion of the goggles, which lets the wearer view the LCD output by looking slightly up. The display is fed by a Raspberry Pi board which connects to a GPS module, all of which is powered by a USB backup battery. In the video after the break you can see that the display shows time of day, speed, altitude, and temperature (although he hasn’t got a temperature sensor hooked up just yet). His bill of materials puts the project cost at about £160 which is just less that $250.

Continue reading “Snowboard Goggle HUD Displays Critical Data While Falling Down A Mountain”

A Homebrew Binary Wristwatch

watch

There are 2 types of people in the world; those who know binary, those who don’t, and those who know ternary. [Emanuele] thought a binary wristwatch is the pinnacle of nerd and set out to build his own. The resulting binary clock not only screams nerd as intended, but is also a functional time piece, as well.

The idea of a binary wristwatch came to [Emanuele] while he was working with PICs at school. Not wanting to let that knowledge go to waste, he used a PIC16F628 microcontroller for this build. There are four LEDs for the hours and six LEDs for the minutes, each attached to a separate microcontroller pin for easy programming.

To keep time, [Emanuele] kept the PIC in sleep mode most of the time, only waking it up when a an internal timer’s register overflows. The watch spends most of its time sleeping, sipping power from a coin cell battery with a battery life that should last weeks, at least.

The entire circuit is tucked away in a PVC enclosure with a wonderful rainbow ribbon cable band. We’re not so sure about how that feels against the skin all day, but it does exude the nerd cred [Emanuele] was looking for.

Google Glass Hack For Apple Fanboys Can Be Had Right Now

google-glass-for-apple-iphone

If you’re a follower of Apple hardware the upcoming Google Glass release probably doesn’t interest you much. But the concept is universally cool. If you want to have your own one-eyed voice-activated computer running iOS, then this is the hack for you. [John] calls it the Beady-i, and posted a step-by-step article on how he put it together.

The headpiece is shown on the left. It’s a combination of a pair of glasses with projection screens built-in, and a gaming headset. [John] cut off one of the lenses, and removed the remaining arm of the glasses. That arm was replaced with the frame of a gaming headset, which now wraps around the back of his neck to make sure the lopsided display isn’t going to fall off.

By combining the electronics from both the glasses and the headset, and terminating the connections with a docking plug he’s got what he was after. The lens displays what is shown on the screen, and the gaming headset lets him hear the device’s sound in one ear and register input using the microphone.

Add Some Animated Bling To Your GQ Duds

geeky-tie-uses-animated-leds

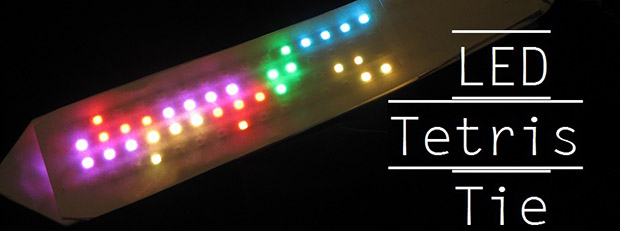
This tie turned VU meter has us asking: Will anyone be able to look you in the eye during a conversation? It uses an integrated microphone and microcontroller to make a single-column display made of RGB LEDs move to ambient sound.

It shouldn’t be hard to guess that this project is another build from [Becky Stern]. She’s been on fire lately, offering up glowing football helmets and a turn-signal backpack. This uses the same family of components as the latter. A Flora board brings an Arduino to the party. It drives sixteen RGB LED pixels which are addressed using a 1-wire protocol. Sound is measured through a microphone and amplifier breakout board.

Since the hardware gets in the way of a full-windsor, the tie used for the project is a breakaway version which uses velcro. But because you need the needle and (conductive) thread to sew on the components it wouldn’t be hard to alter any tie to perform like this.

Don’t miss the high-quality video tutorial which we’ve embedded after the break.

Continue reading “Add Some Animated Bling To Your GQ Duds”