Steel Reinforcement Toughens Cracked Vintage Knobs

Nothing can ruin a restoration project faster than broken knobs. Sure, that old “boat anchor” ham rig will work just fine with some modern knobs, but few and far between are the vintage electronics buffs that will settle for such aesthetic affrontery. But with new old stock knobs commanding dear prices, what’s the budget-conscious restorationist to do? Why, fix the cracked knobs yourself, of course.

At least that’s what [Level UP EE Lab] tried with his vintage Heahkit DX60 ham transmitter, with pretty impressive results. The knobs on this early-60s radio had all cracked thanks to years of over-tightening the set screws. To strengthen the knobs, he found some shaft collars with a 1/4″ inside diameter and an appropriate set screw. The backside of the knob was milled out to make room for the insert, which was then glued firmly in place with everyone’s go-to adhesive, JB Weld. [Level UP] chose the “Plastibonder” product, which turns out not to be an epoxy but rather a two-part urethane resin, which despite some initial difficulties flowed nicely around the shaft collar and filled the milled-out space inside the knob. The resin also flowed into the channels milled into the outside diameter of the shaft collars, which are intended to grip the hardened resin better and prevent future knob spinning.

It’s a pretty straightforward repair if a bit fussy, but the result is knobs that perfectly match the radio and still have the patina of 60-plus years of use. We’ll keep this technique in mind for our next restoration, or even just an everyday repair. Of course, for less demanding applications, there are always 3D printed knobs.

Continue reading “Steel Reinforcement Toughens Cracked Vintage Knobs”

Put Words In Your Dog’s Mouth With A Talking Dog Collar

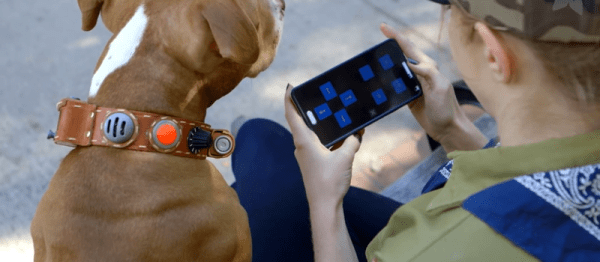
It’s just a little past Halloween, but Adafruit’s talking dog collar, modeled after the movie Up, is still a nice fusion between crafting and hacking.

One reason that Adafruit is so popular is that every time they sell us something, they give us some of the worlds best tutorials and libraries for free. For this project they’re using their Bluetooth LE board and their Audio FX board with a few more mundane vitamins to construct the collar. We’re sure the enterprising hacker could find alternatives if they so choose.

The collar is made of leather and 3D printed props. They went with alkaline batteries rather than lithium, to keep their doggy companion a little safer. All the electronics are hidden under the various props and the wiring is routed behind the belt. To control the app, the different sound bytes are mapped to buttons on their Bluetooth-to-serial phone app.

It’s a good starter tutorial, and the concept applied differently would definitely be good for at least one good prank on a coworker or friend.


Hacking Dog Collars To Save Money On Batteries.

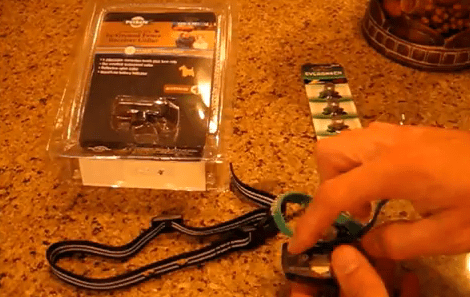
[Lou] sent in this amazingly simple hack that has been saving him money on special batteries for his dog collar. He uses an invisible fence system which gives the dog a shock if it passes beyond certain markers in his yard. The collars use special batteries so you’re not strapping multiple full sized cells to your dogs neck. This is especially necessary when you have a smaller dog that doesn’t weigh much to begin with.

What [Lou] found was that the $8 replacement batteries were simply a plastic shell on a battery he could buy for considerably less. All that was required were a few small cuts to the plastic casing to release the old battery, then he presses the new one into place. This tiny modification will be saving him a considerable amount since the unit burns through a battery in a few weeks.

Continue reading “Hacking Dog Collars To Save Money On Batteries.”

GPS Dog Collar Keeps Track Of Your Walks

[Becky Stern] came up with a way to make sure you and your dog are getting enough exercise. It’s a dog collar mounted GPS that measures how far you have walked. Just set your target distance and the progress bar in the middle of this flower will let you know when you reached it.

The most obvious piece of hardware is the OLED board which is sticking out like a sore thumb. But if you’d like to be a little more discreet you could forego the full-featured display for some carefully places LEDs to make up a circular progress bar. The GPS module itself fits well in the center of the flower, which [Becky] shows us how to make out of wire-edged ribbon. Hidden on the other side is an ATmega23u4 breakout board running the Arduino bootloader.

If you’re interested in sewables and textiles [Becky] uses a lot of basic techniques that are good to learn. Check it out in the clip after the break. She’s always shown a remarkable ability to develop projects which won’t scare away the villagers in the way our wire-sprouting breadboard hacks sometimes do.

Continue reading “GPS Dog Collar Keeps Track Of Your Walks”

LED Dog Collar, Christmas Edition

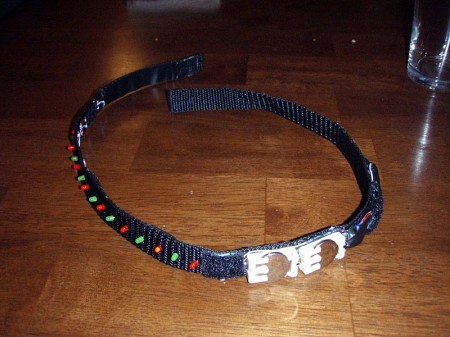
[Aaron] says in our comments that he also made an LED dog collar. This Christmas themed dog collar uses an ATTiny13a and a hand full of red and green LEDs (28?). While the animations aren’t as complex as the collar we posted earlier today, we though you might enjoy this one as well. From the description, we think that the LEDs simply fade back and forth between red and green.  We think that [Aaron] did a great job. He has included the source code and schematic on his site, but sadly there’s no video of this collar in action.

Out Engineering A Sneaky Cat

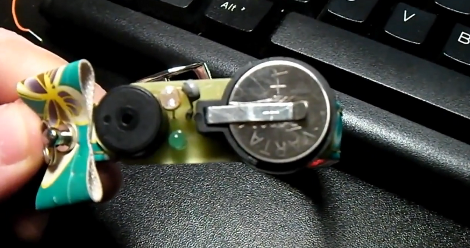
Cats do what they want, which rarely coincides with what their owner wants them to do. In [Dumitru]’s case, his girlfriend’s cat [Pufu] tended to make it outside into the cold more often than desired. Rather than settle with the normal bell which gets obnoxious even when the cat isn’t misbehaving, he decided to put together a custom Cat Finding collar. He used a PIC microcontroller as the brains, and temperature and light sensors to decide whether the cat had snuck into the cold, dark night. Once the cat has been marked as being outside, a buzzer and LED are set to go off at regular intervals until returned into the safety of the indoors.

[Dumitru]’s website along with his YouTube videos are in Romanian, though the schematics and source code provided speak for themselves. He does a wonderful job walking through the entire design process, including time spend in the IDE as well as EAGLE designing the board. YouTube has managed to subtitle the majority of the details, but we imagine this post will be a real treat to any Romanian speaking hobbyists out there. Be sure to catch both videos after the break.

Continue reading “Out Engineering A Sneaky Cat”