Bare Bones Vacuum Forming, Just Add Plastic Plates

Vacuum forming is a handy thing to be able to do, and [3DSage] demonstrates how to do a bare-bones system that can form anything smaller than a dinner plate with little more than a 3D printed fitting to a vacuum cleaner, a heat gun, and a trip to the dollar store.
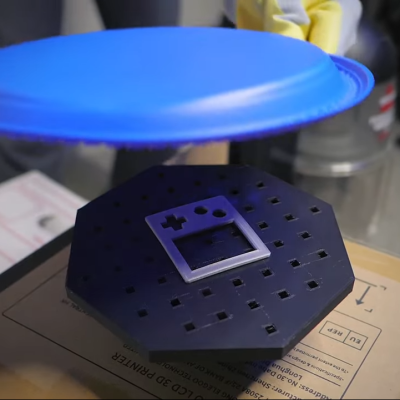
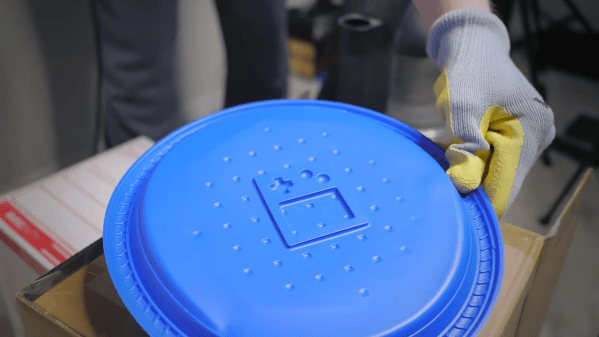
Plastic plates from the dollar store make excellent forming sheets, and in a variety of colors.

The 3D printed piece is a perforated table that connects to a vacuum cleaner hose, and [3DSage] mentions elsewhere that he tried a few different designs and this one worked the best. A cardboard box makes an expedient stand. The object being molded goes on the table, and when the vacuum is turned on, air gets sucked down into the holes.

As for the thermoforming itself, all that takes is some cheap plastic plates and a heat gun. Heat the plastic until it begins to droop, then slap it down onto the vacuum table and watch the magic happen. Using plastic plates like this is brilliant. Not only are they economical, but their rim serves as a built-in handle and helps support the sagging plastic.

Thermoforming plastic on a 3D-printed vacuum table and using 3D-printed molds definitely isn’t a system that will be cranking parts out all day long, but as long as one allows time for everything to cool off in between activations, it’ll get the job done. Nylon will hold up best but even PLA can be serviceable.

Watch it in action in the video embedded below. The video is actually about [3DSage] making adorable Game Boy themed s’mores, but here’s a link to the exact moment the vacuum forming part happens.

Continue reading “Bare Bones Vacuum Forming, Just Add Plastic Plates”

Toothbrush Goes From Mouth-Whitening To Room-Brightening

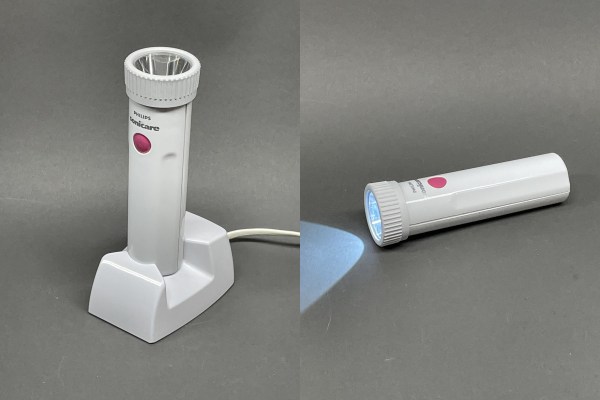
Some of the hacks we see make us wonder why they aren’t already a commercial product, and this electric toothbrush turned rechargeable flashlight is one of them. Sure, these things exist, but we haven’t seen one with a dedicated charging stand. They usually just take micro USB or whatever, so it’s on you to remember to plug it in. How great would it be to have a fully-charged flashlight always at the ready, especially one in a position to illuminate the room? Although [wannabemadsci] makes it look easy, this conversion took quite a bit of doing.

Perhaps the most amazing part is that [wannabemadsci] found a halfway decent flashlight at the dollar store. Better than average, this thing has a main light, a side light, and takes 3xAAs instead of a couple of AAAs. The only issue is that the toothbrush batteries don’t quite put out enough voltage for the flashlight’s LED, so [wannabemadsci] used a booster board.

Of course, there’s a lot more to this hack than sawing off the USB connector from the boost converter so it fits. The toothbrush handle had to be modified to accept the flashlight guts, and the threads relocated from the flashlight. Since the battery charge indicator shines through the momentary button on the toothbrush, [wannabemadsci] wanted to reuse it, but it required a small board that converts it to a latching push button. Finally, the flashlight bezel had to be painted white. Paint is such an easy thing to do, and this detail makes all the difference in how professional this looks.

There’s a lot you can do with a functioning electric toothbrush as your base, like brute-forcing the pins of a lock with vibration.

Non-Contact Probe Works Better With A Little More Complexity

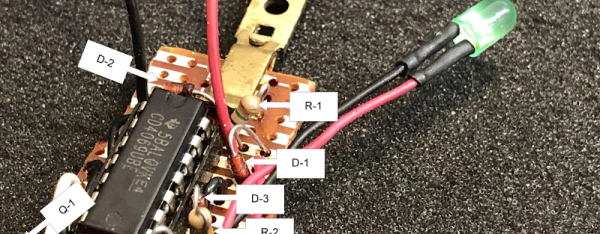
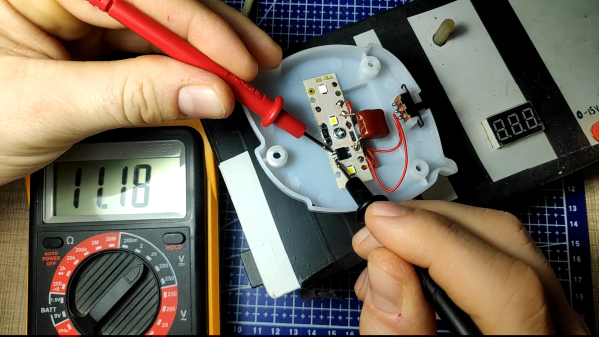
Non-contact voltage probes have been around a while and some test equipment now has them built-in. This is one of those things that you probably don’t think about much, but surely it isn’t that hard to detect AC voltage. Turns out there are a lot of circuits floating around that can do it and [nsievers51] tried a bunch. Many didn’t work very well, but the best used a 4069 CMOS hex inverter. A dollar store flashlight provided power, a case, and an LED and the result was a good-looking and effective probe.

The circuit came from the Electronics Library website and is fairly complex for this sort of device. The CMOS inverters have a high input impedance so they pick up the weak signal. Instead of directly driving an LED, two inverters form a ring oscillator that generate pulses around 1 kHz. At that frequency, the LED appears to be on, but battery consumption is less severe. A single 2N2222-style transistor drives the LED.

We’ve seen a number of variations on this tool in the past. Many of them only use transistors.

Continue reading “Non-Contact Probe Works Better With A Little More Complexity”

Discount Microfluidics From A $9 Spree At The Dollar Store

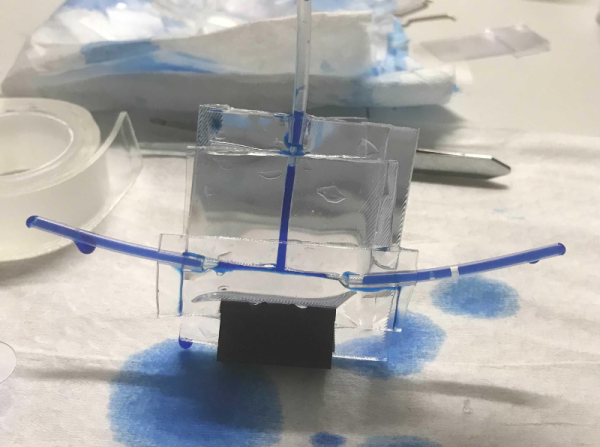
Microfluidics — working with tiny volumes of fluids in tiny channels — isn’t something you’d think would be inexpensive. Unless you read [Alexander Bissells’] post on how he created microfluidic devices using stuff from the dollar store. The channels in these devices can be much smaller than a millimeter and the fluid volumes are sometimes measured in femtoliters. At those scales, fluids don’t work like we intuitively think they will.

The parts list included gel tape, baby droppers, and some assorted containers and tools. Total price at the dollar store $9. One of the key finds in the dollar store was some small spray bottles. They weren’t important themselves, but they contain small lengths of silicone tubing and that was useful. Plastic fresnel lenses along with the tubing and gel tape worked to make “chips.” The gel tape also gets cut to make the channels. An eyedropper with some modifications makes a reasonable syringe.

We aren’t sure what you can practically do with any of these, but the T-junction looked pretty interesting. If you want some ideas on how these devices work in biology, including COVID-19 testing, check out this article. And just last week [Krishna Sanka] hosted a Hack Chat on microfluidics in biohacking, you can find the transcript on the project page. If you need a pump, this one uses 3D printer firmware to control it.

Fixing The Flicker Afflicting A Night Light

It’s hard to part with some things, even if they’re broken and were worth next to nothing to begin with. But some things are just special, y’know? And we would say in this case, the thing was definitely worth saving.

[Taste the Code]’s daughter’s beloved night light had a terrible flickering problem, and then stopped working altogether. Eager to make her happy, he cracked it open and found that one of the wires had disconnected from the outlet pin it was soldered to. That’s a simple enough fix, but trying to solder in tight quarters where the walls are soft plastic can be quite challenging.

Once that was fixed, [Taste the Code] plugged it in to a test outlet. It’s back to working, but also back to flickering, because there is no capacitor to smooth out the signal going to the LEDs. [Taste the Code] measured the voltage drop across the output of the bridge rectifier and soldered in an electrolytic cap with more than double the necessary voltage rating, just to be safe. You can check out the video after the break.

This goes to show several things: one, you can learn from fixing and improving cheap electronics from the likes of your local dollar store. Two, you can also get some kinds of components there quite inexpensively from things like magnetic sensor-based window alarms and dirt cheap solar garden lights.

You can also do some fun stuff with those cheap IKEA lamps designed for children. Here’s an adorable cloud lamp with an RGB LED upgrade that shows the weather mood using an ESP8266.

Continue reading “Fixing The Flicker Afflicting A Night Light”

Build This Handy Leak Detector For $1.02

You’ve probably noticed that modern life has become rather complicated, and the projects we cover here on Hackaday have not been immune to the march of progress. We certainly aren’t complaining, but we’ll admit to the occasional wistful daydream of returning to the days when the front page of Hackaday looked more MacGyver than Microsoft.

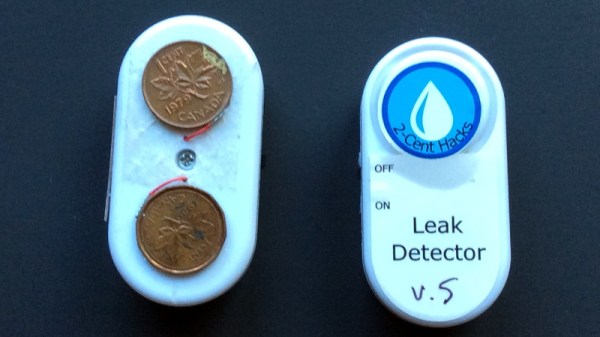
Which is precisely why this hacked together water alarm from [dB] is so appealing. Dubbed the “SqueakyLeaks”, this gadget started its life as a simple wireless intruder alarm from the Dollar Tree. When the magnet got far enough from the battery-powered base, a 90 dB warble would kick in and let you know somebody had opened a window or a door they shouldn’t have.

But with a little rewiring and two Canadian pennies serving as contacts, the alarm has been converted to a water detector that can be placed around potential leaky appliances like the water heater or in areas where you want to be alerted to water accumulation such as sumps. They’re basically “set and forget”, as [dB] says the three LR44 batteries used in the alarms should last about two years. Though with a BOM of $1.02 CAD, it’s probably cheaper to just make multiples and throw them out when the batteries die. Continue reading “Build This Handy Leak Detector For $1.02”

Dollar Store PCB Holder System

As you get into electronic fabrication and repair, one of the first things you realize is how hard it can be to hold a PCB still while you work on it. Securing them is difficult due to their very nature: they’re often weird shapes, quite fragile, and of course need to be electrically isolated. If you don’t mind spending the money, and have the time to wait on it getting delivered, you can order some nice purpose-built systems for holding PCBs online. But what if you need something fast and cheap?

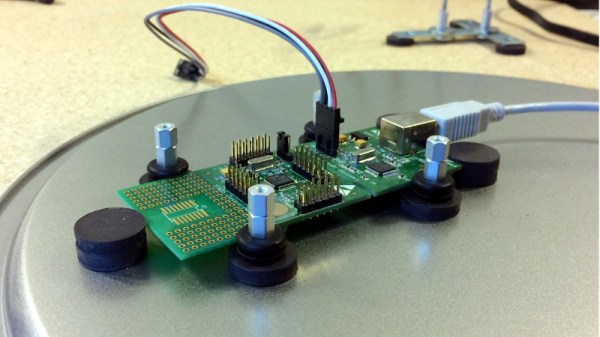
[Paul Bryson] might have the solution for you. On his blog he’s documented how a trip to the dollar store and some parts from the junk bin allowed him to create a practical system for holding multiple PCBs of various shapes and sizes. The most exotic element of the build here are the hexagonal standoffs; and if you haven’t already salvaged a bunch of those from a curbside computer, he even gives the Mouser link where you can buy them new for a few cents each.

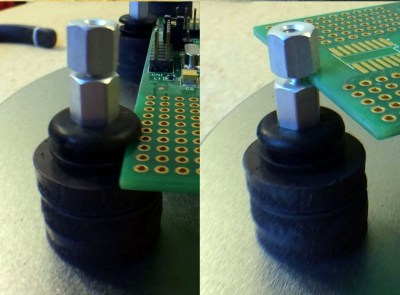
Each individual stanchion of the system is made up of a 3/4″ round magnet with a hex standoff glued to the top. Over the standoff, [Paul] slipped a rubber grommet which gives a nice non-conductive slot to put the edge of the PCB in. Otherwise, a second hex standoff screwed into the first can be used to clamp down on the board. Adjusting the height is as simple as adding a couple more magnets to the stack.

Of course, magnets need something metal to stick on. For that, [Paul] purchased some steel pie pans and matching rack from the dollar store. The round pans are easy to handle and give him plenty of surface area, and the rack makes for an exceptionally convenient storage unit for all the components. The conductivity of the pans might be a concern, but nothing the application of a rubberized spray coating couldn’t fix.

We’ve covered similar systems before, but this one certainly looks to take the top spot in terms of economics. The only thing that would be cheaper would be a few feet of PLA filament and a rubber band.