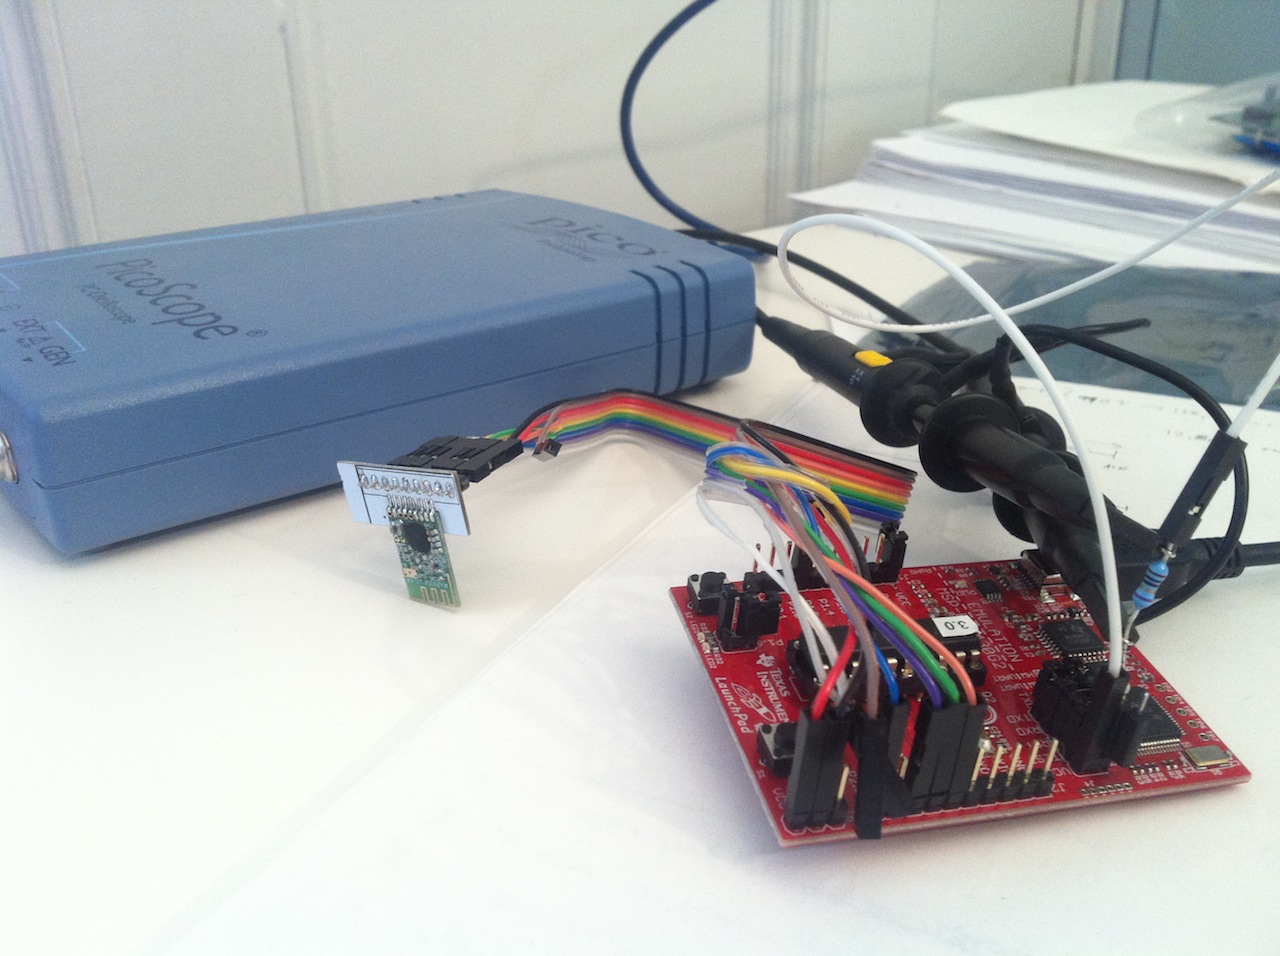
A few days ago we featured [Marcus]’ Contiki port to the TI Launchpad, Contiki being an open source operating system dedicated to the Internet of Things created by [Adam Dunkels] at the SICS in Sweden. Part of [Marcus]’ work involved designing a simple radio duty-cycling protocol that achieves 3% idle listening duty cycle while allowing for an average 65ms latency with no prior contact or synchronization.
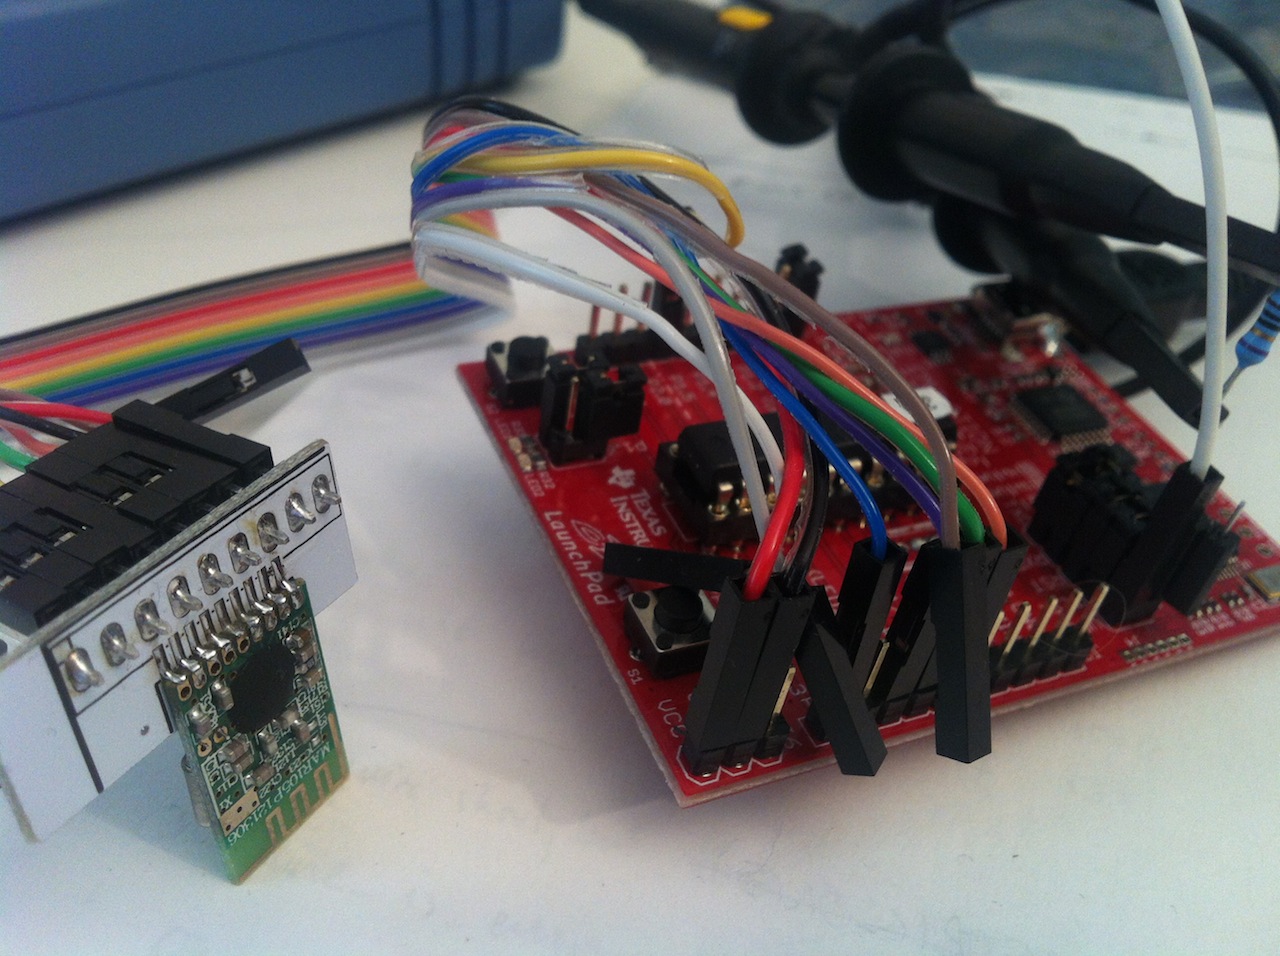
As a few readers may already know, it takes quite a lot of power for a wireless device to listen/send data. A platform therefore needs to have an algorithm that minimizes power consumption while allowing a (regular) planned data transfer. After creating his protocol named SimpleRDC, [Marcus] first simulated it using the Cooja simulator in order to check that it could perform as desired. He then implemented a real life test and checked the protocol’s performance by sniffing the SPI lines connecting his MSP430 to the wireless module and by monitoring the platform power consumption with his oscilloscope and a shunt resistor.