Hackaday Prize Entry: A Cute Synthesizer

For electronics aficionados, there are few devices cooler than music synthesizers. The first synths were baroque confabulations of opamps and ladder filters. In the 70s and 80s, synths began their inexorable march toward digitization. There were wavetable synths that stored samples on 27-series EPROMs. Synths on a chip, like the MOS 6581 “SID chip”, are still venerated today. For his Hackaday Prize entry, [Tim] is building his own synthesizer from scratch. It isn’t a copy of an old synth, instead it’s a completely modern synthesizer with a classic sound.

[Tim] is a former game developer and has already released a synthesizer of sorts. Rhythm Core Alpha 2 for the Nintendo DSi and 3DS is a fully functional synthesizer, but the limitations of the Nintendo hardware made [Tim] want to build his own synth from scratch.

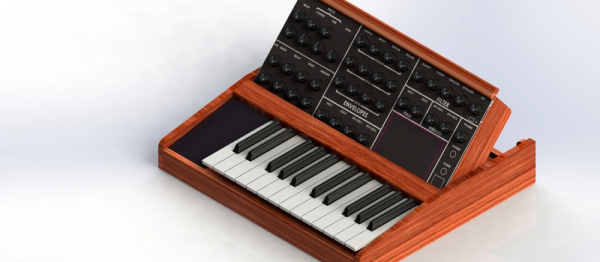
The specs for the synth are more of a wish list, but already [Tim] has a few design features nailed down. This is a virtual analog synth, where everything is digital and handled by DSP algorithms. It’s polyphonic and MIDI capable, with buttons and dials for almost every parameter. For the few things you can’t do with a knob, [Tim] is including a touch screen display.

[Tim] already has the synthesis model working, and from the videos he’s put together, the whole thing sounds pretty good. The next step is turning a bunch of wires, breadboards, and components into  something that looks like an instrument. We can’t wait to see how this one turns out!

You can check out a few of [Tim]’s synth videos below.

Continue reading “Hackaday Prize Entry: A Cute Synthesizer”

Hackaday Prize Entry: DIY Ceramic PCBs

We’ve seen hundreds of ways to create your own PCBs at home. If you have a laser printer, you can put traces on a piece of copper clad board. If you have some hydrogen peroxide and acid, you can etch those traces. Don’t have either? Build a tiny mill and cut through the copper with a Dremel. Making your own PCBs at home is easy, provided your boards are made out of FR4 and copper sheets.

Printed circuit boards can be so much cooler than a piece of FR4, though. Ceramic PCBs are the height of board fabrication technology, producing a very hard board with near perfect electrical properties, high thermal conductivity, and a dielectric strength similar to mineral transformer oil. Ceramic PCBs are for electronics going to space or inside nuclear reactors.

For his entry into this year’s Hackaday Prize, [Chuck] is building these space grade PCBs. Not only is he tackling the hardest challenge PCB fabrication has to offer, he’s building a machine to automate the process.

The basic process of building ceramic PCBs is to create a sheet of alumina, glass powder, and binder. This sheet is first drilled out, then silver ink is printed on top. Layers of these sheets are stacked on top of each other, and the whole stack is rammed together in a press and fired in a furnace.

Instead of making his own unfired ceramic sheets, he’s just buying it off the shelf. It costs about a dollar per square inch. This material is held down on a laser cutter/inkjet combo machine with a vacuum table. It’s just a beginning, but [Chuck] has everything he needs to start his experiments in creating truly space grade PCBs.

The HackadayPrize2016 is Sponsored by:

Hackaday Prize Entry: A Low-Cost Robot Arm

Robot arms are cool, and to judge from the SCARA arms and old Heathkit robots tucked away in a cupboard of every computer science department in every university in the world, they’re still remarkably educational. You can learn a lot about control systems with a robot arm, or you could build a clone of the old Radio Shack Armatron; either way, you’re doing something very cool. Right now, there aren’t many educational robot arms available, and the ones you can get are tiny. For [Jonathan]’s Hackaday Prize project, he’s building a low-cost robot arm with a one meter reach.

There’s a reason you won’t find many large, low-cost robot arms: the square cube law. An ant can carry many times its own body weight, but if you scaled that ant up to the size of a human, its legs couldn’t support itself. Likewise, a small, handheld robot arm will work perfectly well with hobby servos, but scaling this up requires big heavy stepper motors.

Continue reading “Hackaday Prize Entry: A Low-Cost Robot Arm”

You Can And Should Build Something For The Hackaday Prize

For the third year in a row, we’re running the greatest hardware challenge on the planet. It’s the Hackaday Prize, a contest to build something that matters. We’re giving away $300,000 to people who build something that solves a problem. We’ve already awarded $1000 to 20 lucky hackers for the first challenge in the Hackaday Prize — and we’re doing that every 5 weeks this summer! Now it’s your turn. You, too can build something for the Hackaday Prize. It doesn’t have to be complex. All it has to do is solve a problem.

hand-driveThink building something that solves a problem is too hard? Not true. Last year, [Kate Reed], a high school student, built a device that makes a wheelchair much easier. Her device, the Hand Drive, allows anyone in a wheelchair to use a rowing motion to move forward, instead of pulling themselves by the rim of the chair. It is perhaps the most clever and elegant device we’ve ever seen; it’s basically a ratchet that bolts onto a wheelchair, and if wheelchairs were around five hundred years ago, the Hand Drive would bolt right on to those antique chairs. For her entry, [Kate] was a finalist for last year’s Hackaday Prize, gave a talk at the Hackaday Supercon, and demonstrated her device to the president in the White House.

sit-upIs the simple tech behind a ratcheting wheelchair attachment not cool enough? Here’s a device that tells you to sit up. This device is just a few bits of electronics mounted to a chair that tells you to get up and walk around every hour or so. Deep vein thrombosis isn’t a joke, and for this entry to last year’s Hackaday Prize, [electrobob] was one of the 100 creators that made it to the finals.

Your project for the Hackaday Prize doesn’t need to be complex. It doesn’t need to be complicated, and you don’t need to invest months of work into your entry. All you need to do is build something that matters.

If you have an idea for a project that solves a problem, start your project now. There’s nothing to lose, and we’re giving away $300,000 in prizes for people who build something that matters.

The HackadayPrize2016 is Sponsored by:

Hackaday Prize Entry: Powering A Pi From A Battery

Knocking a microcontroller into sleep mode and waking it up on demand or in intervals is common practice in many low power applications, enabling devices to stay in operation for years on a single coin cell battery. Since there are tons of applications where you might want to do similar things with a Raspberry Pi, [Patrick Van Oosterwijck] created the LiFePO4wered/Pi. The module that snaps on to eight GPIO pins of a Pi, extending it by a long life LiFePO4 battery, a charging regulator, and a proper power management. Obviously, it also makes a great UPS.

lifepo_pcbs[Patrick] realized this project by expanding his already available and equally useful LiFePO4wered/USB charging regulator module by a low power MSP430G2131 microcontroller and a load switch. A daemon on the Raspberry Pi speaks to the module over I2C, allowing you to schedule a wake-up timer, let your Pi autoboot after a power outage or just read out the current battery voltage through a command line tool. Once the Pi is safely shut down, the microcontroller will also go to sleep, resulting in a standby current of 8 uA for the whole system. Together with the 500 mAh LiFePo4 cell, that’s theoretically low enough to send your Pi-ncess into a seven-year-long sleep.

LiFePO4wered/Pi is not only good for sleeping, though. [Patrick’s] runtime tests show, that the 500 mAh cell will power a Raspberry Pi Zero and a WiFi dongle for about two hours. Because the Raspberry Pi and many USB peripherals won’t complain when only 3.2 V are present on the VBUS, [Patrick] was able to squeeze out even more runtime by dismissing the boost converter from the design and driving the Pi directly from the battery voltage. If that worries you, you can either read a detailed explanation on why that works so well or just have a look at the more compliant 5 V version.

lifepo_time_laps_cameraEventually, [Patrick] used his module to create a Raspberry Pi time-lapse camera. A little script lets the Pi take a picture on boot up, set a wake-up timer and go back to sleep again. Safely enclosed in a waterproof electric box and deployed into the wild, the camera took 120 pictures on a single charge.

We’re sure the module will find it’s way into many cool projects and we’re counting the hours until we can get one in [Patrick’s] tindie store. Until then, enjoy the time-lapse video:

The HackadayPrize2016 is Sponsored by:


Hackaday Prize Entry: You Can Do Anything With A Bunch Of NANDs

Every few years, someone on the Internet builds a truly homebrew CPU. Not one built with a 6502, Z80, or a CPU from the 80s, either: one built completely out of 74-series logic chips or discrete transistor. We’re lucky enough to have [Alexander] document his build on Hackaday.io, and even luckier to have him enter it into this year’s Hackaday Prize. It’s an 8-bit computer built completely out of NAND gates.

Computers are just logic, and with enough NAND gates, you can do anything. That’s exactly what [Alex] is doing with this computer. It’s built entirely out of 74F00 chips – a ‘fast’ version of the ubiquitous quad 2-input NAND chip. The architecture of this computer borrows from the best CPUs of the 70s and 80s. The ALU is only four bits, like the Z80, but also uses the 6502 technique where the borrow is an inverted carry. It’s a small instruction set, a 2-stage pipeline, and should be able to compute one million instructions per second.

Designing a CPU is one thing, and thanks to Logisim, this is already done. Constructing a CPU is another matter entirely. For this, [Alex] is going for a module and backplane approach, where the ALU is constructed of a few identical modules tied together into a gigantic motherboard. [Alex] isn’t stopping at a CPU, either: he has a 16-byte ROM that’s programmed by plugging diodes into holes.

It’s an amazingly ambitious project, and for entering this project into the 2016 Hackaday Prize, [Alex] already netted himself $1000 and a trip to the final round of competition.

The HackadayPrize2016 is Sponsored by:

Hackaday Prize Entry: A Programmable Calculator With Nixie Tubes

For [Robert]’s entry into The Hackaday Prize, he’s starting off with some basic questions. What’s better than a Nixie tube? More Nixies. What’s better than a calculator? An RPN calculator. What do you get when you combine the two? A calculator that is absurdly large, even by 1970s desk calculator standards, uses a lot of power, and takes up too much space. Sounds good to us.

Nixies, at least when there are a lot of them, are tricky devices. They only draw about 50mA of current, but they only light up when above 150V. That’s only about seven watts, and it’s easy enough for the Arduino-heads out there to build a circuit to drive a few Nixies for a clock. Driving dozens of Nixies is a bit harder. For [Robert]’s RPN calculator, he’s estimating a little under 50W of power being dumped into this calculator.

With the considerable power considerations taken care of, [Robert] turned his attention to the display board. This is going to be a very impressive build, with 80 IN-12B tubes organized in four stack levels of twenty tubes each. The tubes will be controlled with the Maxim MAX6922 VFD driver. This chip has a serial interface, which means it’s relatively easy to have any microcontroller blink these tubes. And of course, it does double-duty as a clock.

The HackadayPrize2016 is Sponsored by: