Printing And Programming A Self-balancer

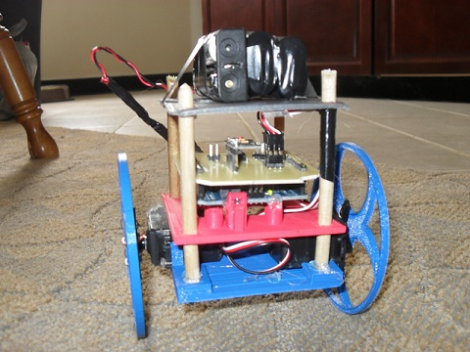
The Hackaday staff isn’t in agreement on 3d printers. Some of us are very enthusiastic, some are indifferent, and some wonder what if they’re as widely useful as the hype makes them sound. But we think [Jason Dorweiler’s] self balancing robot is as strong a case as any that 3d printing should be for everyone!

Don’t get us wrong. We love the robot project just for being a cool self-balancer. Seeing the thing stand on its own (video after the break) using an Arduino with accelerometer and gyroscope sensors is pure win. But whenever we see these we always think of all the mechanical fabrication that goes into it. But look at the thing. It’s just printed parts and some wooden dowels! How easy is that?

Sure, sure, you’ve got to have access to the printer, it needs to be well calibrated, and then you’ve got to make the designs to be printed out. But these hurdles are getting easier to overcome every day. After all, there’s no shortage of people to befriend who want nothing more than to show off their Makerbot/RepRap/etc.

Continue reading “Printing And Programming A Self-balancer”

Salvaged Robot Arm Makes A Big 3d Printer

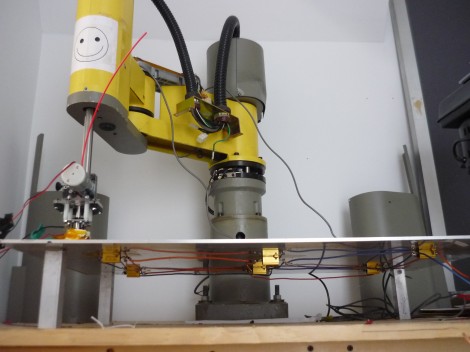
Wow, building a precision 3d printer is amazingly easy if you can get your hands on an industrial-quality robot arm. [Dane] wrote in to tell us about this huge extruder printer made from an ’80s-era SCARA robot arm. It is capable of printing objects as large as 25″x12″x6.5″.

This 190 pound beast was acquired during a lab clean out. It was mechanically intact, but missing all of the control hardware. Building controllers was a bit of a challenge since the it’s designed with servo motors and precision feedback sensors. This is different from modern 3d printers which use stepper motors and no feedback sensors. A working controller was built up one component at a time, with a heated bed added to the mix to help prevent warping with large builds. We love the Frankenstein look of the controller hardware, which was mounted hodge-podge as each new module was brought online.

You can see some printing action in the clip after the break. A Linux box takes a design and spits out control instructions to the hardware.

Continue reading “Salvaged Robot Arm Makes A Big 3d Printer”

Finally, A 3D Printer For Burritos

[Marko] created a robot that prints burritos. Truly, we’ve reached new heights as a species.

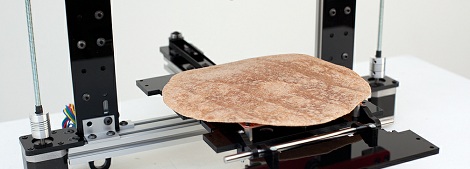
The Burritob0t is based on the ORD Hadron 3d printer with a pair of air compressor/syringe-based extruders based on the Makerbot Frostruder. All the ingredients – rice, meat, salsa, and molten cheese – will be printed onto the surface of a tortilla heated by a Makerbot heated build platform.

[Marko] has some pretty neat plans for his Burritob0t such as an iPhone app for ordering your burritos and some sort of social commentary thing using burritos. We’re assuming [Marko] hasn’t yet got this Burritob0t up and running for the lack of any action shots or demo videos. That said, there’s a wonderful Flickr gallery and an about page that covers the artistic statement behind the Burritob0t.

If you want to get your own Burritobot, [Marko] hopes to have a Kickstarter up sometime in July.

Calculating With 3D Printed Gears

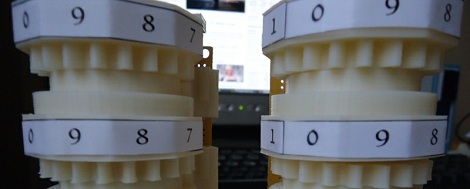
Here’s a 3D printed electromechanical computer built by [Chris Fenton] over at NYCResistor. It uses plastic registers printed on a Makerbot, a bunch of pogo pins, and business-card sized punch cards capable of storing 32 bits of instructions and data.

In case you’re wondering, this isn’t the first time we’ve seen [Chris]’  FIBIAC. Since the last update, [Chris] managed to get a program that walks through the first three digits of the Fibonacci sequence. There’s really no limit to what the FIBIAC can theoretically do, but with only three registers he’s limited to calculating the first three digits of pi.

With more registers, [Chris]’ computer could be expanded, but each register takes about 8 hours to print. We’re sure [Chris] would gladly accept any donations of additional 3D-printed registers, so if you’d like to make a few of these gear registers you can get the files on Thingiverse.

As a proof of concept, [Chris]’ FIBIAC is amazing, but it doesn’t live up to its intended design. The punch card format [Chris] created is capable of storing 8 registers, and the registers themselves can be expanded far beyond their current 3-digit width. Still, it’s an incredible build and has the bonus of being easily expandable thanks to a very clever design.

Continue reading “Calculating With 3D Printed Gears”

Tearing Apart A Hot Glue Gun For A 3D Printer

If you’re building a 3D printer, the most complicated part is the extruder. This part uses a series of gears to pull plastic filament off of a spool, heats it up, and squirts it out in a manner precise enough to build objects one layer at a time. [Chris] made his own extruder out of a hot glue gun and made it so simple we’re surprised we haven’t seen this build before.

The basic operations of a plastic extruder – pushing a rod of plastic through a heated nozzle – already exists in a hot glue gun available for $3 at WalMart. To build his printer, [Chris] tor apart the hot glue gun and mounted the nozzle on a piece of plywood. The hot glue sticks are fed into the nozzle with the help of a 3D printed gear and a stepper motor driver.

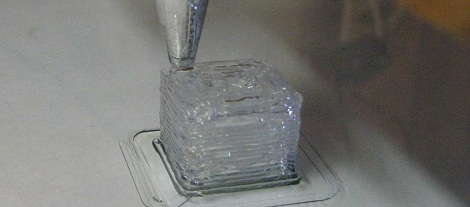
After the break, you can see [Chris]’s hot glue gun RepRap printing a 10cm cube. It’s not fast, but the quality is exceptional, especially considering he made it out of a hot glue gun.

Continue reading “Tearing Apart A Hot Glue Gun For A 3D Printer”

A Personal Manufacturing Stack Exchange

Over on Stack Exchange, there’s a proposal for a new CNC/3D printer site. It’s a personal manufacturing stack exchange, and hopefully we’ll see some awesome discussion when it’s eventually created.

Stack Exchange is already well-known for hosting the most useful programming site as well as awesome sites/forums covering everything from LaTeX to grammar. The proposed Personal Manufacturing site is sure to provide a ton of advice and discussion covering the hardware, software, electronics, and toolchains of CNC routers, RepRaps and mills.

The personal manufacturing stack exchange hasn’t been created yet – a few more people still need to commit to use it. Once that’s done, though, we’re sure to see a lot of very helpful advice and discussion from the Stack Exchange community.

Kudos to [Michael] for sending this in.

Your Face In Chocolate

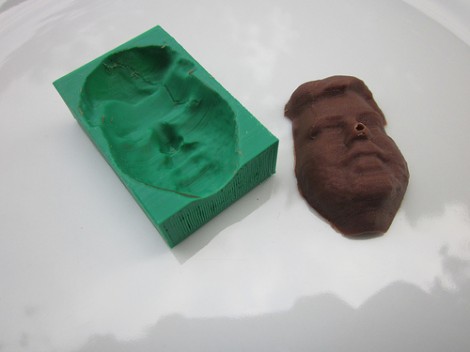
We think in might be absurdly vain, but wouldn’t it be fun to give everyone in your family a chocolate modeled after your mug this holiday season? [Eok.gnah] has already worked out a system to make this possible. It consists of three parts: scanning your head and building a 3D model from it, using that model to print a mold, and molding the chocolate itself.

He used 123D to scan his face. No mention of hardware but this face scanning rig would be perfect for it. He then cleaned up the input and used it to make a mold model by subtracting his face from a cube in OpenSCAD. That needs to be sliced into layers for the 3D printer, and he used the Slic3r program which has been gaining popularity. Finally the mold was printed and the face was cast with molten chocolate. We’d suggest using a random orbital sander (without sand paper) to vibrate the bottom of the mold. This would have helped to evacuate the bubble that messed up his nose.

You know, it doesn’t have to be your face. It could be another body part, even an internal one… like your brain!