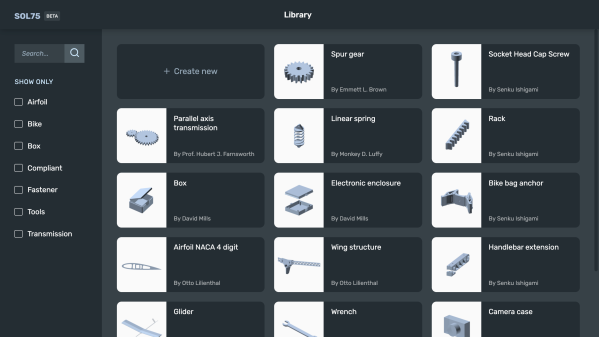
[Francesco] developed a parametric design tool called SOL75 which aims to take the drudgery out of designing the basic mechanical parts used in projects. He knows how to design things like gears, pulleys, belts, brackets, enclosures, etc., but finds it repetitive and boring. He would rather spend his time on the interesting and challenging portions of his project instead.
The goal of SOL75 is to produce OpenSCAD and STL files of a part based on user requirements. These parameters go beyond the simple dimensional and include performance characteristics such as peak stress, rigidity, maximum temperature, etc. The program uses OpenSCAD to generate the geometries and a core module to evaluate candidate designs. In an attempt to overcome the curse of dimensionality, [Francesco] has trained an AI oracle to quickly accept or reject candidate solutions.
In the realm of parametric design aids, you have projects like NopSCADlib which dimensionally parameterize a large collection of common objects by numbers alone ( a 100 cm long, 6.35 mm diameter brass tube with 1.22 mm wall thickness ) or industry standard specifications ( a 10 mm long M3 socket head cap screw ). This approach doesn’t take into account whether the object will hold up in your application nor does it consider any 3D printing issues. At the other extreme, there are the generative design and optimization tools found in professional packages like Fusion 360 and SolidWorks which can make organic-looking items that are optimized precisely for the specified conditions.
SOL75 seems to fall in the middle, combine characteristics of both approaches. It gives you the freedom to select dimensional parameters and performance requirements, yet bounds the solution space by only offering objects that have been prepared ahead of time by domain experts — if you ask for an L-bracket, you’ll get an L-bracket and not something that looks like a spider web or frog leg.
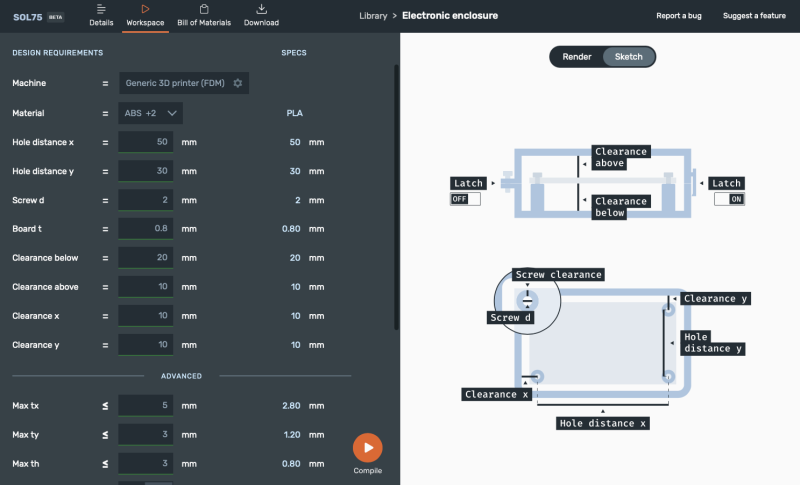
Once you compile the design, SOL75 generates the OpenSCAD and/or STL files and a bill of materials. But wait — there’s more– it also makes a thorough design handbook documenting the part in great detail, including the various design considerations and notes on printing. Here is a demonstration link for an electronics enclosure which is pretty interesting. There is also an example of using SOL75 to make a glider, which you can read about on the Hackaday.io project page.
For now, [Francesco] has only made SOL75 available in a register-by-email online Beta version, as he’s still undecided on what form the final version will be. Do you have any success (or failure) stories regarding generative designs? Let us know in the comments below.