Semi-automatic Mouse Requires No Permit

When [Kerry]’s son asked him if there was a way to make a mouse click rapidly, he knew he could take the easy way and just do it in software. But what’s the fun in that? In a sense, it’s just as easy to do it with hardware—all you have to do is find a way to change the voltage in order to simulate mouse clicks.

[Kerry] decided to use the venerable 555 timer as an astable oscillator. He wired a momentary button in parallel with the left mouse button. A 50k mini pot used as the discharge resistor allows him to dial in the sensitivity. [Kerry] found that he maxed out around 5 clicks per second when clicking the regular button, and ~20 clicks per second with the momentary button as measured here. The mouse still works normally, and now [Kerry]’s son can totally pwn n00bs without getting a repetitive stress injury. M1 your way past the break to check out [Kerry]’s build video.

There are lots of other cool things you can do with an optical mouse, like visual odometry for cars and robots.

Continue reading “Semi-automatic Mouse Requires No Permit”

Greet The Sun With A 555 Flute

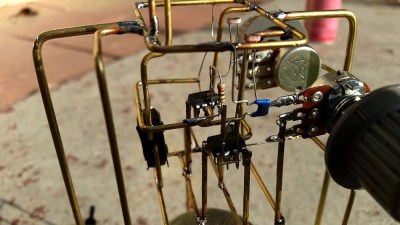
Here’s an interesting implementation of a classic: the 555 timer as astable multivibrator for the noble purpose of making weird music. [pratchel] calls this a Morgenflöte or morning flute, indicating that it is best played in the morning. It would certainly wake up everyone in the house.

Instead of using LDRs in straight-up Theremin mode and waving his hands about, [pratchel] mounted one in each of several cardboard tubes. One tube is small and has just a few holes; this is intended to be used as a flute. [pratchel] cautions against locating holes too close to the LDR, because it will overpower the others when left uncovered. A larger tube with more holes can be used as a kind of light-dependent slide whistle with another holey tube that fits inside. We were disappointed to find that the giant tube sitting by the amplifier hasn’t been made into a contrabass flute.

Continuing the theme of astability, [pratchel] went completely solderless and built the circuit on a breadboard. The LDR’s legs are kept separate by a piece of cardboard. This kind of project and construction is fairly kid and beginner-friendly. It would be a good one for getting your musically inclined friends and family members into electronics. Here’s a 555 player piano built by Hackaday’s own [Steven Dufresne] that might be a good second step. Check out [pratchel]’s performance after the break.

Continue reading “Greet The Sun With A 555 Flute”

555 Plasma Speaker

The 555 can do anything. OK, that’s become a bit of a trope in our community, but there is quite a lot of truth behind it: this little timer chip is an astonishingly versatile component.

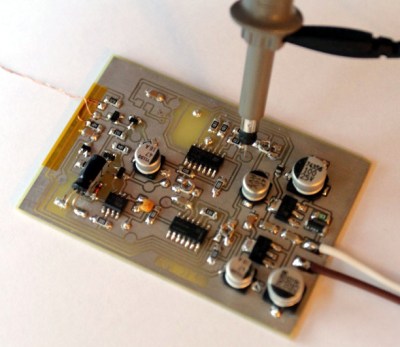
[Alexander Lang] has added another achievement to the 555’s repertoire, he’s used one in the creation of a plasma speaker. Working at Hackspace Manchester, he’s used the 555 as a pulse-width modulator that drives a flyback transformer through a MOSFET, which feeds a spark gap mounted in a lasercut enclosure. The results maybe aren’t yet hi-fi, but it works, and is very audible.

We’ve been following this project for a while, as he’s updated his progress through several iterations. From initial design idea through PCB and enclosure design, to a first working prototype and some audio refinements, and finally this latest post with the spark gap in its enclosure. He is still refining his speaker, so there is more to come

In the video below the break he demonstrates his pulse width modulator, and tests the device using a keyboard as an input.

Continue reading “555 Plasma Speaker”

Fail Of The Week – Steam Cleaner Fix Goes Bad

[Sven337] was gifted a steam cleaner, and seemed pretty happy because it helped clean the floor better than a regular mop. Until it fell one day, and promptly stopped working. It would produce steam for a short while and then start spitting out cold water, flooding the floor.

Like any self-respecting hacker, he rolled up his sleeves and set about trying to fix it. The most-likely suspect looked like the thermostat — it would switch off and then wouldn’t switch on again until the water temperature fell way below the target, letting out liquid water instead of steam after the first switching cycle. A replacement thermostat was ordered out via eBay.

Meanwhile, he decided to try out his hypothesis by shorting out the thermostat contacts. That’s when things went south. The heater worked, and got over-heated due to the missing thermostat. The over-temperature fuse in the heater coil blew, so [Sven337] avoided burning down his house. But now, he had to replace the fuse as well as the thermostat.

[Sven337] bundled up all the parts and put them in cold storage. The thermostat arrived after almost 2 months. When it was time to put it all together, a piece of fibreglass tubing that slides over the heater coil was missing. Without the protective sleeve, the heater coil was shorting out with the grounded heater body, blowing out the fuses in his apartment.

That’s when [Sven337] called it a day and threw out the darn steam mop — a few dollars down the drain, a few hours lost, but at least he learnt a few things. Murphy’s Law being what it is, he found the missing insulation sleeve right after he’d thrown it away.

Motorcycle Headlight Modulator Is A Bright Idea

Motorcyclists are paranoid about being hit by cars, and with reason. You’re a lot safer when you’re encased in a metal shell, with airbags and seatbelts. The mass difference between a car and a motorcycle doesn’t work out well for the biker, either. Unfortunately for bikers, motorcycles are also slimmer and generally less visible than cars.

A few decades ago, motorcycle manufacturers switched over to daytime running headlights to make bikes more visible. In the meantime, however, cars have done the same, leading many bikers to fear that their visibility advantage is losing it’s impact. The solution? Blink the headlights gently during the daytime, and run them normally at night.

[William Dudley] was unsatisfied with commercial versions, so he built a custom headlight modulator for his motorcycle.

head_mod_cds_7_schem And believe it or not, he did it with a 555 timer IC and a light-dependent resistor (plus some transistors and a whole slew of miscellaneous parts). But [William]’s design is a good one, and he walks you through all of the choices he made in building the light-sensing circuit that disables the 555.

Whether you need a motorcycle headlight modulator or are interested to learn how this problem would be solved in the pre-Arduino days, go check out [William]’s post. And while you’re on the nostalgic electronics trip, check out this nixie tube speedometer.

Demodulating BPSK31 With OpAmps And 555s

BPSK31 is an extremely popular mode for amateur radio operators; it’s efficient and has a narrow bandwidth and can be implemented with a computer sound card or an Arduino. Just like it says on the tin, it’s phase shift keying, and a proper implementation uses a phase detection circuit or something similar. [Craig] thought it would be fun to build an analog BPSK31 demodulator and hit upon the idea of doing this with amplitude demodulation. No, this isn’t the way you’re supposed to do it, but it works.

Data is transmitted via BPSK31 with a phase shift of 180 degrees being a binary 0, and no phase shift being a binary 1. [Craig]’s circuit uses an op-amp and a pair of diodes to do a full wave rectification of the signal, which basically makes a binary 1 logic high, and binary 0 logic low.

This rectified signal is then fed into a comparator, making the output go high when the signal is above 2V, and low when the signal is below 1V. That’s all you need to do to get bits out of the signal, all [Craig] had to do after that was figure out a way to sample it.

A 555 set up in astable mode running at 31.25 Hz provides the clock, synchronized with the signal by connecting the comparator’s output to the 555 trigger input. The timer clock ends up being slightly slower, but thanks to the varicode character set, the maximum number of binary ones the circuit will see is nine; every time the trigger sees a zero, the timer’s trigger is reset, re-synchronizing the receiver’s clock.

Yes, it’s a hack, and no, this isn’t how you’re supposed to receive PSK. It does, however, work, and you can thank [Craig] for that.

board

LEGO And Arduino Meet Han Solo

lego blaster gif

This full-size replica blaster from Star Wars, most iconically used by Han Solo and Princess Leia, has everything. Flashing LEDs, blaster noises, LEGO, and yes, even an Arduino. Not bad for [Baron von Brunk]’s first project to use an Arduino!

The blaster was based on electronics and LEGO that were lying around and was intended for use for Star Wars Day 2014. (May the Fourth be with you.) “Lying around” in this sense might be a bit of an understatement for [Baron von Brunk], as the design of the blaster required the use of the LEGO Digital Designer and 400 blocks, some of which are quite rare.

The electronics for the project are tied to a moving trigger mechanism (also made from LEGO). The trigger mechanism hits a momentary pushbutton which tells the Arduino to activate the LEDs and a separate 555 timer and sound recording/playback device which handles the classic blaster sounds. The whole thing is powered by a 9V battery and housed in the front of the blaster, and all of the code (and the LEGO schematics) are available on the project’s site.

This is quite an impressive replica, and the craftsmanship that went into the build shows, especially in the LEGO parts. We think Han Solo would indeed be proud! If you’re ready to go even further with Star Wars and LEGO, you might want to check out this barrel organ that plays the Star Wars theme.