Fantastic Programming Makes This Arduino Gaming Device Something Special

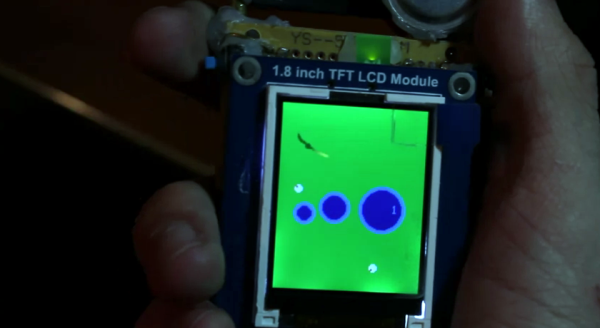
The hardware that went into this Arduino gaming console is just fine. But the coding that produced this game called Twisted SNAKE is beyond compare. [Rodot] has programmed several games for the hardware, which uses an Arduino, 160×168 TFT screen, a 3 axis accelerometer, and two input buttons. If you’re interested, there is a forum thread in which he talks a bit more about the hardware design. But you’re not going to want to pass up either of the two videos embedded after the break.

The first clip shows off a bouncing-ball platforming game. The accelerometer moves the ball back and forth, and the top scrolling level brings more ledges into play. This in itself is a great game. But the Twisted SNAKE game shown off in the second video makes our own ARM-based Snake game look like a 3-year-old programmed it. [Rodot] filled up all of the program memory of the ATmega328 chip to  make this happen. There’s a menu system which allows for color themes and difficulty selection. The game play itself lets the snake travel anywhere it wishes with the tail following behind in graceful curves. Wow!

Continue reading “Fantastic Programming Makes This Arduino Gaming Device Something Special”

Kalman Filter Keeps Your Bot Balanced

If you’re looking to improve the stability of your self balancing robot you might use a simple horrifying equation like this one. It’s part of the journey [Lauszus] took when developing a sensor filtering algorithm for his balancing robot. He’s not breaking ground on new mathematical ideas, but trying to make it a bit easier for the next guy to use a Kalman filter. It’s one method of suppressing noise and averaging data from the sensors commonly used in robotic applications.

His robot uses a gyroscope and accelerometer to keep itself upright on just two wheels. The combination of these sensors presents an interesting problem in that accelerometer input is most accurate when sampled over longer periods, and a gyroscope is the opposite. This filter takes those quirks into account, while also factoring out sensor noise. Despite the daunting diagram above, [Lauszus] did a pretty go job of breaking down the larger function and showing us where to get the data and how to use it in microcontroller code.

Monitoring A Clothes Washer With An Accelerometer

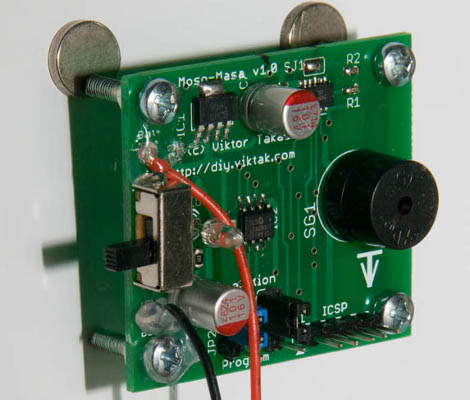
[Viktor’s] washing machine did a good job of cleaning his clothes, but it kept a bit too quiet about it. The machine doesn’t have an audible alert to let him know the cycle has finished. He decided to build his own alarm which can just be slapped on the side of the machine.

You can see that a couple of magnets hold the board to the metal housing of the washer. The board doesn’t actually connect to any of the machine’s circuitry so this should work about equally as well for any unit. The detection is based on motion, thanks to a Freescale MMA7361 3-axis accelerometer. When he starts a load of wash he flips the power switch for the board on. The PIC 12F683 that drives the device starts monitoring the accelerometer for changes. If it goes for more than about one minute without reading motion the piezo buzzer starts beeping. It’s a fun and easy solution along the same line of this oven pre-heat alarm add-on.

Printing And Programming A Self-balancer

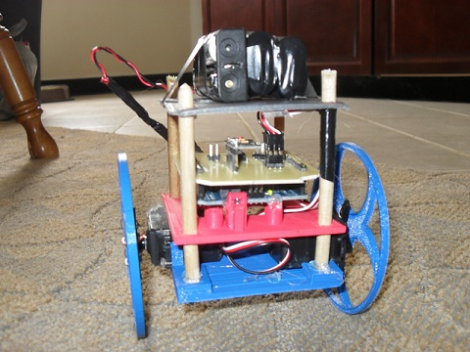
The Hackaday staff isn’t in agreement on 3d printers. Some of us are very enthusiastic, some are indifferent, and some wonder what if they’re as widely useful as the hype makes them sound. But we think [Jason Dorweiler’s] self balancing robot is as strong a case as any that 3d printing should be for everyone!

Don’t get us wrong. We love the robot project just for being a cool self-balancer. Seeing the thing stand on its own (video after the break) using an Arduino with accelerometer and gyroscope sensors is pure win. But whenever we see these we always think of all the mechanical fabrication that goes into it. But look at the thing. It’s just printed parts and some wooden dowels! How easy is that?

Sure, sure, you’ve got to have access to the printer, it needs to be well calibrated, and then you’ve got to make the designs to be printed out. But these hurdles are getting easier to overcome every day. After all, there’s no shortage of people to befriend who want nothing more than to show off their Makerbot/RepRap/etc.

Continue reading “Printing And Programming A Self-balancer”

Pocketwatch Retrofit Takes Input From Accelerometer

A friend of [CNLohr’s] used the mechanism from an old pocket watch in an art piece, but left him with the enclosure. It’s an interesting looking object that feels great in your hand so he decided to fill it with his own electronics, thereby giving it a new life. He’s showing off an early version of the hardware in the video, but plans to send off another version of the board soon to add a few features.

You can see that the round PCB is small enough to fit in the space vacated by the original hardware. The ribbon cable is used to connect to the programmer and we think it’s also the power source for this demonstration. There’s a small Densitron display that’s reading out hex values from the accelerometer. Many of these mems chip (you can learn how they work from this post) include a hardware tap detector. This meant you can tap your finger on the device and the chip will signal an input to whatever chip is attached to it. That’s a great option for user input, and it’s what [CNLohr] chose as the select button here. He tilts the watch to one side, then taps to turn on the LED. That’s all for now, but we like the promise it shows and can’t wait for updates!

Continue reading “Pocketwatch Retrofit Takes Input From Accelerometer”

Arduino Tells You How Rough Your Last Mountain Bike Ride Was

If you want to see what kind of abuse you’re causing your body when out on those single-track rides this system is just the thing. It’s an Arduino data logger that [Wdm006] takes along on the rides with him. When he gets back home, a Python scripts captures the data dump and graphs it. It may sound like a neat trick, but he’s got something planned for that information.

The enclosure mounts to the stem of his bike. It houses an Arduino board with a data logging shield of his own design. That shield holds an SD card for storage, and breaks the other pins out as screw terminals. Right now there’s an accelerometer on the front fork, and some method of recording wheel speed. This is the research phase of an anti-lock brake system (ABS) he plans to build for mountain biking. No word on what hardware he’ll use for that, but we can’t wait to see how it comes out.

The Engineer Guy Explains How MEMS Accelerometer Chips Work

There’s a good chance that you use a MEMS accelerometer every single day. It’s the small chip that let your smart phone automatically adjust its screen orientation. They’re great chips, and since they’re mass-produced you can add them to your projects for a song (if you can abide the tiny packaging). But we have no idea of how they are made and only a inkling of how they work. [Bill Hammack] has filled that knowledge gap with this explanation of how MEMS accelerometers are made and how they function.

Our base knowledge comes from the acronym: Micro Electro-Mechanical Systems. There’s something in the chip that moves (so much for solid state electronics; and it makes us wonder if these wear out). [Bill] includes a diagram in his video after the break which shows the silicon-based system that moves as it is affected by gravity. This changes the capacitive properties of the structure, which can be measured and reported to a microcontroller for further use. The structure is built using an intricate etching process which we never want to try out at home.

Looking for a project in which to use one of these devices? We’ve always been fond of this POV device.

Continue reading “The Engineer Guy Explains How MEMS Accelerometer Chips Work”