Electro-active Polymers

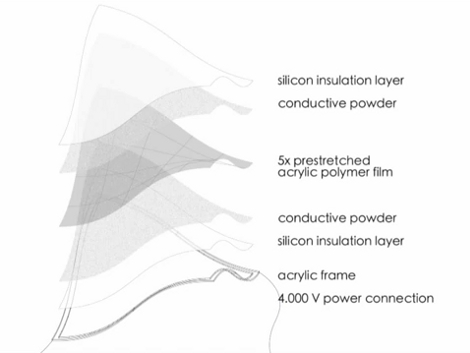
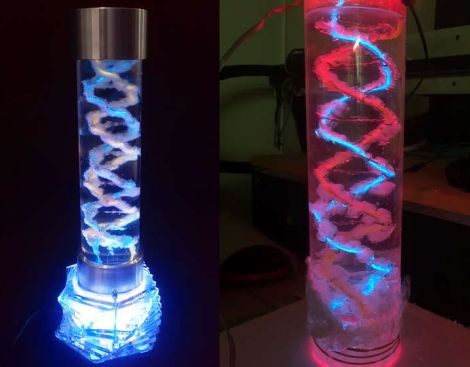
What’s that you say? You’ve got rigid materials that change their shape when exposed to electric current? Sign us up for some! Although the fabrication process looks a bit daunting, we love the results of working with electro-active polymers. These are sheets of plastic that can flex by contracting in one direction when the juice is turned on. It has an effect very similar to muscle wire but distributed over a larger area.

From what we saw in the video after the break it looks like this is not the most resilient of materials. Several of the test shots have broken panes, but we’re sure that will improve with time. It looks like there is some info out there about fabricating your own EAP but the processes seem no easier than what’s going on at the research level. We might stick to building our own air muscles until EAP is easier to source for projects.

Continue reading “Electro-active Polymers”

Converting A Laptop Computer Into A Desktop Machine

[Michael Chen] found himself in possession of a thoroughly broken laptop. The hinges connecting the screen to the body of the computer were shot, and the battery was non-functional. After a bit of thinking he decided that it wouldn’t take much to resurrect the hardware by turning it into a desktop machine.

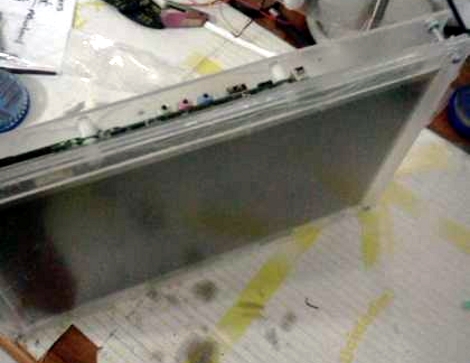
At the core of this hack is the hardware that you must keep for the computer to function. That is, the LCD screen, the motherboard, hard drive, and the AC/DC brick that powers it. [Michael] ditched everything else; the case, keyboard, trackpad, webcam, etc. Next he started building his own enclsure out of acrylic. First he sandwiched the LCD screen between a full sheet of acrylic and a bezel that was one inch wide on each side. Next, another full sheet was used to mount the motherboard and hard drive. You can see how the three sheets are connected by nuts and bolts in the image above. It looks like the only other alteration he made was to relocate the power button to a more convenient spot.

Once a USB keyboard and mouse are added he’s back up and running. We’ve got our eye on an old XP laptop that might end up seeing this conversion to become a dedicated shop computer. We just need to build in some more dust protection.

The Basics Of Building A Multitouch Table

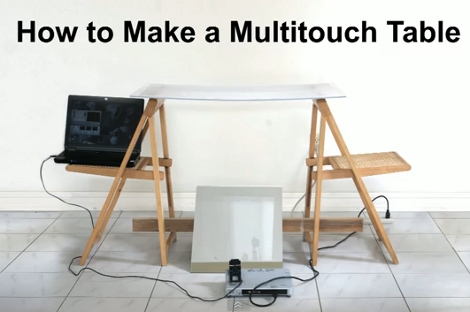
Here is a bare-bones multitouch table setup. We looked in on [Seth Sandler’s] multitouch work a few years ago when he completed the MTmini build. He’s scaling up the size a bit with the MTbiggie, and showing you how easy it is to put together. The demo rig seen above is just a couple of chairs, a sheet of acrylic, a mirror, a projector, a computer, and a diy infrared webcam.

The rig uses ambient infrared light to detect the outlines of your fingers when they touch the acrylic surface. A webcam with an exposed camera film filter feeds an image of the infrared light received below the surface to the computer. The incoming video is processed using Community Core Vision, where each individual point is isolated and mapped. Once the data is available the sky’s the limit on what you can develop. [Seth’s] demo packages include a mouse driver, some physics applications, an Angry Birds implementation, and a few others. See for yourself in the video after the break.

Continue reading “The Basics Of Building A Multitouch Table”

PC Case Using CNC Router And Home Building Products

[Reinventing Science] needed a project that he could use to test out his skills on a new CNC routing machine he recently acquire. He settled on building a PC case using easily obtained materials. What he ended up with is the clean-looking case seen above that was machined from materials you can pick up at the home store.

The bulk of the case is made from extruded PVC which is designed to perform like solid wood trim. He picked up one piece of the ‘lumber’ and cut out the front, back, top, bottom, and drive bay bezel. We expected the joints between the horizontal and vertical pieces to either be butt joints, or rabbits. But [Reinventing Science] wanted a cleaner look and managed to mill mortise and tenon joints. These are strong joints that leave a very nice finished look. Since the material is designed as a lumber replacement it shouldn’t be too surprising to see drywall screws used as the fasteners.

In addition to joinery, some other CNC tricks were used. The sides of the case were cut from clear acrylic, with a decorative bead milled in the surface. There’s also fan ports cut in the top and vents on the bottom, as well as some engraving with the name of the project just above the optical drive. The wood-grain embossing makes for an interesting final look; we’d like to see how this takes a few careful coats of paint.

If you’re interested in the CNC hardware used, take a look at the unboxing post that shares a few details.

Etching Panel Faces On The Cheap

[James] came up with a way to make small numbers of high-contrast instrument panels cheaply, and without too much labor. We’ll make with the bad news right away; you’re going to need a laser cutter to use this method. Traditionally, panels that look like the one above are etched onto special composite that has one color at the surface and a contrasting color beneath. [James] started with plain old acrylic, etched his labels, then filled the voids with black wax crayon. Just scribble all over the etched face to rub wax into the grooves, go through a couple of cleaning steps using white spirit, then bake the panel to even out and harden the wax layer. He’s got several examples of his work, including medallions that are used to label LED indicators.

Shiny Acrylic MAME Box

This nice table-top MAME arcade features a two-toned acrylic case. [Fabricio] spent about 50-60 hours designing the 29 parts that make up the enclosure. Originally the sides were meant to be orange but one design flaw meant he had to have them recut and only had enough black stock for the job. But we like it this way. The screen is just over ten inches and inside you’ll find a mini-ITX motherboard with a gig of ram and a solid state drive. The seven page build log features some bending, glue, screwing, and wiring that really show off the depth of the project.

This results a very modern look but if you like your retro gaming to appear vintage we recommend this cocktail cabinet.

Heater For Bending Acrylic

We like using acrylic in our projects but there are a couple of tricky techniques, particularly getting clean cuts for glued edges and bending the material into curves. [Giorgos Lazaridis] has a great solution to the latter, a dedicated acrylic heater. Instead of using an oven to warm the material for bending he’s using localized heat produced by a high-powered lamp pulled from an old laser printer. The next part of his solution is to keep the heated area of the acrylic as small as possible. This was achieved by creating heat sinks on either side of the bulb. The metal bars seen above have water running through them to help isolate the softening of the material to a narrow strip. See how well this system works in the video after the break.

Continue reading “Heater For Bending Acrylic”