The Smallest GameCube Is Actually A Wii

Casemodding, or stuffing video game consoles into shapes they were never meant to be in, is the preserve of a special breed. Our favorites are when old consoles are stuffed into different versions of the same console. Remember that gigantic O.G. Brick Game Boy carrying case? Yes, you can turn that into a jumbo-scale Game Boy, and it’s sweet. Continuining this trend of consoles of a different size, [Madmorda] has stuffed a GameCube into a sugar cube. It’s small. It’s really small, and it’s some of the best casemodding we’ve seen.

First off, the enclosure. This is an officially licensed micro GameCube case that originally housed gummy candies crafted by gummy artisans who work exclusively in the medium of gummy. This case, incidentally, is the perfect scale to match [Madmorda]’s earlier work, a miniaturized GameCube controller. This controller was originally a keychain, but with a bit of fine soldering skills it can indeed become a functional GameCube controller.

With the candy container GameCube gutted, the only task remaining was to put a GameCube inside. This is a lot easier if you tear down a Wii, and after desoldering, resoldering, and generally cutting up the circuit board of a Wii, [Madmorda] had something very small.

The finished console is a complete GameCube, compatible with all games, and no emulation. There are four controller ports, two USB ports for memory card slots, and output is composite through a 3.5mm jack. It’s a great piece of work and looks exactly like a miniaturized GameCube.


Byte Sized Pieces Help The KiCad Go Down

It’s no surprise that we here at Hackaday are big fans of Fritzing KiCad. But to a beginner (or a seasoned veteran!) the learning curve can be cliff-like in its severity. In 2016 we published a piece linking to project by friend-of-the-Hackaday [Chris Gammell] called Contextual Electronics, his project to produce formalized KiCad training. Since then the premier “Getting to Blinky” video series has become an easy recommendation for anyone looking to get started with Libre EDA. After a bit of a hiatus [Chris] is back with bite sized videos exploring every corner of the KiCad-o-verse.

A Happy [Chris] comes free with every video
The original Getting to Blinky series is a set of 10 videos up to 30 minutes long that walks through everything from setting up the the KiCad interface through soldering together some perfect purple PCBs. They’re exhaustive in coverage and a great learning resource, but it’s mentally and logistically difficult to sit down and watch hours of content. Lately [Chris] has taken a new tack by producing shorter 5 to 10 minute snapshots of individual KiCad features and capabilities. We’ve enjoyed the ensuing wave of learning in our Youtube recommendations ever since!

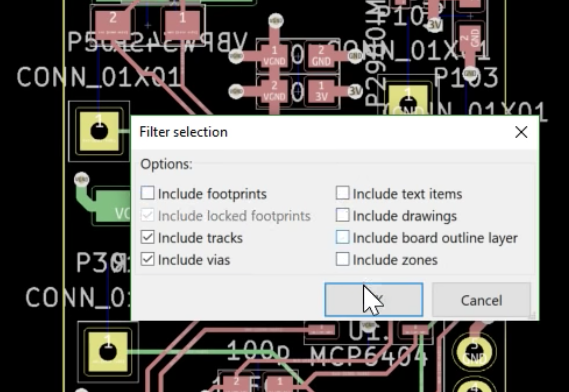
Selecting traces to rip up

Some of the videos seem simple but are extremely useful. Like this one on finding those final disconnected connections in the ratsnest. Not quite coverage of a major new feature, but a topic near and dear to any layout engineer’s heart. Here’s another great tip about pulling reference images into your schematics to make life easier. A fantastic wrapped up in a tidy three minute video. How many ways do you think you can move parts and measure distances in the layout editor? Chris covers a bunch we hadn’t seen before, even after years using KiCad! We learned just as much in his coverage of how to rip up routed tracks. You get the idea.

We could summarize the Youtube channel, but we aren’t paid by the character. Head on down to the channel and find something to learn. Make sure to send [Chris] tips on content you want him to produce!

Simple Ultrasound Machine Shows The Skeleton Lurking Inside Us All

That first glimpse of a child in the womb as a black and white image on a screen is a thrilling moment for any parent-to-be, made possible by several hundred thousand dollars worth of precision medical instrumentation. This ultrasound machine cobbled together from eBay parts and modules is not that machine by a long shot, but it’s still a very cool project that actually gives a peek inside the skin.

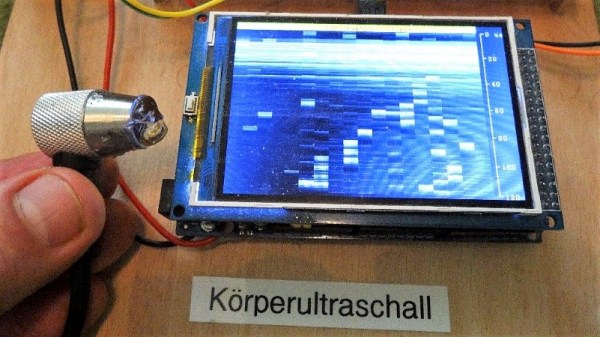
The ultrasound transducer used by [stoppi71] in this build has an unusual source: a commercial paint-thickness meter. Cue the jokes about watching paint dry, but coatings measurement is serious stuff. Even so, the meter in question only ran about $40 on eBay, and provided the perfect transducer for the build. The sender needs a 100V pulse at about 5 MHz, so [stoppi71] had some fun with a boost converter and a 74121 Schmitt-trigger one-shot driving a MOSFET to switch the high voltage. On the receive side, the faint echo is sent through a three-stage amp using AD811 op amps before going through an LM7171 op amp acting as a rectifier and peak detector. Echos are sent to an Arduino Due for display on a 320×480 LCD. The resolution isn’t great, but the video below shows that it’s enough to see reflections from the skin of [stoppi71]’s forearm and from the bones within.

[stoppi71] says that he was inspired to tackle this build by Murgen, an open-source ultrasound project. That project got further refined and entered into the “Best Product” category in the 2018 Hackaday Prize. We like that because focusing on turning projects into products is what this year’s Hackaday Prize is all about.

Continue reading “Simple Ultrasound Machine Shows The Skeleton Lurking Inside Us All”

The 6502 Watch, Because Someone Had To Make One

We are very familiar with retrocomputers, and if you want you too can build a computer that could have been made in the late ’70s on a breadboard. Just grab your CPU of choice, add some RAM, some ROM, a ton of jumper wires, and give it some way to talk to the outside world. The problem with the computers inspired by yesteryear is that they all, inexplicably, use through-hole parts. If only someone used the small QFP parts instead of the big chonkin’ PDIPs, we could have really small retrocomputers. That’s exactly what [NotArtyom] did, and he managed to come up with a wearable 6502 watch.

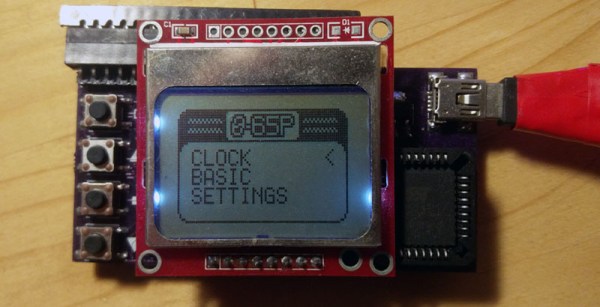
The system design for this 6502-based watch is fairly standard for what you would find in any other retrocomputer. There’s a PLCC 6502, 32k of SRAM, 16k of ROM, and a PLLC’d 6522 for a bit of IO. There are a few peripherals hanging off the 6522, and since this thing is a watch the most important is a real time clock. There’s also a Nokia LCD and a 20-pin Commodore keyboard connector.

Software-wise, most of the ROM is dedicated to G’Mon, a generic monitor that can view and modify memory. There’s also EhBasic, and a kernel to handle the RTC, keyboard, and display.

Whether or not this is a useful smartwatch isn’t the question; this is one of the first retrocomputer projects we’ve seen that lean into the non-PDIP versions of these classic chips. This is a bit surprising, because you can still buy these parts, PDIP or not, new from the usual vendors. If nothing else, it’s a demonstration of what can be done with modern IC packages.

Here’s A Tesla Coil You Can Wear

It’s badgelife season, and if you need an idea for a killer piece of wearable electronics, look no further than this PCB Tesla coil. Yes, it’s killer, doubly so if you’re wearing a pacemaker.

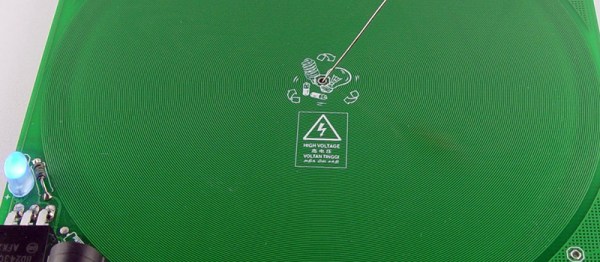
This project was inspired by an earlier Tesla coil on a PCB project that used 160 turns of 6 mil traces on a circuit board as the secondary. All the electronics are there, and it’s powered by USB. Plug this thing in, and you have a pocket full of lightning that’s approximately 30kV. It probably won’t kill you if you touch it, but let’s not test that too much. [Bobricious] took this idea and ran with it, stripping the circuit down to its bare minimum. Now it’s just a single transistor, with all the other parts printed on a circuit board.

There is one problem with making a Tesla Coil on a PCB, and that’s the number of turns on the coil. Any Tesla coil you’ll find is really just the clever application of a single thin wire wrapped around itself a few hundred or thousands of times. This Tesla coil is no different, and in this case it’s 240 turns of a single trace wrapping around a PCB that is 150mm square. [Bobricius] is one of the kings of putting tiny coils on a PCB, and his fiberglass brushless motor is a testament to that. We also just covered his circular linear motor raceway which also uses PCB coils.

The circuit is simple, just a power jack that accepts something around 20 Volts, a single BD243 transistor, an LED, and an 82k resistor. With that, you can lay a small neon tube on the PCB and watch it light up. With another PCB and another neon tube, this circuit board can transfer wireless power. It’s a fun toy, and it’s all PCB tech.

Teardown: The Guts Of A Digital Sentry

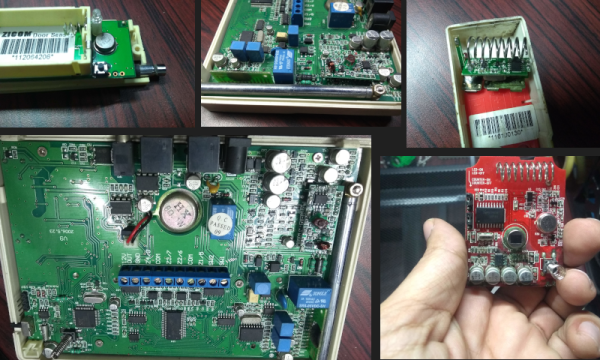
I have a home alarm system that has me wondering if I can make it better with my maker Kung-fu. Recently we had to replace our system, so I took the time to dissect the main controller, the remote sensors, and all the bits that make a home security system work.

To be precise, the subject of today’s interrogation is a Zicom brand Home Alarm that was quite famous a decade ago. It connects to a wired telephone line, takes inputs from motion, door, and gas sensors, and will make quite a racket if the system is tripped (which sometimes happened accidentally). Even though no circuits were harmed in the making of this post, I assure you that there are some interesting things that will raise an eyebrow or two. Lets take a look.

Continue reading “Teardown: The Guts Of A Digital Sentry”

Making A Dash Button Update Your To-do List

Amazon’s Dash Buttons are useful little devices, that let you automatically order a wide variety of common household goods at the press of a button. They’re cheap and wireless and readily available, and that makes them ripe for hacking. In just this vein, [Inbar] and [Ezra] found a way to make the Dash buttons update their to-do list.

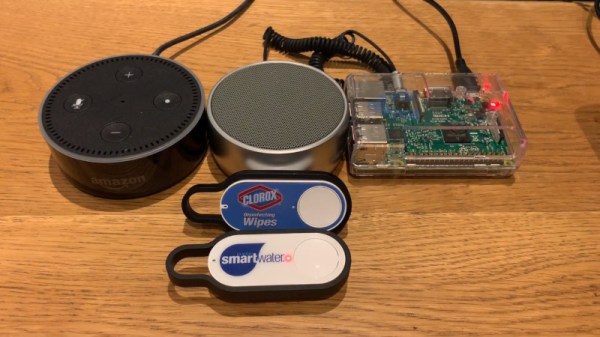
[Inbar] uses Any.do to manage his to-do list. There’s no public API, but the service can be configured to respond to Alexa commands. Naturally, this meant that if a Dash Button could be configured to trigger a voice command, Alexa would then make the necessary additions to the list.

This was achieved with lashings of Python, a Raspberry Pi, and Apple’s text-to-speech engine. The Raspberry Pi is set up as a wireless hotspot, to which the Dash Buttons are connected. When the button is pressed, a DHCP request goes out as the button tries to phone home. By scraping the MAC address from this request, the Raspberry Pi can identify which button has been pressed, and then plays a recorded voice sample of Apple’s Samantha voice. This voice was specifically chosen to be the one most reliably understood by Alexa, which is responsible for parsing the voice command and updating the list on Any.do.

It’s a cheeky hack that doesn’t bother itself with the nitty-gritty of interfacing with various services and tools. Instead, it laces up a bunch of easy-to-use software and hardware, and gets the job done just as well.

As we’ve seen, Amazon’s Dash Button has been thoroughly pwned. Video after the break. Continue reading “Making A Dash Button Update Your To-do List”