Your Undocumented Project May Also Baffle People Someday

What’s life without a little mystery? There’s one less rolling around after historians finally identified a donated mystery machine that had been in storage for years.

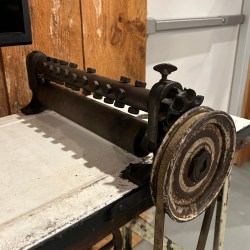
Feeding dough through this machine may have been faster, but probably not safer.

The main pieces of the machine are about a century old and any staff who may have known more about the undocumented device were no longer around to ask. The historical society finally posted pictures and asked for any insights, which eventually led to solving the mystery.

The machine is in all likelihood a beaten biscuit maker, which was a type of dense baked good popular in the American south. Making them called for a long and labor-intensive process of pounding and working the dough, and the society says this machine was likely created by a fellow trying to help his aunt streamline her business, offloading the labor of working the dough to a machine.

The machine had no branding of any sort and lacked any identifying marks. Its purpose was doubtlessly obvious at the time, but no records remained and quite possibly none existed in the first place. Sound familiar? Perhaps someday our own undocumented projects and prototypes will mystify people. It’s certainly happened in the case of mysterious Roman dodecahedrons, which remain a head-scratching mystery.

Preserving Floppy Disks

Time is almost up for magnetic storage from the 80s and 90s. Various physical limitations in storage methods from this era are conspiring to slowly degrade the data stored on things like tape, floppy disks, and hard disk drives, and after several decades data may not be recoverable anymore. It’s always worth trying to back it up, though, especially if you have something on your hands like critical evidence or court records on a nearly 50-year-old floppy disk last written to in 1993 using a DEC PDP-11.

This project all started when an investigation unit in Maryland approached the Bloop Museum with a request to use their antique computer resources to decode the information on a 5.25″ floppy disk. Even finding a floppy disk drive of this size is a difficult task, but this was further compounded not just by the age of the disk but that the data wasn’t encoded in the expected format. Using a GreaseWeazle controlled by a Raspberry Pi, they generated an audio file from the data on the disk to capture all available data, and then used that to work backwards to get to the usable information.

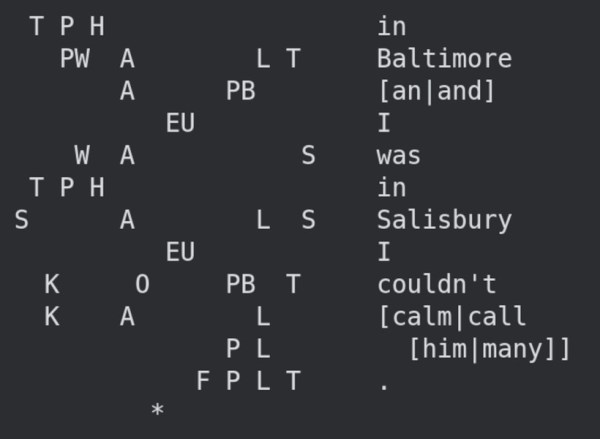
After some more trials with converting the analog information to digital and a clue that the data on the disk was not fragmented, they realized they were looking at data from a digital stenography machine and were finally able to decode it into something useful. Of course, stenography machines are dark magic in their own right so just getting this record still requires a stenographer to make much sense out of it.

Digital Replica Of Antique Weather Monitoring Instrument

Computers and digital sensors have allowed for the collection and aggregation of data barely possible to imagine to anyone in the instrumentation scene even sixty years ago. Before that, things like weather stations, seismometers, level sensors, and basically any other way of gathering real data about the world would have been performed with an analog device recording the information on some sort of spool of paper. This was much more tedious but the one thing going for these types of devices was their aesthetic. [mircemk] is back to bring some of that design inspiration to a digital barometric display.

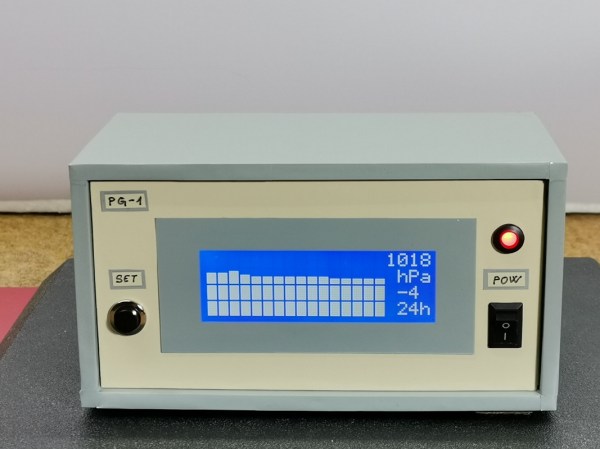
The barometer is based around an Arduino Arduino Nano and a relatively large I2C display to display the captured data. It also uses a BME 280 pressure sensor board, but the technical details of this project are not the focal point here. Instead, [mircemk] has put his effort in recreating the old analog barographs, which display barometric data on a spool of paper over time, on the I2C display. As the device measures atmospheric pressure, it adds a bar to the graph, displaying the data over time much as the old analog device would have.

We’ve discussed plenty of times around here that old analog meters and instrumentation like this recreation of a VU meter are an excellent way of getting a more antique aesthetic than is typically offered by digital replacements. Adding in a little bit of style to a project like this can go a long way, or you can simply restore the original antique instead.

A Handy Guide To The Humble BBS

Some of us who’ve been online since the early days fondly remember the web of yore — with its flashing banners, wildly distracting backgrounds, and automatic side-scrolling text. But there was a time before the worldwide web and the Internet as we recognize it today, and the way of communicating in this before-time was through Bulletin Board Systems, or BBS. There are still some who can cite this deep magic today, and this page is perhaps the definitive guide to this style of retrocomputing.

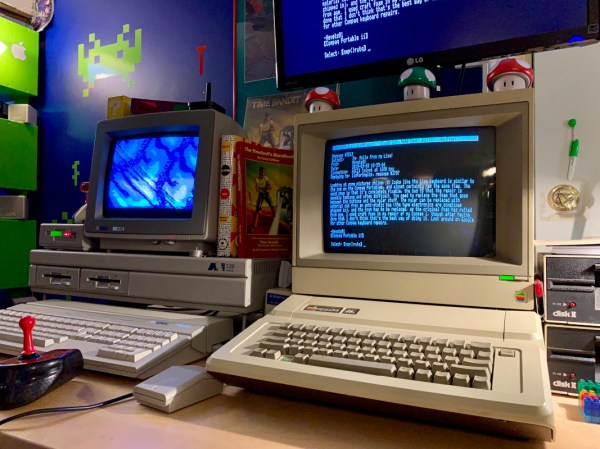
This how-to is managed by [Blake.Patterson] who is using a wide variety of antique machines and some modern hardware in order to access the BBSes still in service. He notes in this guide that it’s possible to use telnet and a modern computer to access them, but using something like an Amiga or Atari will give you the full experience. There are some tools that convert the telephone modem signals from that original hardware to something that modern networking equipment can understand, and while the experience might be slightly faster as a result, it does seem to preserve the nostalgia factor quite well.

For those looking for more specific guides, we’ve featured [Blake]’s work a few times in the past, once with an antique Epson PX-8 laptop and again with a modern ESP8266. It doesn’t take much computing power to get connected to these old services, so grab whatever you can and start BBSing!

Power Up Vintage Electronics Less Unsafely With A Dim-Bulb Tester

Plugging in something like an antique radio to see if it works is a good way to have a bad time, because some old components don’t age well. For vintage electronics, inspection and repair are steps one and two. When it comes time to cautiously apply power, it’s best to use what’s called a dim-bulb tester and most hackers can probably put one together from scrap.

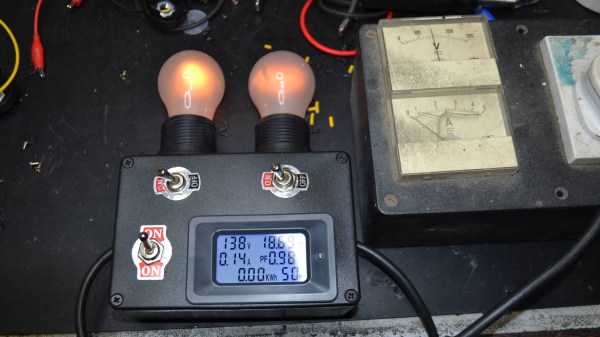
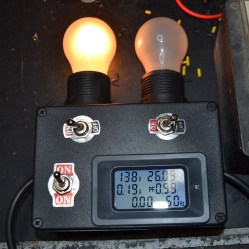
Being able to use one (or both) bulbs adds some flexibility, and the embedded power monitor is an inexpensive and handy addition.

These testers make it easier, and safer, to tell if there are any big problems with a device’s power supply. In its simplest form, a dim-bulb tester puts an incandescent lamp in series between a device — like an old radio — and the AC power from a wall socket. Thanks to this, if the device has a short circuit, the bulb will simply light up instead of causing any damage.

Ideally, one uses a bulb with a wattage rating that is roughly equal to the power consumption of the device being tested. If all is well, the bulb will glow very faintly and the device will work normally. A brightly glowing bulb would indicate excessive current draw. To allow some flexibility, [Doz]’s tester design allows using one or two 60 W incandescent bulbs in series, and even incorporates an inexpensive power monitor.

A dim-bulb tester isn’t an in-depth diagnostic tool but it is effective, simple, and allows for a safe startup even if there’s a serious problem like a short.  It helps protect valuable hardware from going up in smoke. In fact, the fundamental concept of limiting power to protect hardware in case of a fault has also been applied in the world of retrocomputing, where it helps protect otherwise irreplaceable hardware if something goes wrong.

Everything You Wanted To See About Restoring A 1956 Radio

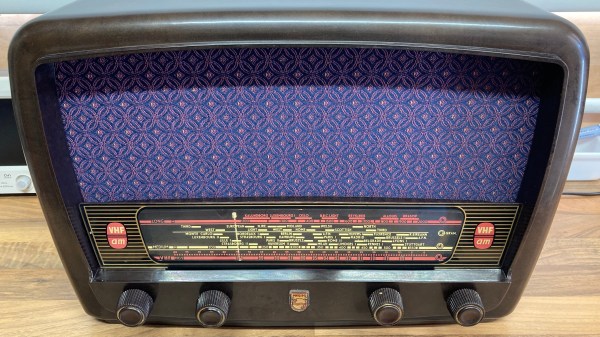
Ever wanted a good, good look at the insides of a 1950s radio, along with fantastic commentary on the internals and the purpose of various components? Then don’t miss [Adam Wilson]’s repair and restoration of a 1956 Philips 353A, a task made easier by a digitized copy of the service manual. [Adam] provides loads of great pictures, as well as tips on what it takes to bring vintage electronics back to life. What’s not to like?

Vintage electronics like this are often chock-full of components that deteriorate with age, so one doesn’t simply apply power to see if it still works as a first step. These devices need to be inspected and serviced before power is ever applied. Even then, powerup should be done with a current-controlled source that can be shut down if anything seems amiss.

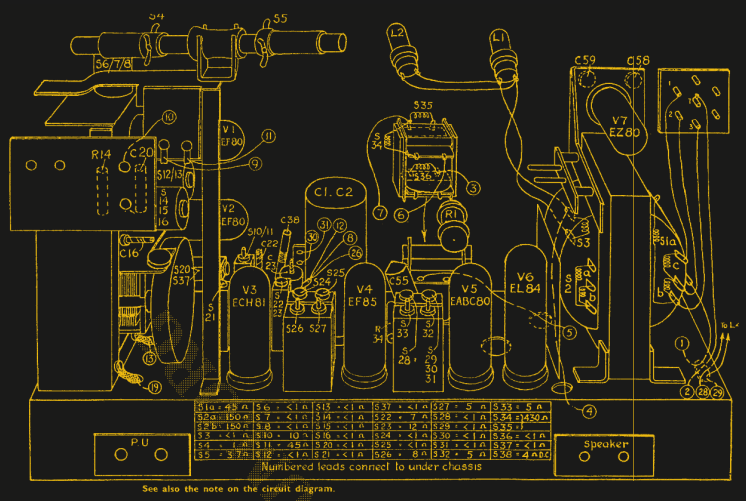
Thank goodness for high quality, digitized service manuals.

Devices like these largely predate printed circuit boards, so one can expect to see plenty of point-to-point soldering. Vacuum tubes did much of the hard work, so they are present instead of integrated circuits and transistors. Capacitors in the microfarads were much larger compared to their modern equivalents, and paper/wax capacitors (literally made from rolled-up paper covered in wax) handled capacitances in the nanofarad range instead of the little ceramic disk caps of today.

One thing that helped immensely is the previously-mentioned Philips 353A service manual, which includes not only a chassis and component layout, but even has servicing procedures such as cord replacement for the tuning dial. Back then, a tuning dial was an electromechanical assembly that used a winding of cord to rotate the tuning capacitor, and replacing it was a fiddly process. If only all hardware was documented so well!

The end result looks wonderful and still has great sound. As a final tweak, [Adam] added an external audio input cable as a nod to the modern age. Now, we have in the past seen a small LED screen integrated convincingly into an antique, but in this case [Adam] kept the original look completely intact. You can see it in action, playing some Frank Sinatra in the short video embedded below.
Continue reading “Everything You Wanted To See About Restoring A 1956 Radio”

Mommy, Where Do Ideas Come From?

We wrote up an astounding old use of technology – François Willème’s 3D scanning and modeling apparatus from 1861, over 150 years ago. What’s amazing about this technique is that it used absolutely cutting-edge technology for the time, photography, and the essence of a technique still used today in laser-line 3D scanners, or maybe even more closely related to the “bullet time” effect.

This got me thinking of how Willème could have possibly come up with the idea of taking 24 simultaneous photographs, tracing the outline in wood, and then re-assembling them radially into a 3D model. And all of this in photography’s very infancy.

But Willème was already a sculptor, and had probably seen how he could use photos to replace still models in the studio, at least to solidify proportions. And he was probably also familiar with making cameos, where the profile was often illuminated from behind and carved, often by tracing shadows. From these two, you could certainly imagine his procedure, but there’s still an admirable spark of genius at work.

Could you have had that spark without the existence of photography? Not really. Tracing shadows in the round is impractical unless you can fix them. The existence of photography enabled this idea, and countless others, to come into existence.

That’s what I think is neat about technology, and the sharing of new technological ideas. Oftentimes they are fantastic in and of themselves, like photography indubitably was. But just as often, the new idea is a seed for more new ideas that radiate outward like ripples in a pond.