X-Ray CT Scanners From EBay, Brought Back To Life

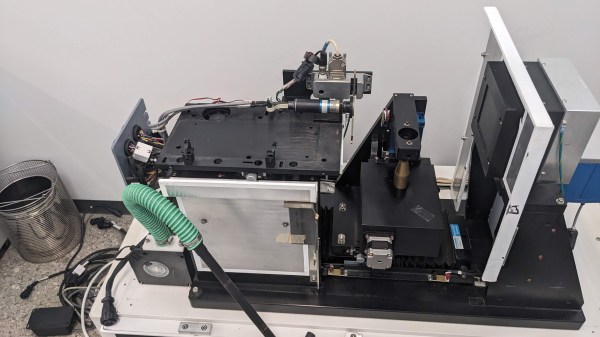
If you have ever wondered what goes into repairing and refurbishing an X-ray Computed Tomography (CT) scanner, then don’t miss [Ahron Wayne]’s comprehensive project page on doing exactly that. He has two small GE Explore Locus SP machines, and it’s a fantastic look into just what goes into these machines.

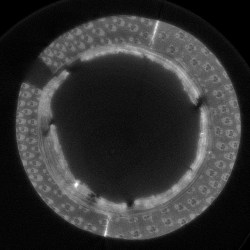
CT scan of papyrus roll in a bamboo sheath.

These devices use a combination of X-rays and computer software to reconstruct an internal view of an object. To bring these machines back into service means not only getting the hardware to work correctly, but the software end (including calibration and error correcting) is just as important.

That means a lot of research, testing, and making do. For example, instead of an expensive calibration grid made from an array of tiny tungsten carbide beads, [Ahron] made do with a PCB laden with a grid of copper pads. The fab house might have scratched their heads a little on that one, but it worked just fine for his purposes and price was certainly right.

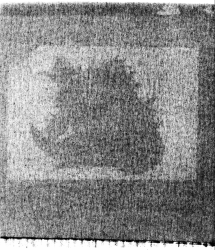
Scan of a foil Pokémon card from inside a sealed package.

Tools like these enable all kinds of weird and wonderful projects of their own. So what can one do with such a machine? CT scanning can spot fake AirPods or enable deeper reverse engineering than a regular workshop is normally able to do.

What else? Shown here is an old foil Pokémon card, from an unopened package! [Ahron] coyly denies having a pet project of building a large enough dataset to try to identify cards without opening the packs. (Incidentally, if you just happen to have experience with supervised convolutional neural networks for pix2pix, he asks that you please reach out to him.)

The real power of CT scanning becomes more apparent if you take a look at the videos embedded below the page break. One is a scan of an acorn, [Ahron]’s first successful scan. Another is an interesting scan of a papyrus roll in a bamboo sheath. Both of the videos are embedded below.

Continue reading “X-Ray CT Scanners From EBay, Brought Back To Life”

Everything You Wanted To See About Restoring A 1956 Radio

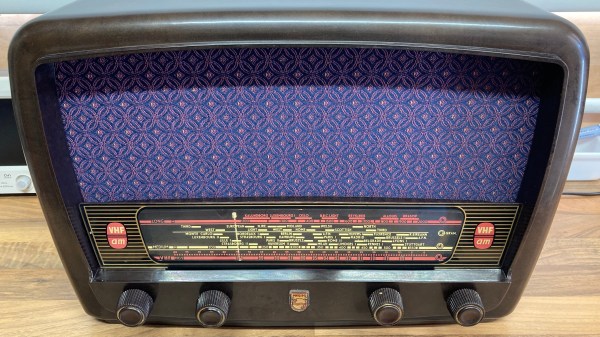
Ever wanted a good, good look at the insides of a 1950s radio, along with fantastic commentary on the internals and the purpose of various components? Then don’t miss [Adam Wilson]’s repair and restoration of a 1956 Philips 353A, a task made easier by a digitized copy of the service manual. [Adam] provides loads of great pictures, as well as tips on what it takes to bring vintage electronics back to life. What’s not to like?

Vintage electronics like this are often chock-full of components that deteriorate with age, so one doesn’t simply apply power to see if it still works as a first step. These devices need to be inspected and serviced before power is ever applied. Even then, powerup should be done with a current-controlled source that can be shut down if anything seems amiss.

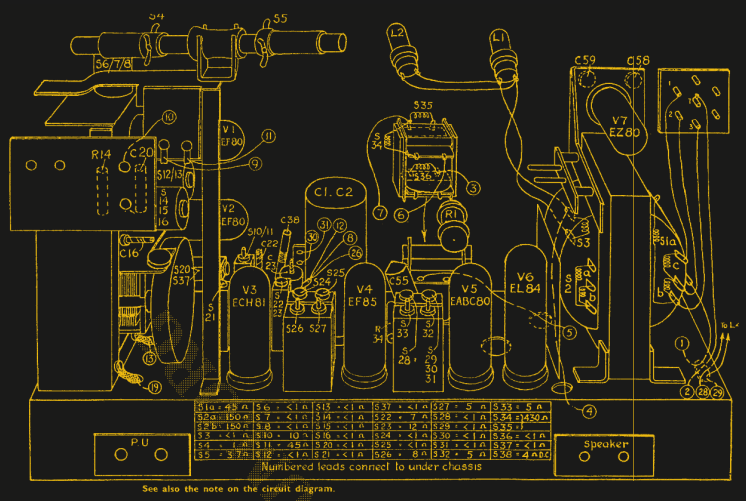
Thank goodness for high quality, digitized service manuals.

Devices like these largely predate printed circuit boards, so one can expect to see plenty of point-to-point soldering. Vacuum tubes did much of the hard work, so they are present instead of integrated circuits and transistors. Capacitors in the microfarads were much larger compared to their modern equivalents, and paper/wax capacitors (literally made from rolled-up paper covered in wax) handled capacitances in the nanofarad range instead of the little ceramic disk caps of today.

One thing that helped immensely is the previously-mentioned Philips 353A service manual, which includes not only a chassis and component layout, but even has servicing procedures such as cord replacement for the tuning dial. Back then, a tuning dial was an electromechanical assembly that used a winding of cord to rotate the tuning capacitor, and replacing it was a fiddly process. If only all hardware was documented so well!

The end result looks wonderful and still has great sound. As a final tweak, [Adam] added an external audio input cable as a nod to the modern age. Now, we have in the past seen a small LED screen integrated convincingly into an antique, but in this case [Adam] kept the original look completely intact. You can see it in action, playing some Frank Sinatra in the short video embedded below.
Continue reading “Everything You Wanted To See About Restoring A 1956 Radio”

See Acorn Archimedes Get Repaired And Refurbished, In Glorious Detail

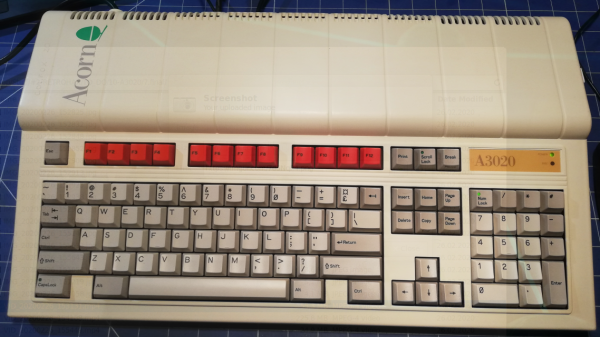
Want to see a 90s-era Acorn Archimedes A3020 home computer get opened up, refurbished, and taken for a test drive? Don’t miss [drygol]’s great writeup on Retrohax, because it’s got all that, and more!

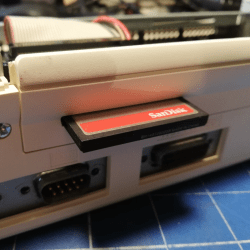
A modern upgrade allowing the use of a CF card in place of an internal hard drive, via a CF2IDE adapter and 3D-printed fixture.

The Archimedes was a line of ARM-based personal computers by Acorn Computers, released in the late 80s and discontinued in the 90s as Macintosh and IBM PC-compatible machines ultimately dominated. They were capable machines for their time, and [drygol] refurbished an original back into working order while installing a few upgrades at the same time.

The first order of business was to open the machine up and inspect the internals. Visible corrosion gets cleaned up with oxalic acid, old electrolytic capacitors are replaced as a matter of course, and any corroded traces get careful repair. Removing corrosion from sockets requires desoldering the part for cleaning then re-soldering, so this whole process can be a lot of work. Fortunately, vintage hardware was often designed with hand-assembly in mind, so parts tend to be accessible for servicing with decent visibility in the process. The keyboard was entirely disassembled and de-yellowed, yielding an eye-poppingly attractive result.

Once the computer itself was working properly, it was time for a few modern upgrades. One was to give the machine an adapter to use a CF card in place of an internal IDE hard drive, and [drygol] did a great job of using a 3D-printed piece to make the CF2IDE adapter look like a factory offering. The internal floppy drive was also replaced with a GOTEK floppy emulator (also with a 3D-printed adapter) for another modern upgrade.

The fully refurbished and upgraded machine looks slick, so watch the Acorn Archimedes A3020 show off what it can do in the video (embedded below), and maybe feel a bit of nostalgia.

Continue reading “See Acorn Archimedes Get Repaired And Refurbished, In Glorious Detail”

Disgusting Apple II Monitors Live Again

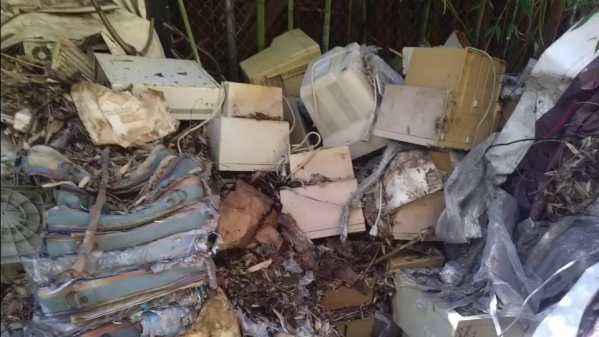
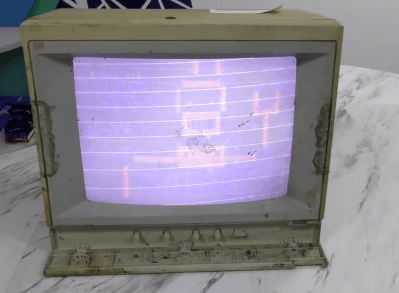
[The 8-Bit Guy] recently went to check out a stash of old Apple II Color monitors which had been sitting outside in a trash pile for 20 years, and decided to bring one home to restore. As you can see from the lead photo, they were dirty — really dirty. Surprisingly, the team of volunteers who discovered these monitors had fired them up, and every one of them works to some extent or another.

Check out the video below as he cleans up this filthy monitor and starts troubleshooting. You’ll chuckle aloud when he turns the circuit board over to desolder a mysterious diode, and when he flips the board back over, the diode has disappeared (it actually disintegrated into dust on his lab bench). For the curious, one commenter on YouTube found that it was a glass passivated and encapsulated fast recovery diode called a V19. There’s going to be a part 2, and we have every confidence that [The 8-Bit Guy] will succeed and soon add a shiny, like-new monitor to his collection.

If you’re a collector of old monitors, this demonstrates that they can survive quite a bit of abuse and exposure. We’re not sure that rummaging through your local landfill is the best idea, but if you run into an old monitor that has been exposed to the elements, don’t be so quick to dismiss it as a lost cause. Do you have any gems that you’ve restored from the trash? Let us know in the comments.

Continue reading “Disgusting Apple II Monitors Live Again”