DIY Multimeter, Arduino Sold Seperately

Arduino-based Multimeter

You can’t argue that Arduinos are extremely popular with the maker/hacker community. Some would say that there is certainly no shortage of projects to make using them. [Milen] thought otherwise and felt it was time to create an Arduino-based multimeter.

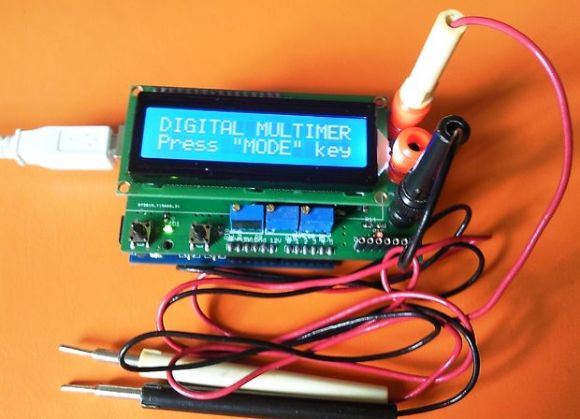
At the heart of this project  is a common Arduino Uno. The additional parts were kept to a minimum in order to keep down the overall cost and project complexity. The finished product can measure voltage from 0-100v, amperage up to 500mA and resistance between 0-250 kohm. If you need to check for continuity, it can do that too.

All of the parts required to make the multimeter fit on a shield that plugs directly into the Arduino. Banana plugs allow for attaching test leads. The measurement values are displayed on an LCD screen and/or (if connected) to the Arduino IDE Serial Monitor. If only using the serial monitor, the LCD screen can be omitted to save a few bucks.

Continue reading “DIY Multimeter, Arduino Sold Seperately”

Building A Final Key

Final Key

Remembering passwords is a pain, and there’s a number of devices out there to make it easier. If you’re looking to roll your own, this guide to building a Final Key will walk you through the process.

We talked about the Final Key before. It’s a one button password manager that encrypts and stores your password. It acts as a virtual serial port for configuration. When you hit the button, it becomes a keyboard and types in the correct password.

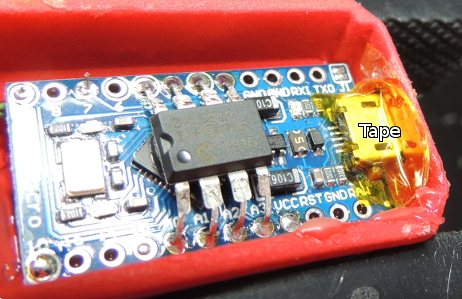
The creator has no intentions of making this a commercial project for a number of reasons. Instead, easy build instructions are provided based on the Arduino Pro Micro. The 24LC512 EEPROM can be soldered directly to the Arduino by bending out the DIP legs. A few resistors, a button, and an LED finish off the project. The last step is to fill it with hot glue to prevent tampering.

The Final Key firmware is available on Github, and the case can be ordered from Shapeways. If you’re interested in hardware password management, you can also check out the Mooltipass which is being developed on Hackaday.

[Thanks to Lars for the tip!]

Sublime Text As An Arduino IDE

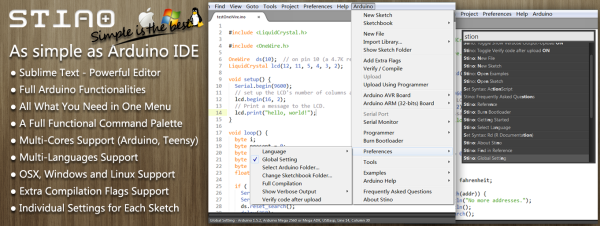
If you’ve played with an Arduino, you’ve probably been frustrated by the IDE. It works, but it’s not the best editor. It’s especially painful for bigger files and larger projects. The Stino plugin for Sublime Text aims to solve this issue by bringing the full functionality of the Arduino IDE to the Sublime Text editor.

Sublime Text is a powerful text editor with support for most programming languages. What it’s missing is support for compiling and uploading code to an Arduino. Stino bridges that gap. Sublime is a commercial product, and retails for $70 USD. However Sublime does have an indefinite trial period, so Stino can be evaluated for free. Stino itself is an open source plugin written in Python, and you can contribute to the project on Github.

After installing Sublime and Stino, you point the plugin at an Arduino install folder. It then allows you to build and flash directly from the editor. For anyone who’s been frustrated with the Arduino IDE, this looks like a slick solution.

[Thanks to Matt for the tip!]

Flexible Arduino Sure To Be A Hit


Scrolling LED on soda can

Wearable, lightweight hacks have long been dominated by the Lilypad. This will probably change with the introduction of the Printoo. Using printable circuit technology, the Printoo takes a modular approach to enable hackers, makers, and engineers alike to construct flexible circuits that can be put on almost anything, including paper!

Powered by the all too familiar ATmega328, the Printoo core module is fully compatible with the Ardunio IDE. The modular design enables functionality with several other printed devices including displays, batteries, sensors and even LED strips to make many different projects possible. One of the most interesting modules is the 1.5 volt, 500 micron thick electrochromic display.

Be sure to check out their Kickstarter, which has a nice video that demonstrates the project. If funded, they will be available in October in case you want to get your hands on one. Or feel free to make your own. Just be sure to let us know if you do!

A LIN Bus Signal Injector

LIN bus signal injector

[Zapta] tipped us about his latest project: a LIN bus signal injector. For our unfamiliar readers, the LIN bus is a popular automotive bus that is used to interface with buttons, lights, etc. As [Zapta] was tired of having to press the Sport Mode button of his car each time he turned the ignition on, he thought it’d build the platform shown above to automatically simulate the button press.

The project is based around an ATMega328 and is therefore Arduino IDE compatible (recognized as an Arduino Mini Pro), making firmware customization easy. In the car, it is physically setup as a proxy between the LIN master and the slave (which explains the two 3-wires groups shown in the picture). It is interesting to note that the injection feature can be toggled by using a particular car buttons press sequence. The project is fully open source and a video of the system in action is embedded after the break.

Continue reading “A LIN Bus Signal Injector”

Sniffing the Multidrop Bus

Sniffing Vending Machine Buses

We’ve talked about a variety of protocols and how to deal with them in the past. Today, [Dan] is working on sniffing vending machine Multidrop Bus. The Multidrop Bus (MDB) protocol is a standard used in vending machines to connect devices such as currency collectors to the host controller.

To connect to the bus, interface hardware is required. [Dan] worked out compliant hardware and connected it to an Arduino. With the device on the bus, [Dan] got to work on an Arduino sketch to parse the MDB data into a human-readable format. With that working, the bus can easily be sniffed over the Arduino’s serial console.

This is just the start of a more involved project. Since this protocol is used to communicate with a vending machine’s currency collector or card reader, being able to communicate it would allow him to implement his own payment methods. The plan is to augment the vending machine he operates at Vancouver Hack Space to accept Bitcoin. We’re looking forward to seeing that project unfold.

OLED display, blue LED and Smartcard

Developed On Hackaday: Olivier’s Design Rundown

The Hackaday writers and readers are currently working hand-in-hand on an offline password keeper, the Mooltipass. A few days ago we presented Olivier’s design front PCB without even showing the rest of his creation (which was quite rude of us…). We also asked our readers for input on how we should design the front panel. In this new article we will therefore show you how the different pieces fit together in this very first (non-final) prototype… follow us after the break!

Continue reading “Developed On Hackaday: Olivier’s Design Rundown”