Despite Apple’s unfailing dedication to UI, they still sometimes manage to put out some stinkers. The latest of these is the ‘keyboard’ for the search interface in the Apple TV. It’s an alphabetical keyboard, laid out in a square with the obvious frustration that goes along with that terrible idea. [Lasse] was frustrated with this design and realized searching anything with the Apple TV IR remote is a pain. His solution was to build his own version of the Apple TV remote with a web interface, powered by an Arduino.
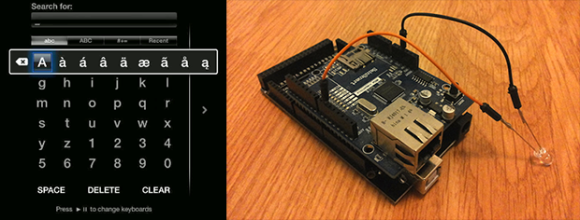
Inspired by the Apple Remote Arduino Shield we featured a few years ago, [Lasse] stuck an IR LED int the pins of Arduino with an Ethernet shield, current limiting resistors be damned. The web UI is the innovative part of this build. He’s hosting a simple website on the Arduino that allows him to type – with a real keyboard – a search query into the website, and have the Arduino take care of moving the Apple TV cursor around to select each letter.
The web UI has all the features found on the Apple TV remote, including the swipe gestures, and has a really slick brushed metal texture to boot. You can check out the video of [Lasse]’s project typing text into an Apple TV hilariously fast below.