[Massimo] Talks About Arduino Clones

pick one

Back in 2005, the Arduino was just a twinkle in they eyes of [Massimo Banzi] and the other core developers. Since then, you can’t go to any electronics site without hitting something beginning with ‘ard~’ or ending with ‘~duino’. The platform has become so popular, people everywhere are piggybacking on the name to the point of trademark infringement or simply outright counterfeiting one of the many official Arduino boards. Now [Massimo] has something to say about these clones, ripoffs, derivatives, and ‘duino-compatible boards.

On the list of things bad for the open source ecosystem, [Massimo] points to direct clones of existing Arduino boards. While these boards are electrically identical to officially licensed boards, they simply don’t support the Arduino project financially and usually don’t contribute to the existing libraries and code. Even worse are counterfeits; these boards copy the trademarks of the Arduino project – sometimes terribly given the three examples above (guess which one is the real one) – and directly profit off of the Arduino project without giving any support in return.

There are other veins of Arduino that [Massimo] considers more acceptable. Arduino-compatible boards, seen by the dozen over on Kickstarter, usually add something of their own, be it a radio chip, or an entirely different microcontroller. Derivatives, like Teensy and Adafruit’s Flora actually bring new things to the table with improved hardware and new and interesting libraries.

As far as counterfeits and clones go, we can’t agree more with what [Massimo] has to say. You have to admire the folks in the Arduino project being so open about their creations and admiring the Arduino derivatives that bring some new hardware to the table. Then again, that’s the lesson of the Arduino project; you can make hardware open source and still be outrageously popular.


DIY Airbag, Explosions Included

AnAirbagSavedMyLife

Your car’s airbag is one of the major engineering accomplishments of the auto industry. In an accident, a whole host of processes must take place in sequence to keep your face from slamming into the steering wheel, and  everything must happen in just a fraction of a second. [Steve] over at Make thought it would be a cool idea to discover what actually goes in to saving a life with an airbag and decided to build his own.

The electronics of the build consisted of an accelerometer and an Arduino. A lot of research, development, and experimentation has gone into the algorithms that trigger airbags, but [Steve] decided to keep things simple: when a sudden acceleration is detected, set off a small charge of black powder.

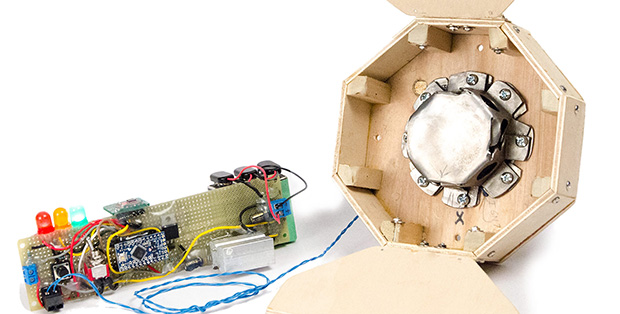
The airbag itself is ripstop nylon reinforced with canvas, contained in a small wooded box fitted with hinged doors. All these components are put on wheeled aluminum test rig, manned with a honeydew melon crash test dummy, and pulled into a short wall at a few miles per hour.

Despite [Steve] not putting hundreds of thousands of man hours into the development of his airbag – unlike the ones you’ll find in your steering column – his device actually worked pretty well. While not a complete success, he did manage to come up with something that both looks and acts like the familiar device that has saved countless lives.

Animating A Lamp With The Leap Motion

leap

The Leap Motion is a very cool device, but so far we haven’t seen many applications of interacting with physical devices. [Xavier] wanted to control a cute servo animated desk lamp with his hands, and with the help of a Leap and an Arduino he was able to do just that.

The Leap Motion API has a handy feature that will output all its data over a websocket. It’s a very easy way to transfer hand positions with a minimum amount of overhead, and with just a little bit of Node.js, it’s only two lines of code to connect the Leap to a websocket server.

With the Leap data on a web server, the only thing left to do is pulling it down to an Arduino. Again, [Xavier] used Node.js, this time in the form of johnny five, a Javascript-based Arduino framework. After that, it was a simple matter of mapping the data from the Leap to servo movements in [Xavier]’s Pixar-inspired lamp.

Video of the build below.

Continue reading “Animating A Lamp With The Leap Motion”

3D Printed Dispenser Flings Treats At Your Pets

internet-connected-dog-treat-dispenser

If you’re stuck in the virtual world like [Kevin Flynn] you can still make sure your pup is rewarded for good behavior. Just follow [Jwarp’s] design for this Internet connect dog treat dispenser.

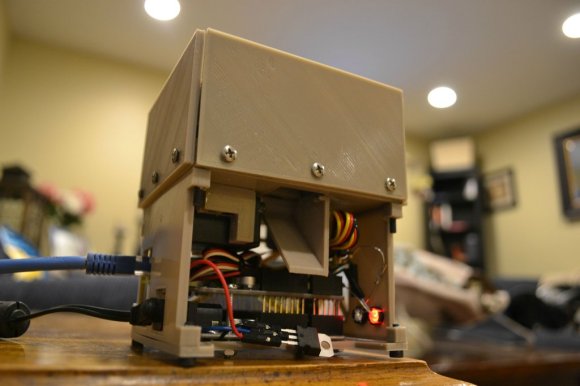
We were actually a bit surprised by the demo video. It shows that the compact unit is more than capable of reliably dispensing one treat at a time. It started as a wood prototype which allowed him to tweak how the servo motors worked before laying out all of the 3D parts in Sketch Up. Two motors cooperate to get the job done. The first allows one treat to exit that shoot coming from the center of the hopper. The other stirs the remaining inventory to both position the next treat and loosen any jams.

Continue reading “3D Printed Dispenser Flings Treats At Your Pets”

737 Autopilot, Courtesy Of An Arduino

737

To start this off, no, we’re not looking at a piece of actual flight hardware. This is [Andrea Giudici]’s project to tie real-world hardware into Flight Simulator X. It’s an autopilot for simulated aircraft, so those of you looking at flying a 737 sometime in the near future need not worry about computers flying your plane. Airbus passengers, though…

[Andrea] didn’t want to dig around with the clunky point-and-click interface in FSX, so he created a virtual autopilot with a 2×16 LCD display and an Arduino to interact and set the most common autopilot settings such as altitude, speed, heading, and engagement. The physical interface is just three tact switches and a pot, while the interface to FSX is a custom driver that turns the USB out of the Arduino into actual flight commands.

It’s not a 737 cockpit in a garage, but it’s still a wonderful alternative to poking around in a completely computer-bound interface.

Video of the ‘duino in action after the break.

Continue reading “737 Autopilot, Courtesy Of An Arduino”

Rocketduino, For High-G, High Altitude Logging

rocketduino

Although the thrill of launching rockets is usually found in their safe decent back to Earth, eventually you’re going to want some data from your flight. Everything from barometric pressure, GPS logging, and acceleration data is a useful thing to have, especially if you’re trying to perfect your craft. [zortness] over on reddit created a data logging board created especially for amateur rocketry, a fabulous piece of work that stands up to the rigors of going very fast and very high.

The design of the board is a shield for the Arduino Mega and Due, and comes with enough sensors for over-analyzing any rocket flight. The GPS logs location and altitude at 66Hz, two accelerometers measure up to 55 G. Barometric, temperature, and compass sensors tell the ground station all the data they would need to know over a ZigBee 900MHz radio link.

Because this is an Arduino, setting up flight events such as deploying the main and drogue chutes are as easy as uploading a bit of code. [zortness] built this for a 4″ diameter rocket, but he says it might fit in a 3″ rocket. We just can’t wait to see some videos of it in action.

Turning A Router Into An Arduino Shield

[Dirk] had a problem: while he already had an Arduino with an Ethernet shield, he needed WiFi for an upcoming project. Running a Cat5 cable was out of the question, and a true Arduino WiFi shield is outrageously expensive. He did, however, have a WiFi router lying around, and decided it would make a perfect WiFi shield with just a little bit of cutting.

The router [Dirk] used was a TL-WR702N, a common router found in the parts bins of makers the world over. Inspiringly, the size of the router’s PCB was just larger than the space between the Arduino’s pin headers. Turning the router into a shield is simply a matter of scoring the edge of the board and gluing on a few pins for mechanical strength.

Power and ground lines were soldered between the pin headers and the router, while data is passed to the Arduino and Ethernet shield through a short cable. It may not look pretty, but if it works in a pinch we can’t complain.