We’ve seen a lot of projects that let you control all of your devices from a smartphone. But this universal web-based remote control system looks like the most versatile we’ve seen yet. The project is called Webmote as the controls are served up as a web interface so that you’re not limited to say an Android device. The UI can be customized by choosing what buttons you will use and where to place them on the display. You can get a good feel for this by viewing this G+ album. Setup is made a bit easier thanks to an add-on system that has predefined layouts for common things like controlling XBMC.
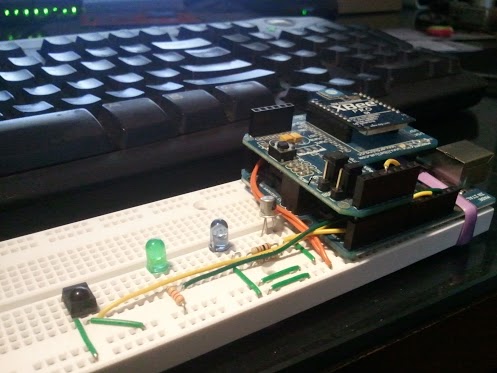
The hardware seen above is the business end of Webmote. It’s an Arduino with an IR receiver, IR LED, and an XBee module. For your common home entertainment devices you can teach the system your codes using the IR receiver. The IR LED is used to transmit those codes back, and the Xbee gives you the ability to control X10 (home automation) devices. Right now the setup requires the hardware be connected to a server via USB, but it shouldn’t be hard to set up some type of wireless alternative.