We love capacitive touch screens. They’re much more robust than resistive touch screens and if the UI is programmed well they produce a great user experience. But getting your electronics project to interact with one is a bit tough. [RobB] has been experimenting in that area, and managed to build a simple touchscreen actuator for microcontroller use.
In the video after the break you can see his proof of concept. He’s using an Arduino to enter the number 2 on an Android iOS calculator app once every second. It doesn’t take much to pull off this trick, [RopB] just taped a piece of tin foil to the screen and connected it to the Arduino with a jumper wire. The pin is left floating until a screen tap is needed, at which point it is pulled to ground.
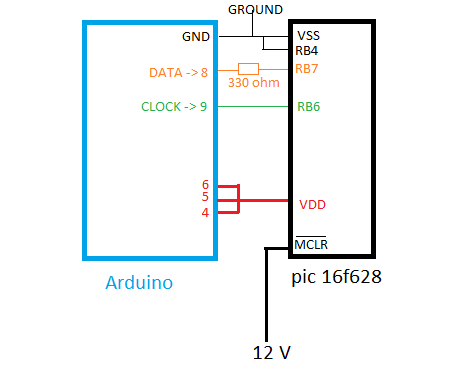
A custom app operating at slow speeds could use this as an input technique. Two pieces of foil (one acting as clock, the other data) would provide a rudimentary serial transfer system.
Continue reading “Reaching Out To A Touch Screen With A Microcontroller”