Electronic Diaper Bag Reminds You To Pack Everything But The Baby

lilypad_diaperbag

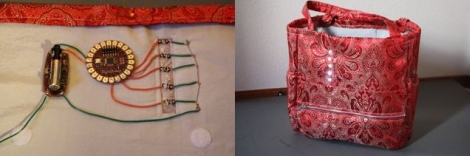
[jnorby] knows what it’s like to leave the house with her baby in tow, only to realize that she has left something she needs at home. Instead of relying on a paper checklist, she decided to craft her own diaper bag that alerted her if she had forgotten to pack a particular item.

She built her bag from scratch, wiring small circuits into each of the pockets she created on the inside of the bag. Wires were run to each half of a snap fastener, so that they would complete the circuit when the snaps touch. The LEDs and snaps were then connected to a LilyPad Arduino, which checks the status of the snap circuits, lighting the appropriate LED once the proper item has been packed.

While we like the idea of a bag that uses functional indicators that remind you to pack items, we do think that the use of the Arduino, or any microprocessor for that matter, is massive overkill. We would ditch the LilyPad and snap fasteners for reed switches or perhaps normally closed micro leaf switches that turn the LEDs off once the proper item has been packed, rather than the other way around.

Tilt And Pivot Camera Base Uses Just Two Servos

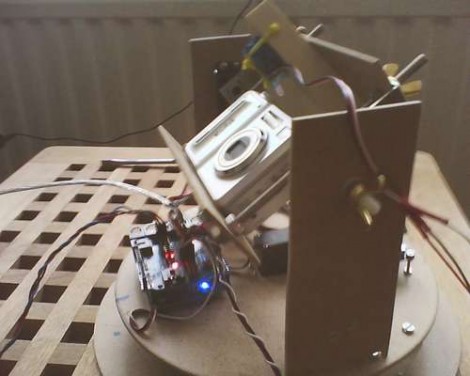
[Caled] shows us how to build a tilt and pivot camera base. One of these can be quite handy for taking precisely aligned images that can later be stitched together into panoramic, or even spherical images. We have grand visions of being able to produce something along the lines of these stunning interactive images with hardware that is cheaper and easier to build than this other motorized rig.

The design utilizes just two servo motors. In the image above you can just make out a pair of discs that serve as the base for the rig. In the center of the upper disc is the first servo, pointing downward, which rotates the camera. Two upright supports on either side of the point-and-shoot provide the framework for the tilt feature. The camera is mounted in a frame whose center is a threaded rod on the near side, and the second servo motor on the far side. An Arduino with a servo shield controls the movements along with a button pad and LCD screen as a user interface. The last step in the project log points to software options for combining the captured photos.

NBA Hangtime Pinball Display

[Ed Zarick] continues work on his NBA Hangtime pinball machine with the completion of the scoreboard and backglass. You should remember this project as we already covered the layer audio he developed for the system. Now he’s proving to be a protoboard master, using point-to-point techniques to build a pair of two and a half digit LED displays for team scores, as well as a shot clock timer and other status indicators.

The lighting board that controls it all is commanded via the i2c protocol, just like the three audio modules. It uses shift registers along with MOSFETs and [Ed] has taken the time to add pin headers and sockets for board interconnects. As is true with the audio system, one Arduino Mega acts as the master on the i2c bus and you’ll notice in the video after the break that the display works in perfect harmony with the sound effects.

We can’t wait to see what he comes up with for the play field!

Continue reading “NBA Hangtime Pinball Display”

Passcode Protected Laser Tripwire Alarm System

laser_tripwire

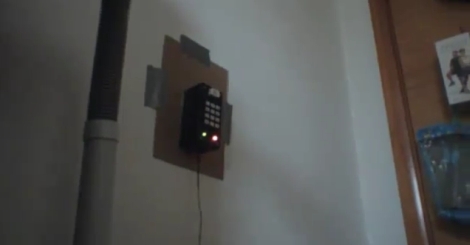
Sometimes security doesn’t need to be overly complex to be effective. Instructables user [1234itouch] recently built a simple laser tripwire alarm that can be mounted virtually anywhere, complete with a keypad for disarming the device.

He mounted a photo cell in a project box, along with an Arduino and a 12-button key pad. A laser pointer is aimed at the photo cell from across a gap, which results in a steady voltage being read by the Arduino. When the laser beam is broken, a drop in voltage is detected, and the alarm sounds until you enter the proper pre-configured passcode. Entering the passcode triggers a 15 second grace period during which the the alarm cannot be tripped again.

It might not be built with triple-thick steel doors and thermo-sensors, but it’s a simple device for simple needs. In its current form it could be pretty useful, and with a little reworking, there are a wide range of things it could be used for.

Continue reading to see a demo video of the tripwire alarm, and be sure to check out these other tripwire-based security systems.

Continue reading “Passcode Protected Laser Tripwire Alarm System”

Bench-top Laser Engraver Does Some Cutting Too

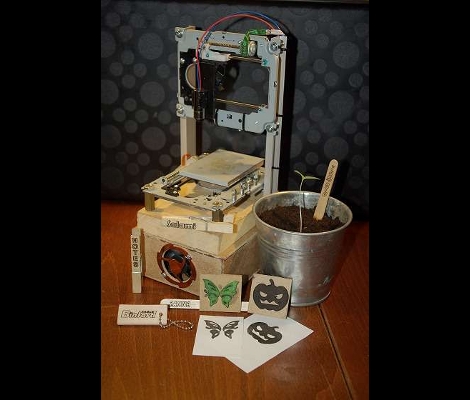
Grab that stack of old optical drives you have in the corner and get to work building this laser engraver. [Groover] is taking a no-nonsense approach to the build and we think it is just simple enough to be accessible to a very wide audience.

The physical assembly uses sleds from two optical drives. These are mounted some angle bracket. Since lasers cut at one specific focal length, there is not need for a Z axis (simplifying the build greatly). In fact, we think the hardest part of the assembly is retrieving the laser diode from a DVD-R drive and packaging it for use with this setup.

The electronics are a combination of a couple of consumer products. Two pre-fab motor drivers are used to command the stepper motors on the optical sleds. These receive their commands from an Arduino. A package called GRBL reads in G-code ([Groover] shows how to generate this from Inkscape) and in turn sends commands to the Arduino.

The results are quite remarkable. It can engrave wood with great resolution and contrast. The video after the break even shows it cutting out shapes from construction paper. Now we still want our own full-size laser cutter, but this project is much more fiscally possible for us.

Continue reading “Bench-top Laser Engraver Does Some Cutting Too”

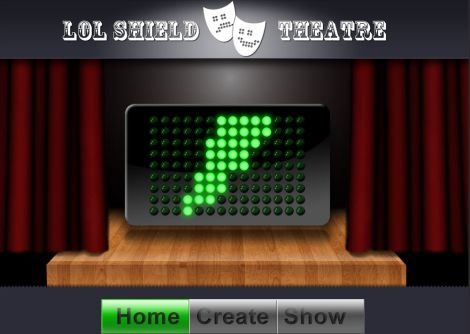
Lol Shield Theatre Brings Online Video To The Pixelated Screen

lol_shield_theatre

[FallDeaf] bought a Lol Shield, and after making all sorts of blinky displays, he thought to himself, “What in the world can I use this thing for?”

In a really slick fusion of hardware, software, and the power of the Internet, he has created what he calls, “Lol Shield Theatre”.

The idea goes something like this:

You visit his site, and create your own “movie” by drawing on his virtual Lol Shield. Add as many frames as you would like, set the frame rate, then submit your creation. From there, you can download an Arduino sketch that contains your entire animation so you can play it on your own Lol Shield. You can also visit his Lol Shield gallery, where you have the ability to watch, download, and vote on movie submissions from other visitors.

He has also provided the source code to drive your Lol Shield, as well as created an API through which you can stream the various animation feeds from his Lol Shield gallery directly to your Arduino via a USB cable.

Be sure to check out the video demo we have embedded below, and show off your pixel cinematography skills over in the theatre.

Continue reading “Lol Shield Theatre Brings Online Video To The Pixelated Screen”

Header File Brings Arduino Sketches To The TI Launchpad

[Chris Hulbert] is making it easy for Arduino users to program MSP430 chips with a header file that allows you to compile Arduino sketches for the Launchpad. This makes sense, as the growing number of Arduino sketches available, and the low cost of the TI Launchpad make for a good bedfellows. It’s really wasn’t that hard to make this happen, although you’re not going to find support for all of the Arduino functions just yet.

At the time of writing, [Chris] has just 51 lines of code committed to the project. It provides macros for setup(), loop(), delay(), pinMode(), pinBit(), digitalWrite(), and digitalRead(). You’ll notice that one of the most important parts of the header file is that it disables the watchdog timer for the user (a stumbling block for many MSP430 beginners). It’s an interesting solution, but to be truly useful we’d want to see hardware integration with the Arduino IDE. That, as well as the rest of the Arduino functions are at the tips of your fingers. Get coding and submit your push requests to [Chris] for inclusion in his repository.

[Thanks Chris]