Arduino Asteroids

[nootropic] has a new game out for hackvision, “Asteroids”! We covered the hackvision back when it first started appearing in October of 2010, and hardware wise it has not changed. It is still an Arduino (software) compatible system sporting a atmega328, video and audio out connections (uses the TV-out library), all on a nice printed circuit board that, with the buttons, resembles a game controller.

While its impressive enough to run arcade inspired games like space invaders, pong, and tetris while using Arduino and a library, Asteroids takes the game up a notch.

Features that make Asteroids well, Asteroids include a mod of the TV-out library so that bitmaps can fly over each other without erasing the pixels under them to give that old time vector arcade feel, and “point in polygon” style collision detection, which is a fantastic / efficient way of collision detection against irregular shapes, limited platform or not.

Last but not least, [nootropic] used the set_vbi_hook() function of the tv out library in sound design, going from simple “beeps” and “boops”, to “beeps” and “boops” on a constant 60Hz refresh (in the case of NTSC) that allows him to build more complex sound effects that give a nice arcade sound of explosions and laser blasts.

Join us after the break for a quick video, and remember, this is Arduino based so if you already have an Arduino, you can add the supporting hardware (buttons, resistors, and RCA jacks) and run any of the games currently offered, or make your own.

Continue reading “Arduino Asteroids”

Simple RFID Access System Clone

rfidbboards

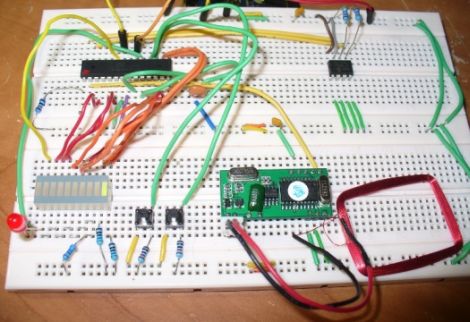
A few months back, [John] was reading an article about a simple RFID security system kit, and decided he would like to build one himself.  While many of the system’s details, including full schematics were provided, he was dismayed to find that the source code for the project was not published as it was held under copyright by the manufacturer.  Believing that open source is better, he modified the original design, replacing their PIC controller with an ATmega328 armed with an Arduino bootloader.

His system replicates all of the original kit’s functionality, while offering plenty of opportunity for modification beyond the initial design.  The article contains a complete parts list, wiring schematic, and the Arduino code required to get things up and running.  He even has a video of his clone at work, demonstrating the acceptance and rejection of RFID tags as well as the system’s learning mode.

Going Cellular With Your Arduino Projects

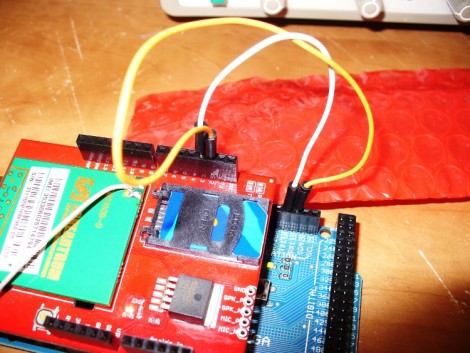
You can add a huge measure of extensibiltiy to a project by using a cellular connection. Anywhere the device can get service you can interact with it. In the past this has been a pretty deep slog through datasheets to get everything working, but this tutorial will show the basics of interacting with phone calls and text messages. It’s the 26th installment of what is becoming and mammoth Arduino series, and the first one in a set that works with the SM5100B cellular shield.

We love the words of warning at the top of the article which mention that a bit of bad code in your sketch could end up sending out a barrage of text messages, potentially costing you a bundle. But there’s plenty of details and if you follow along each step of the way we think you’ll come out fairly confident that you know what you’re doing. Just promise us that you won’t go out and steal SIM cards to use with your next project. Find part two of the tutorial here and keep your eyes open for future installments.

Charging Timer For R/C Batteries

arduino_controlled_socket

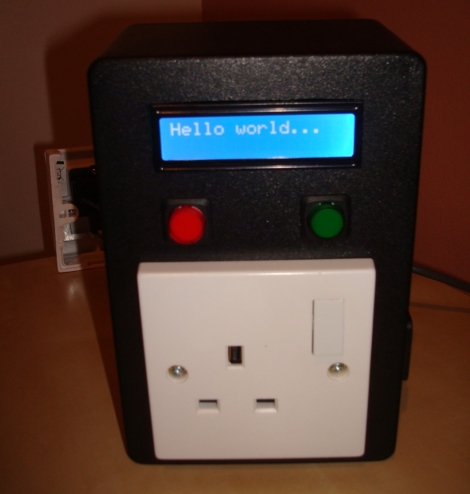
Santa brought [Quinten’s] son a shiny R/C truck for Christmas, but this new toy had one drawback – its batteries could only be connected to the charger for a maximum of 6 hours, lest he turn his house into a pile of smoldering ash.  With grave warnings from the manufacturer dancing in his head, he searched around for a timer that would allow him to cut power to the battery after charging for its allotted time.  Coming up empty, he decided to create his own timed electric socket regulated by an Arduino he had sitting around.  He grabbed a project box and wired up a nice looking socket timer, complete with an LCD status display.  To make things easy for his son, he added two buttons to the front of the controller – one for selecting the amount of charging time, and one to set the timer in motion.  As with his previous hacks, [Quinten] has provided plenty of documentation in the form of pictures, code, and even a video of the timer in action.

See-through LED Display

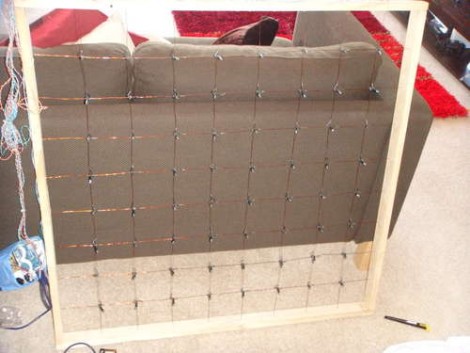
[Ndsit] is having a party and wanted to liven up the place with some blinky lights. He’s a bit new when it comes to hobby electronics, and although we’d highly recommend inviting some resistors to participate, the LED matrix that he built is very nice. It’s 8×8, it’s big, and (as shown in the clip after the break) the lights seem to hover in midair. That’s because he didn’t use a substrate to make the display. A grid of enameled wire is strung between the four sides of the wooden frame. LEDs were gathered from a string of Christmas lights which means they’re in a holder and have insulated wires already connected. Each one was tied on at a junction point of the grid, then connected to a portion of the wire where enamel had been scraped off.

It works but there’s already one light that is out. We hope some current protection is added so that this can be used again and again.

Continue reading “See-through LED Display”

Rotary Dial Authenticates Sudo Commands

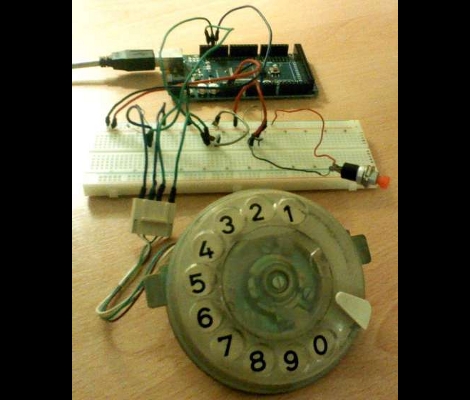
[W1ndman] won’t win any security awards for this build, but it’s an interesting idea. On many Linux-based systems commands can be run with administrator privileges by prefacing them with the keyword ‘sudo’. Normally you’d be asked for a password but [W1ndman] used the Pluggable Authentication Modules (PAM) to authenticate via his own shell script. That script checks a code from this rotary dial for authentication. An Arduino takes care of listening for each digit that is entered and then sends the code via USB for comparison with a stored file. We’re not sure if that stored code is in a plain file or is otherwise protected, but at the very least this prevents you from using ‘sudo’ willy-nilly.

Fermentation Temperature Control

[Eric Friedrich] needed to keep the wort warm enough for yeast to ferment it into beer. To solve the problem he built his own fermentation temperature controler using a microprocessor to turn some heating tape on and off. You can see the heating element embracing that diminutive fermentation bucket in the picture above. This was originally meant for keeping reptile cages warm. It costs less than similar products meant just for brewing and works well for [Eric]. A DS1820 temperature sensor gives feedback to an ATmega168 which then uses a relay to switch the heat on and off. The target temperature can be changed using a potentiometer on the board, with the setting displayed on a character LCD screen on the project enclosure.