The Tiny, $25 PocketBeagle

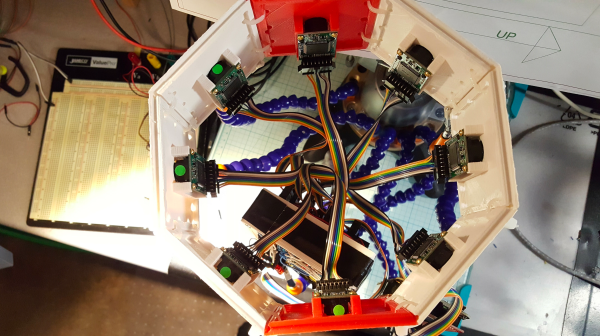
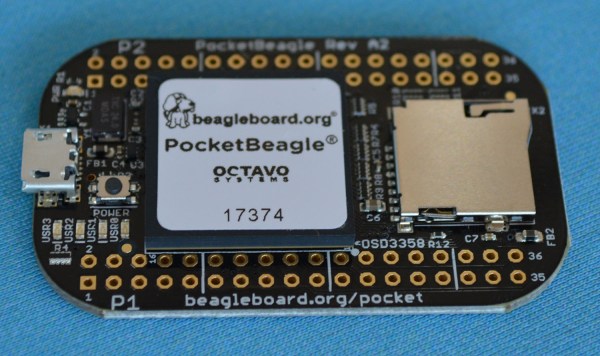
It was announced a day or two ago, but now the PocketBeagle has made its first real-world appearance at the World Maker Faire in New York this weekend. This is a tiny, tiny Linux computer that’s small enough to fit on a keychain, or in an Altoids mini tin. It’s only $25 USD, and from the stock lists on Mouser and Digikey, there are plenty to go around.

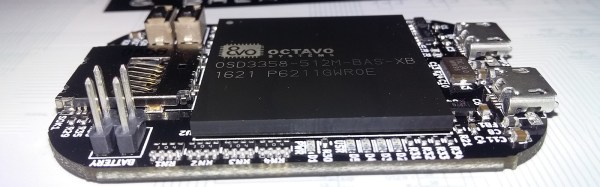
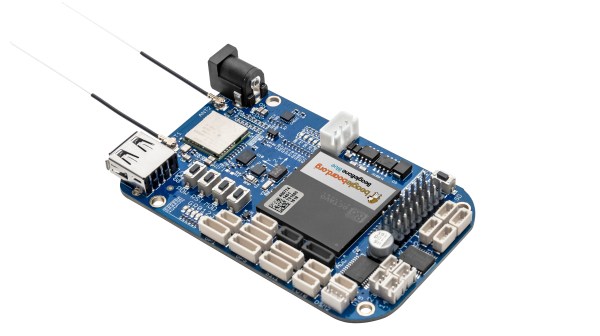
The specs for the PocketBeagle are more or less exactly what you would expect from any BeagleBone. There’s an ARM Cortex-A8 running at 1GHz, 512 MB of RAM, and SD card storage. I/O is eight analog inputs, up to 44 digital GPIOs, up to 3 UARTs, 2 I2C busses, 2 SPI busses, and 4 PWM outputs. All of this is packed into the OSD3358 System on a Chip from Octavo Systems.

This isn’t the first time we’ve seen Octavo Systems’ ‘BeagleBone on a Chip’ — Before the release, head Beagle herder [Jason Kridner] built a PocketBone in Eagle, which was shortly followed by [Michael Welling]’s similar efforts in KiCad. The PocketBeagle has been a reality for months, but now it’s accessible to hackers who don’t want to deal with soldering BGA packages.

This version of the PocketBeagle is getting close to as Open Source as you can get, with the design files available in Eagle and KiCad. One interesting feature of the PocketBeagle is which pins, busses, and peripherals are enabled by default. The killer feature of the BeagleBone has always been the PRUs — programmable real-time units — that enable vast arrays of LEDs, fast steppers for CNC machines, and DMA tomfoolery. The pins for the PRUs on the PocketBeagle are set up by default, with no need to screw around with configurations, modules, or drivers.

Continue reading “The Tiny, $25 PocketBeagle”

Shoot Video In 26 Different Directions

[Mark Mullins] is working on a project called Quamera: a camera that takes video in every direction simultaneously, creating realtime 3D environments on the fly.

[Mark] is using 26 Arducams, arranging them in a rhombicuboctahedron configuration, which consists of three rings of 8 cameras with each ring controlled by a Beaglebone; the top and bottom rings are angled at 45 degrees, while the center ring looks straight out. The top and bottom cameras are controlled by a fourth Beaglebone, which also serves to communicate with the Nvidia Jetson TX1 that runs everything. Together, these cameras can see in all directions at once, with enough overlap for provide a seamless display for viewers.

In the image to the right, [Mark] is testing out his software for getting the various cameras to work together. The banks of circles and the dots and lines connecting to them represent the computer’s best guess on how to seamlessly merge the images.

If you want to check out the project in person, [Mark] will be showing off the Quamera at the Dover Mini Maker Faire this August. In the meantime, to learn more about the Jetson check out our thorough overview of the board.

Hackaday Links: April 30, 2017

This last week was SEFF, a week of electric-powered remote-controlled aircraft above 1700 feet of Bermuda grass in the middle of Georgia. [Damon Atwood] has been bringing his 16-foot-wingspan Emmaselle to SEFF for a few years now, and this year we’re getting a great video of the flight. This is, or was at one time, the 3rd largest electric RC on the planet. It’s flying on 11S, and is absolutely beautiful in the air.

Speaking of electric RC meetups, Flite Fest West is going on right now. Flite Fest East will be July 13th through the 16th. Here’s the link to the relevant YouTube channel.

One of the very inexpensive 3D printers announced at CES by Monoprice is now on sale. It’s the improved $200 Cartesian, not the $150 delta. As I saw at CES last January, this is a slight improvement over the already fantastic V1 version of this printer. Improvements include an all metal hot end (an E3D clone) and working WiFi on the main board. Still waiting on the $150 delta printer? The only thing I can tell you is that it’s coming out soon.

StippleGen is an application from Evil Mad Scientists Labs to create stippled drawings. Stippling is dots, but not halftone. [HEXceramic] is using StippleGen to create laser cut molds for making ceramic tiles. The results look awesome, and I can’t wait to see one of these fired.

Hackaday has been voted, ‘The Hacker News of Hardware‘ by the Hacker News community. I would have included this in the links post last week, but feared that would be seen as manipulating the upvote system on Hacker News. This is great, but of course you already know Hackaday is seen as a reputable source of hardware and embedded news!

As a rule, Hackaday is nonpartisan and not political at all. In fact, two of my headlines have been shot down so far this year for using the word ‘trump’ as a verb. You’re welcome. This project is too cool, so we’re going to bend a few rules. This is a Trump gummi. It’s the rarest gummi of them all. It was carved by gummi artisans who work exclusively in the medium of gummi.

[Michael Welling] designed the PocketBone Mini in KiCad. It’s built around the Octavo Systems OSD3358, and is really, really tiny while designed to be as capable as a full size BeagleBone. He’s doing an interest check to gauge the community’s interest in this tiny, tiny single board computer.

A Modern Day PDP-11 Front End

Hands up if you feel your spiritual home is in front of a terminal with a “DIGITAL” logo on it.  It’s a name that has long ago been subsumed into first Compaq and then by extension HP, but it’s one with a lot of history when it comes to computing.

From the start of the electronic computing age, there were the computers we’d probably now describe as mainframes. Big computers that cost the GDP of a small country, filled an entire floor of a building, and could only be found in government departments, universities, and large companies. By the 1960s, the technologies existed to build computers that broke this mould, could be bought within the budget of a smaller organisation, and for which you didn’t need a huge air-conditioned basement to house. These so-called minicomputers were the great revolution of that era because they bought the fruits of computing into everyday business, and probably the most successful of the companies that produced them was the Maynard, Massachusetts-based Digital Equipment Corporation, or DEC.

DEC produced a succession of minicomputers in their PDP line, of which the most successful was their PDP-11 series. These were 16-bit minicomputers that remained in their product line from their launch in 1970 through to the early 1990s, and were available in a succession of configurations and physical form factors. The famous view of a PDP-11 is of a set of floor-to-ceiling racks, but there were also standalone terminal models, and desktop models. One of these, a PDP-11/03 from 1975, has come into the hands of [Joerg], and he’s used it to craft his LSIbox, the PDP11/03 card frame packaged with a BeagleBone for access via a modern-day interface. It’s a build in the vein of modern tube audio amplifiers that feature the retro hardware on the top of their cases, the card frame is exposed as a feature on top of a white case that is featureless except for a genuine PDP-11/03 front panel.

You might ask why anyone would do this in order to run PDP-11 software when the BeagleBone could almost certainly emulate the vintage hardware much faster than the real thing. But to take that view is to miss the point; the PDP-11 series are a seminal part of computing history, and to have genuine PDP-11 hardware on your desk is quite an achievement.

We’ve shown you a few PDP-11 projects in the past. There was this minimalist PDP-11 implementation using one of the later integrated PDP-11 processors, and we’ve seen a faithful reproduction of an earlier PDP-11 front panel powered by a Raspberry Pi.

An Even Smaller BeagleBone

The BeagleBone famously fits in an Altoids tin. Even though we now have BeagleBone Blacks, Blues, and Greens, the form factor for this curiously strong Linux board has remained unchanged, and able to fit inside a project box available at every cash register on the planet. There is another Altoids tin, though. The Altoid mini tin is just over 60×40 mm, and much too small to fit a normal size BeagleBone. [Michael Welling] has designed a new BeagleBone to fit this miniature project box. He’s calling it the Pocketbone, and it’s as small as the mints are strong.

The Pocketbone is based on the Octavo Systems OSD355x family, better known as the ‘BeagleBone on a chip’. This chip features a TI AM355x ARM Cortex A8, up to 1GB of DDR3 RAM, 114 GPIOs, 6 UARTs, 2 SPIs, 2x Gigabit Ethernet, and USB. It’s housed in a relatively large BGA package that makes routing easy, and as a proof of concept [Jason Kridner] built a PocketBone in Eagle.

[Michael]’s version of the Pocketbone is based on the earlier proof of concept, with a few handy additions. There’s an IO expansion header, provisions for a battery input, a few fixes to the USB, and all the parts are on one side of the board facilitating easier assembly. This version of the Pocketbone was created using KiCad, which will endear the project to the Open Source community.

The BeagleBone Blue – Perfect For Robots

There’s a new BeagleBone on the block, and it’s Blue. The BeagleBone Blue is built for robots, and it’s available right now.

If a cerulean BeagleBone sounds familiar, you’re not wrong. About a year ago, the BeagleBone Blue was introduced in partnership with UCSD. This board was meant for robotics, and had the peripherals to match. Support for battery charging was included, as well as motor drivers, sensor inputs, and wireless. If you want to put Linux on a moving thingy, there are worse choices.

The newly introduced BeagleBone Blue is more or less the same. A 9-axis IMU, barometer, motor driver, quad encoder sensor, servo driver, and a balancing LiPo charger are all included. The difference in this revision is the processor. That big square of epoxy in the middle of the board is the Octavo Systems OSD3358, better known as a BeagleBone on a chip. This is the first actual product we’ve seen using this neat chip, but assuredly not the last – a few people are working on stuffing this chip onto a board that fits in mini Altoids tins.

Reverse Engineering The Smart ForTwo CAN Bus

The CAN bus has become a defacto standard in modern cars. Just about everything electronic in a car these days talks over this bus, which makes it fertile ground for aspiring hackers. [Daniel Velazquez] is striking out in this area, attempting to decode the messages on the CAN bus of his Smart ForTwo.

[Daniel] has had some pitfalls – first attempts with a Beaglebone Black were somewhat successful in reading messages, but led to strange activity of the car and indicators. This is par for the course in any hack that wires into an existing system – there’s a high chance of disrupting what’s going on leading to unintended consequences.

Further work using an Arduino with the MCP_CAN library netted [Daniel] better results, but  it would be great to understand precisely why the BeagleBone was causing a disturbance to the bus. Safety is highly important when you’re hacking on a speeding one-ton metal death cart, so it pays to double and triple check everything you’re doing.

Thus far, [Daniel] is part way through documenting the messages on the bus, finding registers that cover the ignition and turn signals, among others. Share your CAN hacking tips in the comments. For those interested in more on the CAN bus, check out [Eric]’s great primer on CAN hacking – and keep those car hacking projects flowing to the tip line!