LAMEBOY Is Handheld Gaming On The ESP8266

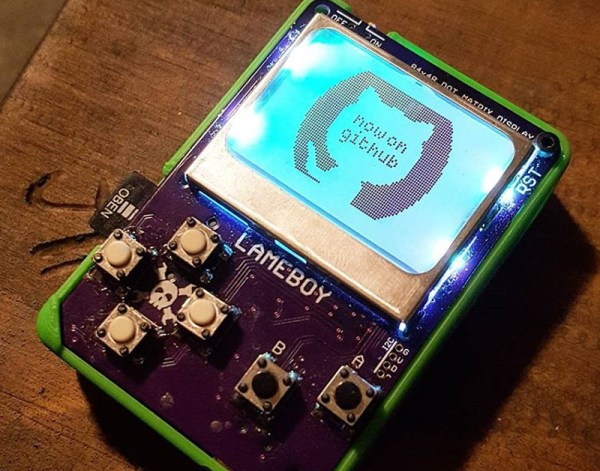
We’ve had our eye on [davedarko’s] LAMEBOY project for a while now, a handheld setup in roughly the same form factor as the classic Nintendo Game Boy. It’s remarkable how approachable portable electronic design has become, and that’s really what makes this interesting. The design is beautiful, and the closer you look, the more respect you have for what [dave] is doing.
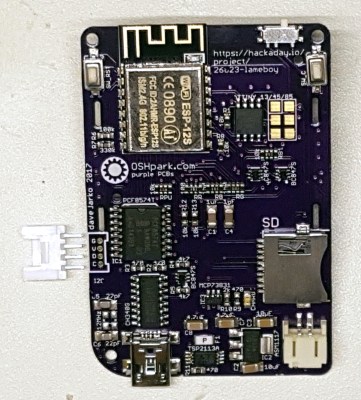
Right now his proof of concept has a 3D printed enclosure whose face is the printed circuit board. We love how the lower left corner of the PCB slips under a pocket in the case, which makes it possible to use just one screw to secure the two together in the upper right.

The LAMEBOY is built around an ESP8266 module. Anyone who has used one knows this chip contains a fair amount of horsepower, but very little I/O. [Dave] has a lot going on with an LCD screen, six user buttons, a USB to I/O chip, and an SD card slot. He took two approaches to solve this dilemma. First he grabbed a PCF8574 port expander, and second he’s offloaded the color control of the screen backlights to an ATtiny85 (running a BlinkM clone).

Below you can see some early game tests on the perfboard prototype. We haven’t seen game play on the most recent prototype (there is a screen color test video in his latest project log) but it sounds as though [dave] plans to make use of the Gamebuino framework. This should mean that there will be no shortage of cool ROMs to load.

Continue reading “LAMEBOY Is Handheld Gaming On The ESP8266”

Solving IoT Problems With Node.js For Hardware

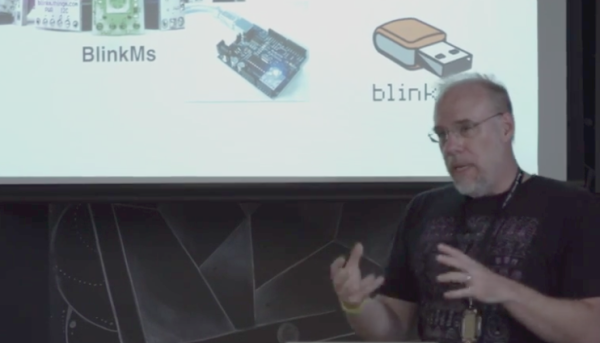
Tod Kurt knows a thing or two about IoT devices. As the creator of blink(1), he’s shipped over 30,000 units that are now out in the wild and in use for custom signaling on everything from compile status to those emotionally important social media indicators. His talk at the 2016 Hackaday SuperConference covers the last mile that bridges your Internet of Things devices with its intended use. This is where IoT actually happens, and of course where it usually goes astray.

Continue reading “Solving IoT Problems With Node.js For Hardware”

BlinkM Gets Upgraded To A USB Mass-market Device

[TodBot] has a new piece of hardware on the way up. His Blink(1) is currently about 50% funded on Kickstarter. It’s a USB nub that has an RGB LED inside of it. When plugged into a computer it can be used as a status indicator. At first that sounds like a let down, but his marketing is fantastic as the myriad of uses really caught our attention. If you’re on the road you can use it to report back your server statistic. Plug one into each rack-mounted servers for quick visual indication of which one has crashed. Or find your own use.

You probably remember [TodBot] as the creator of the BlinkM. Recently he was calling it the world’s smallest Arduino. Well this Blink(1) is being marketed as Arduino programmable as well. The board size is about the same, and both have an RGB LED module. The difference is that the BlinkM had an ATtiny85 and needed a serial converter to program it. This has a USB plug so we’d bet he’s swapped the tiny for an ATmega8u2 or something from the same family.

Don’t think one blinky LED is going to cut it? For folks that just need more resolution there are other hardware options out there. For instance, this project gives you a wireless 8×8 RGB led display to use as an indicator.

Building DIY BlinkM Clones

ghetto_pixels

If you are planning on using more than a handful of BlinkMs in a project, you will likely find that their $15 price tag quickly adds up. Instructables user [jimthree] found himself in that position and opted to create his own homebrew version of a BlinkM instead. He calls his creations “Ghetto Pixels”, and while they might not look as professional as the real thing, they get the job done just the same.

He bought a batch of RGB LEDs online for under a dollar apiece, pairing them with ATTiny45s that he scored for about $1.50 each. [imthree] popped his uCs into a programmer, flashing them with an open-source BlinkM firmware clone called CYZ_RGB. He then prototyped his circuit on some breadboard, adding the appropriate resistors to the mix before testing out the LEDs. When he was confident everything was working correctly, he assembled Ghetto Pixels deadbug-style.

When everything was said and done, they came together in a pretty compact package comparable to that of the BlinkM. As you can see in the video below, they work great too!

Continue reading “Building DIY BlinkM Clones”

Hacking Cakes With LEDs, The Sequel!

A few weeks back we ran a piece about the convergence of making and baking in an attempt to create a cake festooned with working LEDs. The moral was that not every creative idea ends in victory, but we applauded the spirit it takes to post one’s goofs for the whole internet to see and to learn from.

[Craig]’s LED matrix proved unreliable…and the underlying cake didn’t fare much better, resembling that charred lump in the toaster oven in Time Bandits. The cakes-with-lights meme might have died right there if not for a fluke of association…

Continue reading “Hacking Cakes With LEDs, The Sequel!”

Home Made BlinkM Units

[Stephen] wrote in to show us this fun LED wall he constructed in his house. He says he was inspired by this project, but found the cost of the BlinkM units from sparkfun to be out of his price range. He really liked how they worked though, so he downloaded the schematic and firmware and built his own. He was able to fabricate 130 of his own for roughly 250 euros as opposed to the 1,452 euro price tag his sparkfun shopping cart had. That’s not a bad deal at all if you’re willing to invest the time in making your own PCBs and assembling the units. You can follow along on his site to see the entire construction process, as well as some pictures of his glass wall in action. The videos, however, aren’t loading for us. Great job [Stephen]!

A Weighted Companion Cube Worth Saving From The Incinerator

companion_cube

It’s honestly sad that Valve has not released any official Portal-related items to the masses, as a market for them clearly exists. As the saying goes, “necessity is the mother of invention”, and [Jamie] needed a Weighted Companion Cube in the worst way.

Actually he constructed his Companion Cube in order to test out some modifications and upgrades he performed on his homebrew CNC Mill. Judging by how the cube turned out, and the fact that he was able to keep tolerances within .005”, we would say that his mill is working just fine.

The cube was designed in Solidworks, and passed through the BobCAD plugin to generate the GCode for the mill. The base of the cube was machined out of a 3” solid block of aluminum, hollowed out on one side to give him access to the cube’s innards. He milled out heart shaped openings on each side, covering them with frosted Lexan.

He added a BlinkM to the mix, mounting it on the cover plate he milled for the open side of the cube. Once lit it cycles through several colors, including the pinkish tone anyone who has played Portal is quite familiar with.

We would say that it’s a great job, but it doesn’t do his work justice – it’s absolutely stunning. We’re not just saying that because we want one, though we do want one…badly.