Camera Sees Electromagnetic Interference Using An SDR And Machine Vision

It’s one thing to know that your device is leaking electromagnetic interference (EMI), but if you really want to solve the problem, it might be helpful to know where the emissions are coming from. This heat-mapping EMI probe will answer that question, with style. It uses a webcam to record an EMI probe and the overlay a heat map of the interference on the image itself.

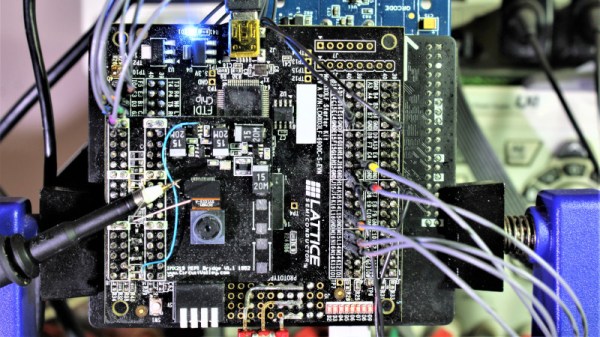
Regular readers will note that the hardware end of [Charles Grassin]’s EMI mapper bears a strong resemblance to the EMC probe made from semi-rigid coax we featured recently. Built as a cheap DIY substitute for an expensive off-the-shelf probe set for electromagnetic testing, the probe was super simple: just a semi-rigid coax jumper with one SMA plug lopped off and the raw end looped back and soldered. Connected to an SDR dongle, the probe proved useful for tracking down noisy circuits.

[Charles]’ project takes that a step further by adding a camera that looks down upon the device under test. OpenCV is used to track the probe, which is moved over the DUT manually with the help of an augmented reality display that helps track coverage, with a Python script recording its position and the RF power measurements. The video below shows the capture process and what the data looks like when reassembled as an overlay on top of the device.

Even if EMC testing isn’t your thing, this one seems like a lot of fun for the curious. [Charles] has kindly made the sources available on GitHub, so this is a great project to just knock out quickly and start mapping.

Continue reading “Camera Sees Electromagnetic Interference Using An SDR And Machine Vision”

A High-Speed Slide Scanner Build

Photographic slides were popular in the middle part of the 20th century, but are long forgotten now. If you’ve found a handful in a dusty attic, you might consider sending them away to be digitized professionally, or using a flatbed scanner at home. [Bryan Howard] found himself with over 200,000 slides, however, so that just wouldn’t do. Instead, he endeavored to build an automated scanner of his own. 

Like many similar projects, [Bryan] started with an existing slide projector as a base. This means that all the difficult work of slide transport is already taken care of. The projector has then been upgraded with an LED light source and other tweaks befitting its new role. An Arduino Pro Micro runs the show, firing off the camera to image each slide before loading the next one into place. The DSLR responsible for imaging is then hooked up to a PC so the incoming images can be checked while the machine is in operation.

Preliminary tests are promising, with the scanner successfully capturing several slides in a row. [Bryan] estimates that, with a capture time of between 1 and 2 seconds per slide, it should take somewhere between 2-5 days to image the entire collection.

We wish [Bryan] the best of luck with the project, and look forward to seeing the final results. We’ve seen similar work before, too. Video after the break.

Continue reading “A High-Speed Slide Scanner Build”

Pocket Watch Becomes Pinhole Camera

A pinhole camera is essentially the combination of the camera obscura with photographic film. The pinhole acts as the lens, focusing the scene onto the film, and after exposure, the film can then be developed and you’ve got your picture. They’re a fun way to learn about photography, and easy to make, too. [Brooklyntonia] decided to undertake just such a build, secreted away inside a pocket watch.

The build starts with with the disassembly of the watch, which acts as the main cavity of the camera. A bellows is then constructed from leather and a toilet paper roll to allow the camera to still fold up inside the original watch case. A pinhole is then installed at the end of the bellows, and a plug is used as a shutter to allow the bellows to be properly unfolded prior to exposure.

It’s a fun build, and one that comes complete with instructions for the proper processing of film in your own darkroom – or bathroom. Pinhole cameras can be useful tools, too – particularly for things such as capturing an eclipse.

Print Your Own Large Format Camera

Just like how vinyl records are seeing a resurgence in an era of digital streaming music, we’re also seeing a lot of people interested in another technology that is as obsolete as it is perfected. The large format camera is back as a kit, it makes huge images, and there’s an Open Source version if you want to print your own.

The Standard 4×5 is a project to build an affordable, lightweight, 3D printed large format camera. It was a Kickstarter project last year, and after a lot of work the project has now been improved with better rails, better bellows, and a lot of refinements.

As an Open Source project, this camera has all the models available, dimensioned drawings for all the metal parts, and a lot of patience required to make your own bellows. With this, you can screw a lens on take a picture, just make sure you get the focus right with some ground glass beforehand.

As for why anyone would want a large format camera, there are a few things that big cameras with tiny apertures can do that nothing else can.  Here’s the pinhole solution for the Standard 4×5 with a laser drilled hole, and with this camera you’re getting an f-stop between f/240 and f/520.

Reverse Engineering A Modern IP Camera

Security cameras used to be analog devices feeding back into a room full of tiny screens and commercial grade VCRs. As technology moved forward, IP cameras began to proliferate. Early models simply presented a video stream and configuration page to the local network. Modern models aimed at the home market differ however. More often than not, configuration is through a strange smartphone app, and video is accessed through third-party servers. It’s all a bit oblique, and so [Alex] decided to take a look under the hood. 

The exploration begins externally, with [Alex] capturing data sent to and from the camera with Wireshark. Straight away, red flags are raised. For as yet unknown reasons, the camera attempts to resolve Google, Facebook and Alibaba servers over DNS. Disassembly then follows, revealing that a serial terminal with root access is available. [Alex] uses this to probe around, uncovering the firmware update script and a way to decrypt said updates.

The work thus is a great example of how to approach hacking a given device from first principles. The overall goal is to find a way to gain complete control over the camera, reprogramming it to serve up video as [Alex] wishes, rather than to a distant third party server. It’s not the first time we’ve seen an IP camera hacked, and we doubt it will be the last. If you’ve got one cracked, be sure to let us know.

Painting With Light And A Little G-Code

Most photographs are made in the fraction of a second that the camera’s shutter is gathering reflected light from the scene. But there’s fun to be had by leaving the shutter open and directing light into the camera. Called light painting, it can be as simple as a camera on a tripod in a dark room and a penlight spelling out dirty words – not like we’d know – or as complicated as this CNC dot-matrix light printer.

The first idea that [Jeremy S. Cook] had for this build didn’t go so well. He fitted an LED to the gantry of his 3D-printer, intending to send it G-code representing bitmaps. The idea would be to set it up in a dark place, open the shutter, and let the machine build up the image by rastering through the X- and Y- axes while blinking the LED on and off at the right time. But since the gantry only moves in one axis, he abandoned the printer in favor of his CNC router. He printed a collar to fit the dust collector shroud we previously featured, added a battery-powered LED, and affixed a pushbutton switch to the let the Z-axis turn on the light. It took some tweaking such as adding a translucent PLA diffuser, to get decent images, but in the end it worked. We like the soft look of the floating voxels, which were really helped by the later addition of a Nano and a Neopixel. Check out the build in the video below.

One thing we’d suggest is better reflection control. [Jeremy] used a black platen as a background, but it wasn’t quite enough. We suggest going none more black next time.

Continue reading “Painting With Light And A Little G-Code”

Adding Real Lenses To An Instant Camera

The Instax SQ6 and Fujifilm’s entire range of instant cameras are fun little boxes that produce instant photos. It’s a polaroid that’s not Polaroid, and like most instant cameras, the lenses are just one or two pieces of plastic. A lens transplant is in order, and that’s exactly what [Kevin] did to his Instax camera.

The key to this lens transplant project is to make it not look like a complete hack job. For this, [Kevin] is keeping the number of custom mechanical parts to a minimum, with just two pieces. There’s a lens shroud that screws down to the current flange on the camera’s plastic chassis, and should blend in perfectly with the rest of the camera. This demanded a significant amount of 3D modeling to get perfect. The other mechanical part is just a plastic disc with a hole in it. These parts were ordered from Shapeways and bolted to the camera with only a few problems regarding spacing and clearances. This didn’t prevent the camera from coming back together, which is when the documentation becomes fast and loose. Who could blame him: the idea of putting real lenses on an instant camera is something few can resist, and the pictures that come out of this modified camera look great.

The current state of the project with a single lens leads the camera to have an inaccurate and tunnel-like viewfinder, but a huge modification brings this project into twin-lens reflex territory. There are more modifications than camera here, but all the printed parts are documented, there are part numbers for McMaster-Carr, and the camera has full control over focusing and framing.