[Usagi] Whips A Chain Printer Into Shape

What does it take to get a 47-year-old printer working? [Usagi Electric] shows us it’s not too hard, even if you don’t exactly know what you’re doing.  When we last left this project, he’d tested and verified his power supply was working. This week, after a bit of cleaning, it was time to dig into the mechanics.

If you haven’t seen a chain printer in action before, definitely check one out. They’re big, loud, and sound a bit like a turbine when they spool up. The type chains on these printers never stops moving. This means the printer has to know exactly where a particular letter is before launching one of 66 hammers at it. If the timing is off, parts will fly. To the average computer user, they’re quite intimidating.

Thankfully [Usagi’s] printer was in pretty good shape. When he flipped the big power switch, there was plenty of strange noises, culminating in the test pattern of dollar signs. Probably an early reminder to customers that they needed to order more print supplies.

Continue reading “[Usagi] Whips A Chain Printer Into Shape”

Learning About Ferroresonant Transformers While Fixing A 1970s Power Supply

Ferroresonant (constant voltage) transformer diagram. Secondary side is kept in full saturation with the tank, keeping voltage constant. (Credit: Usagi Electric)

While troubleshooting the power supply of a 1970s Centurion system, [Usagi Electrics] came across a fascinating feature of these units: the ferroresonant, or constant voltage transformer (CVT). The main difference between a regular transformer and a CVT is that the former has a quite direct correlation between the input and output voltage, as the magnetic flux induced on the primary side is directly translated to the secondary (output) side.

A CVT adds a second element on the secondary side in the form of a tank circuit (LC circuit) – essentially a large capacitor – along with a magnetic shunt that ‘short circuits’ part of the magnetic flux between the primary and secondary side. The result of this is that even as the primary side is kept well below the saturation point where efficiency plummets, the secondary side is kept within this saturation region, enabling a very constant output voltage across a wide range of input voltages. For the Centurion’s power supply this input range goes from 90 to 130 VAC.

Continue reading “Learning About Ferroresonant Transformers While Fixing A 1970s Power Supply”

Trying (and Failing) To Restore A 1970s CDC 10MB Hard Drive

One fun aspect of 1970s-era hard disk drives is that they are big, clunky and are fairly easy to repair without the need for a clean room. A less fun aspect is that they are 1970s-era HDDs and thus old and often broken. While repairing a CDC 10 MB HDD for the upcoming VCF East event, the folks over at [Usagi Electric], this led to quite a few struggles, even after a replacement 14″ platter was found to replace the crashed platter with.

These CDC HDDs are referred to as Hawk drives, and they make the associated 8-bit Centurion  TTL logic-based computers so much faster and easier to work with (for a 1970s system, of course). Despite the large size of the components involved and the simple, all through-hole nature of the PCBs, issues that cropped up ranged from corroded DIP switches, to head alignment sensors, a defective analog board and ultimately a reported bad read-write head.

Frustratingly, even after getting the platters to spin up and everything moving as intended, it would seem that the remaining problem is that of possibly bad read-write heads, as in plural. Whether it’s due to age, previous head crashes onto platters, or something else, assembling a working Hawk drive turned out to be somewhat more complicated than hoped.

We definitely hope that the bunnies can get a working Hawk together, as working 1970s HDDs like these are become pretty rare.

Continue reading “Trying (and Failing) To Restore A 1970s CDC 10MB Hard Drive”

A vintage computer terminal next to a bank of computer cards

Minicomputer Restoration Hanging In The Balance

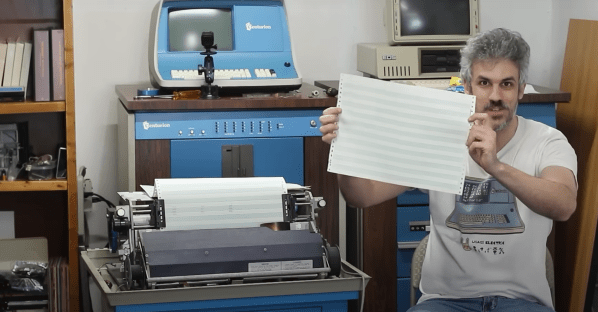
[David Lovett] aka Usagi Electric has spent the last several months dissecting a Centurion minicomputer from 1980. His latest update reveals that the restoration has hit several snags, and bootstrapping this old blue beast is going to be a challenge.

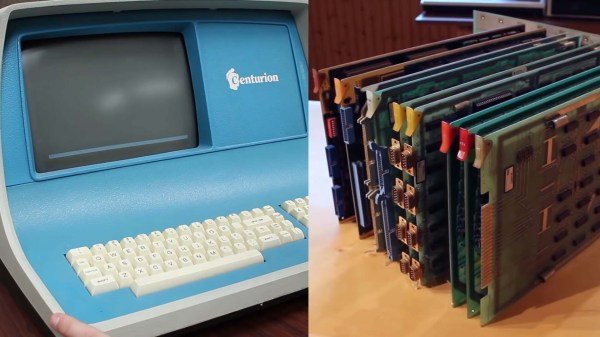
When we last checked in on this project, [David] had built a homebrew ROM reader to backup critical data stored several of the minicomputer’s ROM chips. Since then, the good news is that the Centurion is showing signs of life. Probing the Data Set Ready pin on the default RS232 serial port reveals a stream of data, likely stemming from the ‘CPU6’ board.

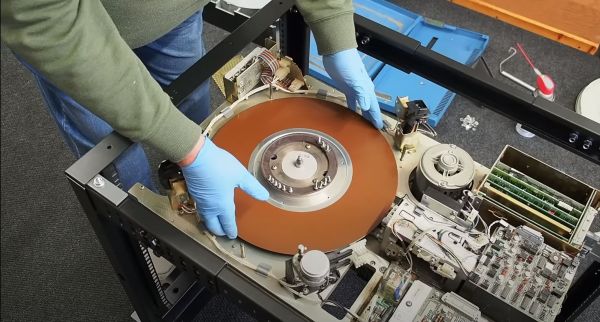
Unfortunately, that’s where the good news ends. Adding a terminal to the serial port interrupts this stream of data, and no information appears to be sent or received from any of the three terminals tested. To make matters worse, both of the massive hard drives appeared to have suffered catastrophic head crashes at some point in the 1990s, destroying the Centurion operating system and likely other important data in the process. Soiled air filters were the likely culprits, with evidence showing that yearly maintenance had been overlooked. While at least one of the drives can be repaired with new platters, the original operating system is completely lost.

As luck would have it, a previous employee of Centurion was able to provide a wealth of undocumented information that greatly aided in making sense of the minicomputer’s individual components. Incredibly, they were also able to provide a PROM Diagnostic board for the Centurion system. Not only could this board run a barrage of tests, it could also bootstrap the system with TOS (Test Operating System), a bare-bones memory monitor stored on the card’s PROMs. While the diagnostic card itself needs repairs, there’s now the slightest chance that [David] can use TOS as the starting off point for writing new software for the Centurion.

We really can’t wait to see what happens next with this project. We’ve covered some very special vintage computer restorations in the past, such as the cursed Diablo drive from a rare Xerox Alto, not to mention the delicate power-up procedure for an original Apple 1.

Continue reading “Minicomputer Restoration Hanging In The Balance”

Roman Headgear Looks Less Silly With Lots Of Blinky

centurion-project

Look, it’s not Steam-Punk because the period is way out of whack. And we’ve never seen ourselves as “that guy” at the party. But it would be pretty hard to develop The Centurion Project and not take the thing to every festive gathering you could possibly attend. This sound-reactive helm compels party-going in a toga-nouveau sort of way.

[Roman] tells us that it started as a movie prop. The first build step was to remove the plume from the top of it. The replacement — seven meters worth of addressable RGB LEDS — looks just enough like an epic mohawk to elicit visions of the punk rock show, with the reactive patterns to make it Daft. The unexpected comes with the FFT generated audio visualizations. They’re grounded on the top side of each of the LED strips. Most would call that upside-down but it ends up being the defining factor in this build. Seriously, watch the demo after the break and just try to make your case that this would have been better the other way around.

As a final note, this project was written using Cinder. It’s an Open Source C++ library that we don’t remember hearing about before.

Continue reading “Roman Headgear Looks Less Silly With Lots Of Blinky”

Drinking Games And Digital Logic

Untitled-1

For those of you who might have forgotten, let’s go over the rules of Centurion. The object of the game is for every minute, for 100 minutes, drink a shot of beer. It doesn’t sound like a lot, but after completing the challenge you’ll have had 3 liters of beer (or about eight and a half 12 oz cans) in just under two hours. When [Peter] played Centurion, he found the biggest problem was – understandably – keeping track of the time and who drank what. For an upcoming weekend of drinking, [Peter] decided to solve this problem once and for all with shift registers and seven-segment displays.

[Peter]’s Centurion score box comes in two parts. The first and largest part of the build is the main board housing an ATMega8 microcontroller and a huge two digit seven-segment display to keep track of the countdown until the next shot. Two other boards house eight additional two digit seven-segment displays for each player, incremented every time a player presses a giant arcade button.

The entire build is designed around a small travel case that also holds a large battery for cordless drinking parties. Let’s just hope the project is reasonably water-resistant; we can see a lot of spills happening in the future. Check out the video demo below.

Continue reading “Drinking Games And Digital Logic”