555 Timers Bring Christmas Charm To Miniature Village

The miniature Christmas village is a tradition in many families — a tiny idyllic world filled happy people, shops, and of course, snow. It’s common to see various miniature buildings for sale around the holidays just for this purpose, and since LEDs are small and cheap, they’ll almost always have some switch on the bottom to light up the windows.

This year, [Braden Sunwold] and his wife started their own village with an eye towards making it a family tradition. But to his surprise, the scale lamp posts they bought to dot along their snowy main street were hollow and didn’t actually light up. Seeing it was up to him to save Christmas, [Braden] got to work adding LEDs to the otherwise inert lamps.

Now in a pinch, this project could have been done with nothing more than some coin cells and a suitably sized LED. But seeing as the lamp posts were clearly designed in the Victorian style, [Braden] felt they should softly flicker to mimic a burning gas flame. Blinking would be way too harsh, and in his own words, look more like a Halloween decoration.

This could have been an excuse to drag out a microcontroller. But instead, [Braden] did as any good little Hackaday reader should do, and called on Old Saint 555 to save Christmas. After doing some research, he determined that a trio of 555s rigged as relaxation oscillators could be used to produce quasi-random triangle waves. When fed into a transistor controlling the LED, the result would be a random flickering instead of a more aggressive strobe effect. It took a little tweaking of values, but eventually he got it locked down and sent away to have custom PCBs made of the circuit.

With the flicker driver done, the rest of the project was pretty simple. Since the lamp posts were already hollow, feeding the LEDs up into them was easy enough. The electronics went into a 3D printed base, and we particularly liked the magnetic connectors [Braden] used so that the lamps could easily be taken off the base when it was time to pack the village away.

We can’t wait to see what new tricks [Braden] uses to bring the village alive for Christmas 2025. Perhaps the building lighting could do with a bit of automation?

Continue reading “555 Timers Bring Christmas Charm To Miniature Village”

Christmas Lithophanes Make Neat Decorations

Lithophanes are neat little artistic creations that use variations in the thickness of a material to reveal an image when lit from behind. 3D printing is a great way to make lithophanes, and they can make for beautiful Christmas decorations, too!

It’s easy to make lithophane decorations for your Christmas tree with the help of the ItsLitho tool. The online application takes any image you upload, and can generate lithophane geometry that you can 3D print at home. Print your custom bell or bauble, add the printed hooks, and then the final decoration can be backlit to reveal its image by inserting an LED from a string of Christmas lights.

The result is a beautiful, glowing decoration that displays a detailed image when lit up. All you need is a few images and a 3D printer to produce decorations as unique gifts for your family and friends.

We’ve seen the technique put to other uses too, such as in this convincing lamp designed after our very own Moon. Video after the break.

Continue reading “Christmas Lithophanes Make Neat Decorations”

Simple Christmas Tree Christmas Tree Ornament

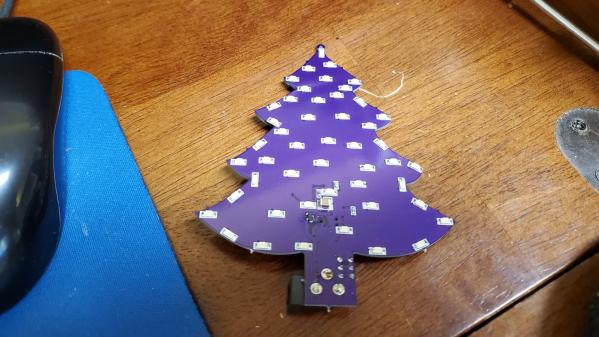
When the only tool you have is a hammer, every problem looks like a nail. An LED ornament for the Christmas tree can be built in any manner of simple, easy implementations. You certainly don’t need an ARM Cortex M4 CPU running at 120MHz having a mouthful of three letter features like FPU, ETM, ETB, ECC, RWW, TCM, EIC, AES, CAN bus and much, much more. But [Martin Held] built a super simple LED Christmas tree ornament using the ATSAME51 series micro-controller, which he regularly works with and had on hand, and lots of bi-color LEDs. He already had schematic symbols and programmers for the device from other projects where he uses it more extensively, so putting it all together in time for the festive season was that much faster for him, despite the fact that the micro-controller was most likely the cheapest part of the BOM, besides the passives.

At this point it might be tempting to argue that it would have been so much simpler to use addressable LED’s, such as the WS2812B or the APA102C. You can drive them using a more basic micro-controller, and not require so many GPIO pins. But using such “smart pixel” LED’s for hand assembled prototypes can sometimes lead to unexpected results. If they are not stored in sealed tape/reel form, then storage conditions can have an adverse effect leading to dead pixels. And, they need a specific baking procedure before being soldered. Doing that for a few LEDs at home can be tricky.

So for the LED’s, he again went a bit off the beaten path, selecting to use three different color styles of bi-color LED’s with easy to hand-solder, 1206 footprints. This allows him to get a fairly random mix of colors in the completed ornament.
The LED array is pseudo-charlieplexed. One terminal of each LED goes to a GPIO pin on the micro-controller and the other terminal of all the LED’s are connected to a single complimentary pair of N-channel/P-channel MOSFETs — connected in totem-pole fashion. Depending on which MOSFET is switched on via a GPIO pin driving the gate pin high or low, the second terminal of each LED gets connected to either supply or ground. In combination with the GPIO pins being driven high/low, this allows the bi-color LED to be biased in either direction. Getting each LED to emit one color is simple enough — setting all LED GPIOs low, and MOSFET gate GPIO high will bias the LEDs in one direction. Reverse the GPIO logic, and the LEDs will be biased in the other direction. If this is done slow enough, the two colors can be differentiated easily. If the driving logic is made fast, changing states every 10us, the two separate colors merge to form a third hue. With some clever bit of code, he also adds some randomness in the GPIO output states, resulting in a more appealing twinkling effect. [Martin] does a detailed walk through in the video embedded below.

If you have the same bunch of parts lying around and wish to replicate the project, be warned that the KiCad source files will need some work to clean up errors — [Martin] was in a hurry and knew what he was doing so there are some intentional mistakes in the schematic such as using the same symbol for the N-channel and P-channel MOSFETs, and uni-directional LED symbol in place of the bi-directional one. And for programming, you will need one of these pricey pogo-pin style cables, unless you decide to edit the PCB before sending off the Gerbers.

[Martin] built just three of these bespoke ornaments, retaining one and giving away the other two to a neighbour and a co-worker. But if you would really like to build a tree ornament with addressable LEDs, then check out the Sierpinski Christmas Tree which can be cascaded to form an array of tree ornaments.

Continue reading “Simple Christmas Tree Christmas Tree Ornament”

Sierpinski PCB Christmas Tree

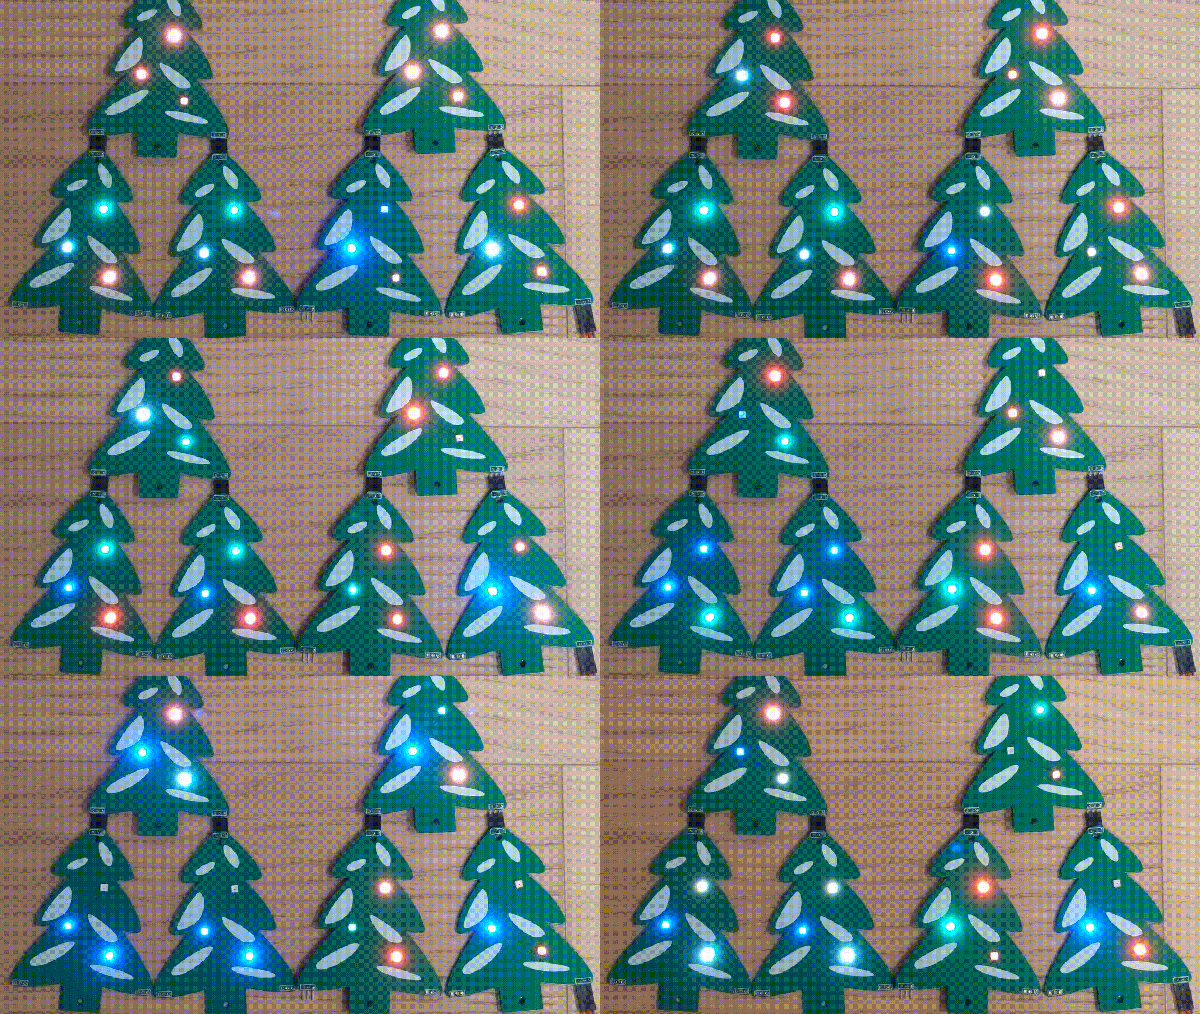
It’s holiday time again! And that means it’s time to break out the soldering iron and the RGB LEDs! If you’re going to make a custom PCB to put those LEDs on, you’ll notice that you get few copies of your PCB in your order, so, might as well design it such that you can combine them all together into a single Sierpinski Christmas Tree, just like [Landon Carter] did.

Each PCB “tree” has three connections which can be used as either inputs or outputs by soldering one of two bridge connections on the PCB. The power and signal goes up and down through the tree, rather than across, so the connections go one on the top of the tree and two on the bottom. This way, each tree in the triangle can easily be connected, and each triangle can be easily connected to another. Each individual tree has three WS2812b-mini addressable RGB LEDs and the tree is controlled by an external Arduino.

The first order of 10 PCBs came in, which makes a 9 member tree – next up is a 27 member tree. After that, you’re going to need some pretty high vaulted ceilings in order to put these on the wall. On the upside, though, once the holidays are over, everything can be easily disconnected and packed away with the rest of the decorations. If you, too, are interested in RGB LED decorations, there are a few on the site for your perusal.

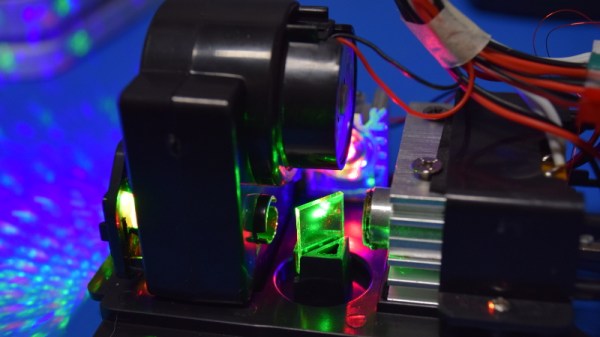
Teardown: What’s Inside A Christmas Laser Projector?

In the world of big-box retail, December 26th is a very special day. The Christmas music playing on the overhead speakers switches back to the family friendly Top 40, the store’s decorations get tossed in the compactor, and everything that’s even remotely related to the holiday is put on steep clearance. No more money to be made on the most commercialized of all holidays, so back to business as usual.

It’s in this narrow corridor of time, between the Great Holiday Unloading and the new spring products coming in, that you can find some fantastic deals on Christmas decorations. Not that long ago, this would hardly be exciting news for the readers of Hackaday. But Christmas lights and decorations have really started pushing the envelope in terms of technology: addressable RGB LED strands, Bluetooth controlled effects, and as of the last couple years, friggin’ lasers.

That’s right, you’ve seen them all over the neighborhood, probably took a few stray beams to the eye, you might even own your own. Laser projectors have been one of the most popular Christmas decorations for the last couple of years, and it’s not hard to see why. Just set the projector up in front of your house, and you’re done. No need to get on a ladder and string lights on the roof when you can just blast some directed energy up there instead.

Given how popular they are, I was surprised to see a lone Home Accents Holiday Multi-Color Light Projector on the clearance rack at Home Depot for around $14 a few days after Christmas. This was a 75% price reduction from normal MSRP, and right in that sweet impulse-buy price range. Let’s see what’s hiding inside!

Continue reading “Teardown: What’s Inside A Christmas Laser Projector?”

Tis The Season For Terror With DIY Krampus

The holiday season is full of many sounds; walking through your neighborhood on a winter night you may hear time-honored songs, the tinkling of glasses, and the laughter of good company. But if the chilly wind also brings to your ear the panicked sounds of screaming children, you may have wandered a bit to close to [Tyler Garner]’s house.

Rather than old Saint Nick or a couple of reindeer, [Tyler] decided to top the roof of his home with a disturbingly well done rendition of everyone’s favorite��Austro-Bavarian goat-demon, Krampus. While he did finish the build off with a store-bought Krampus mask, every other component was made with about a 60/40 ratio of hardware to craft store scores. While your holiday decorations this year may not include any spawns of hell, the general construction techniques and resourcefulness [Tyler] shows in this build may come in handy when Halloween rolls around again.

The “skeleton” of Krampus is made up of PVC pipes and fittings mounted on an MDF base. Not only do the PVC fittings make it easy to recreate the rough anatomy of a humanoid figure, but if you don’t glue them all together, you can take it apart later for storage. We might have gone with something a little heartier than MDF for the base, but at least [Tyler] added a few pieces of galvanized pipe at the bottom to give it a little weight down low.

Things start to get interesting when [Tyler] adds sections of drainage pipe to his PVC skeleton to give it a more girth, as he was finding the bare PVC didn’t have a realistic presence when the robes were thrown over them. [Tyler] also uses expanding spray foam to soften up areas such as the hunched back, which may look messy but has the dual advantages of being cheap and fast.

The figure’s robes are made up of a patchwork of burlap, waterproofed with a spray on liner intended for pickup truck beds. With the application of red and black spray paint and the customary white fringe, it really nails the look.

A particularly nice detail is the hoof peeking out from beneath the robes, which [Tyler] made out of painted air-dry clay. It’s an awesome detail, though almost impossible to see once Krampus is mounted on the roof. Maybe it’s just us, but we think putting so much effort into a nearly hidden feature of a project is the true mark of a master craftsman; this is a secret little hoof that [Bob Ross] himself would be proud of.

While we can’t say we’ve played host to holiday scamps like Krampus or Belsnickle before, Hackaday has certainly seen its fair share of festive hacks over the years.

Massive Pixel Display Holiday Decoration

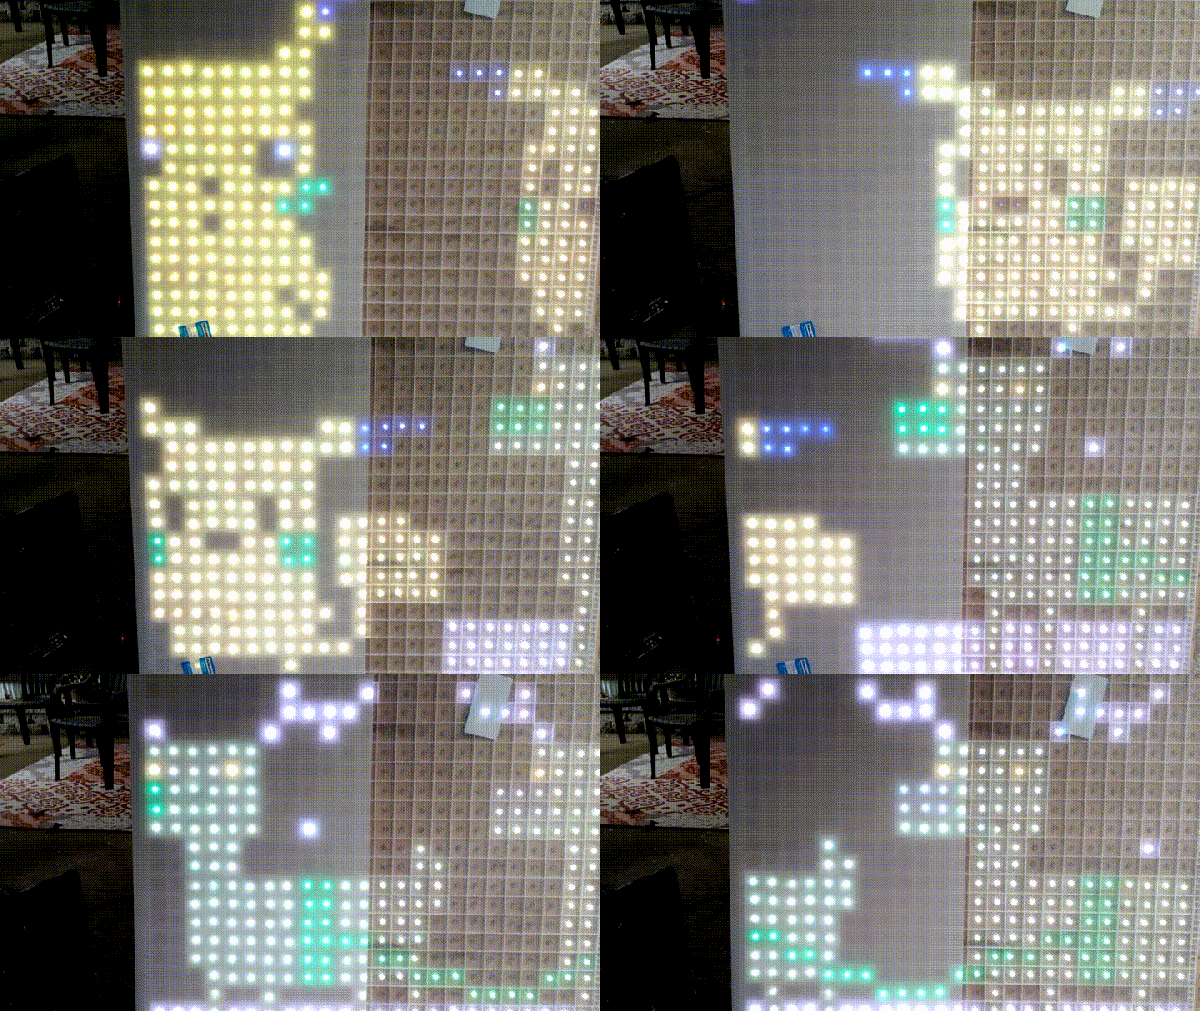
Decorating for the holidays is serious business! Finding themselves surrounded by neighbours who go big, redditor [wolfdoom] decided that this was the year to make a strong showing, and decided to build an oversized pixel LED display.

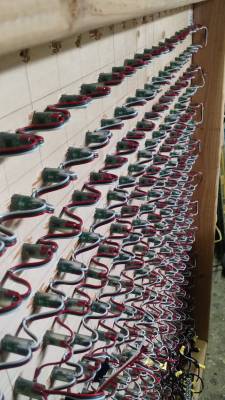
LED Pixel Holiday DisplayDemonstrating resourcefulness in their craft, [wolfdoom] found an old fluorescent light grid pattern to prevent bleed from one pixel to the next. Reusing this grid saves many hours of precision-cutting MDF — to be substituted with many hours of cutting the plastic with decidedly more room for error. Attaching the resulting grid to a sheet of plywood, and 576(!) drilled holes later, the LEDs were installed and laboriously wired together.

A Plastic light diffusing sheet to sell the pizel effect and a little help from their local maker space with the power circuit was enough to keep this project scrolling to completion — after the requisite period of basement-dwelling fabrication.


Despite some minor demotion attributed to a clumsy daughter, the massive 4×4 display remained a suitably festive decoration. For now the control system remains in [wolfdoom]’s basement, but with plans to incorporate it into the display’s frame down the road.

One of the more interesting LED matrix builds we saw this year is the one that uses 1575 beer bottles. For a more interactive holiday decorations, Halloween usually takes the cake — like this animated door knocker.

[via /r/DIY]