Readers of a certain age will remember a time when the Christmas season in the US officially kicked off after Thanksgiving. That was when advertisers began saturation bombing the communal mind with holiday-themed TV commercials night and day. Broadcast TV no longer holds sway like it did back then, and advertisers now start their onslaught in September, but you can put a little retro-commercialism back to Christmas with this 90s Christmas commercial-playing ornament for your tree.
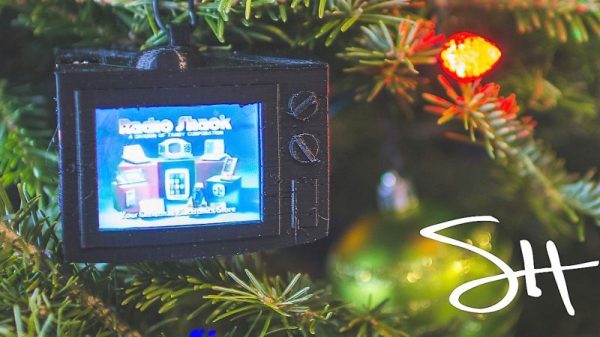
The idea came to [SeanHodgins] after stumbling upon a collection of Christmas commercials from the 1990s on YouTube. With his content identified, he set about building a tree-worthy display from a Pi Zero W and a TFT LCD display. An audio amp and tiny speaker from an old tablet and a LiPo battery and charger form the guts of [Sean]’s TV, which were stuffed into a 3D-printed TV case, appropriately modeled after the TV from The Simpsons. The small fresnel lens that mimics the curved screens of yore is a nice touch. The software has some neat tricks, such as an HTTP server that accepts the slug of a YouTube video, fetches the MP4, and automatically plays it. We prefer our Christmas tree ornaments a little quieter, so a volume control would have been nice, but aside from that this looks like a ton of fun.
This isn’t [Sean]’s first foray into tricked-out ornaments, of course; readers might recall his IoT cheer-measuring Christmas ornaments from last season.
Continue reading “Make Christmas Commercial Again With This Tiny TV Ornament”