Cathode-Retro is a collection of shaders and sample C++ code for reliving the glorious days when graphics were composite video signals displayed on a CRT screen. How? By faking it in software and providing more configuration options than any authentic setup ever had.
Love it or don’t, there’s nothing quite like it.
Not satisfied with creating CRT-style color images with optional scanlines and TV picture controls like tint and saturation, Cathode-Retro can emulate more nuanced elements as well.
The tool includes the ability to imitate things like the slight distortion of a period-correct curved screen, the subtle effects of different methods CRT displays used to actually work (such as shadow mask vs aperture grille), and even taking into account the slight distortion of light refracting imperfectly through the glass face of the CRT. There’s even options for adding noise and ghosting, which may spark some artistic ideas.
If all you need is software to recreate an old-school CRT terminal, we have you covered. But if your needs are a bit more low-level, Cathode-Retro might be what you’re missing.
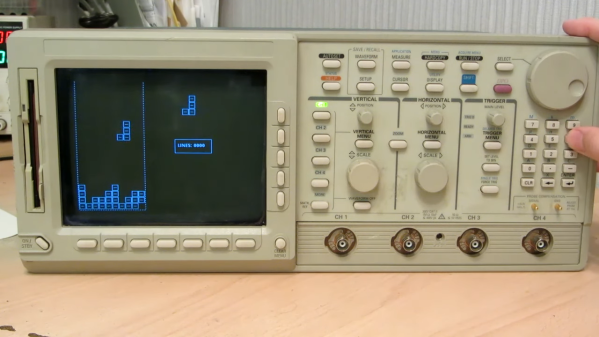
When we talk about video games on an oscilloscope, you’d be pardoned for assuming the project involved an analog CRT scope in X-Y mode, with vector graphics for something like Asteroids or BattleZone. Alas, this oscilloscope Tetris (Russian language, English translation) isn’t that at all — but that doesn’t make it any less cool.
If you’re interested in recreating [iliasam]’s build, it’ll probably help to be a retro-oscilloscope collector. The target instrument here is a Tektronix TDS5400, a scope from that awkward time when everything was going digital, but CRTs were still cheaper and better than LCDs. It’s based on a Motorola 68EC040 processor, sports a boatload of discrete ICs on its main PCB, and runs VxWorks for its OS. Tek also provided a 3.5″ floppy drive on this model, to save traces and the like, as well as a debug port, which required [iliasam] to build a custom UART adapter.
All these tools ended up being the keys to the kingdom, but getting the scope to run arbitrary code was still a long and arduous process, with a lot of trial and error. It’s a good story, but the gist is that after dumping the firmware onto the floppy and disassembling it in Ghidra, [iliasam] was able to identify the functions used to draw graphics primitives on the CRT, as well as the functions to read inputs from the control panel. The result is the simple version of Tetris seen in the video below. If you’ve got a similar oscilloscope, the code is up on GitHub.
When you’ve been a fact-sponge for electronics trivia for over four decades, it’s not often that an entire class of parts escapes your attention. But have you seen the Skiatron? It’s a CRT that looks like a normal mid-20th-century tube, until it’s switched on. Then its secret is revealed; instead of the glowing phosphor trace we’d expect, the paper-white screen displays a daylight-readable and persistent black trace. They’re invariably seen in videos of radar installations, with the 360 degree scans projected onto large table-top screens which show the action like a map. It’s like e-ink, but from the 1940s. What’s going on?
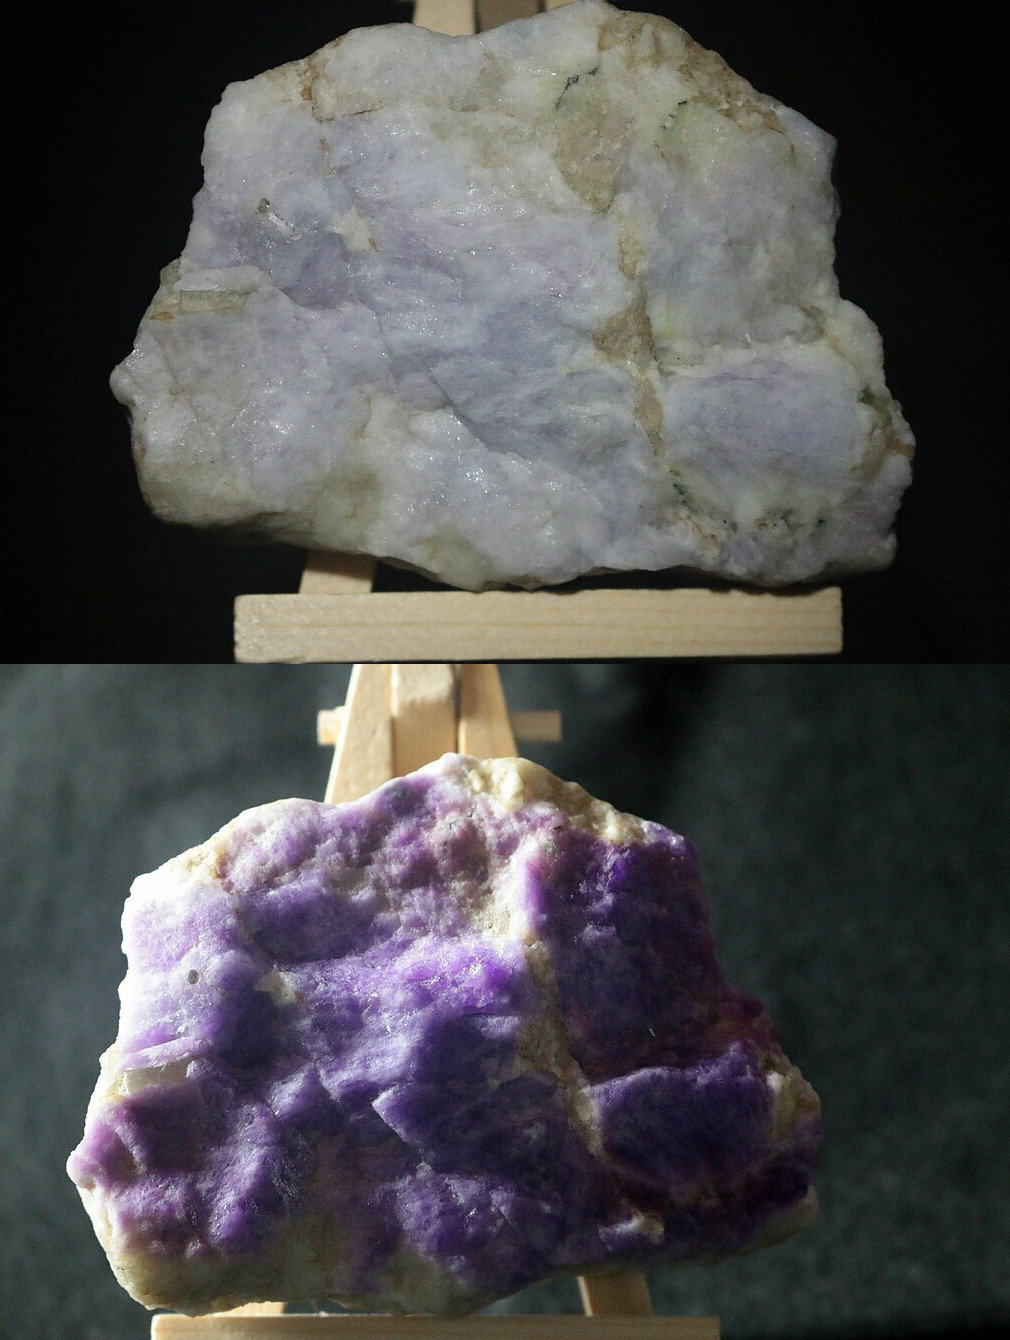
The tenebrescent mineral Hackmanite, before and after UV exposure. Leland Green…, CC BY-SA 2.0 and CC BY-SA 2.0.
The phosphor coating on a traditional CRT screen is replaced by a halide salt, and the property on which the display relies is called tenebrescence, changing colour under the influence of radiation. This seems most associated online with UV treatment of some minerals and gemstones to give them a prettier look, and its use a s a display technology is sadly forgotten.
A high-school physics understanding of the phenomenon is that energy from the UV light or the electron beam in the case of the tube, places some electrons in the crystal into higher energy levels, at which they absorb some visible light wavelengths. This is reversible through heat, in some substances requiring the application of heat while in others the heat of room temperature being enough. Of course here at Hackaday we’re hands-on people, so into the EPROM eraser went a small amount of table salt in a makeshift dish made of paper, but sadly not to be rewarded by a colour change.
On a real dark-trace CRT the dark trace would be illuminated from behind by a ring light round the glass neck of the tube. An interesting aside is that, unlike phosphor CRTs, they were more suitable for vertical mounting. It seems that small amounts of phosphor could detach themselves from a vertically mounted screen and drop into the electron gun, something that wasn’t a problem for tenebrescent coatings.
This display tech has shuffled off into the graveyard of obsolescence, we’re guessing because CRT technology became a lot better over the 1950s, and radar technologies moved towards a computerised future in which the persistence of the display wasn’t the only thing keeping the information on the screen. It seems at first sight to be a surprise that tenebrescent coatings have never resurfaced in other displays for their persistence, but perhaps there was always a better alternative whether it was ultra-low-power LCDs or more recently e-ink style devices.
For more bleeding-edge 1950s radar displays, we’ve previously brought you Volscan, a radar with an early form of GUI, which no doubt was one of those which consigned dark-trace CRTs to history.
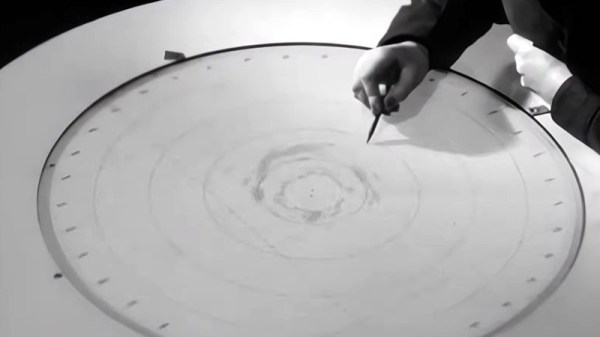
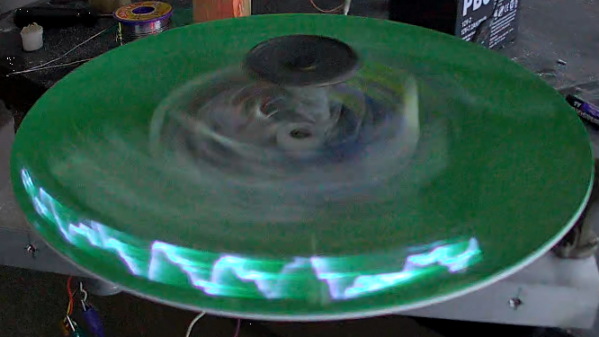
A question for you: if the cathode ray tube had never been invented, what would an oscilloscope look like? We’re not sure ourselves, but it seems like something similar to this mechanical tachyscope display might worked, at least up to a point.
What’s ironic about this scenario is that the tachyscope [Daniel Ross] built actually uses a CRT from a defunct camcorder viewfinder as the light-up bit of what amounts to a large POV display. The CRT’s horizontal coil is disconnected while the vertical coil is attached to the output of a TEA205B audio amplifier. The CRT, its drive electronics, and the amp are mounted to a motorized plastic platter along with a wireless baby monitor, to send audio to the CRT without the need for slip rings — although a Bluetooth module appears to be used for that job in the video below.
Speaking of slip rings, you’d expect one to make an appearance here to transfer power to the platter. [Daniel] used a slip ring for his previous steampunk tachyscope, but this time out he chose a hand-wound air core transformer, with a stationary primary coil and secondary coil mounted on the platter. With a MOSFET exciter on the primary and a bridge rectifier on the secondary, he’s able to get the 12 volts needed to power everything on the platform.
Like most POV displays, this one probably looks better in person than it does in video. But it’s still pretty cool, with the audio waveforms sort of floating in midair as the CRT whizzes around. [Daniel] obviously put a lot of work into this, not least with the balancing necessary to get this running smoothly, so hats off for the effort.
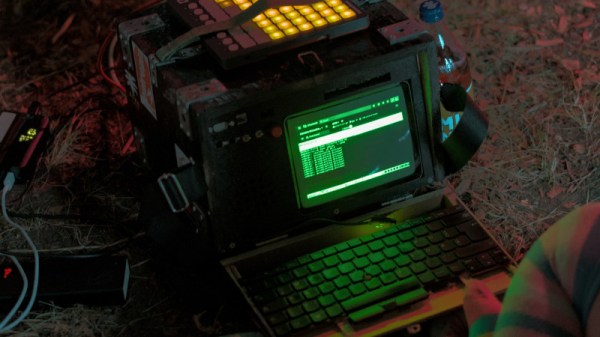
There was a time when portable computing meant not a svelte laptop but a suitcase-sized machine that was really a slimmed-down desktop with a small CRT incorporated int he same box. They were heavy and unwieldy, but the computing compromises of using one at the time were less than with what served for more portable machinery. It’s a form factor which understandably has long ago disappeared, but that hasn’t stopped [Sdomi] from reviving it with a machine that packs plenty of modern computing power.
It’s a project that started with a monitor, a diminutive green-screen model which had previously adorned a CNC machine. It’s a composite model, so it’s driven from a VGA-to-composite converter. The computing power comes from a thin-client board that packs an up-to-date AMD Ryzen processor and 32 GB of memory, and the case is manufactured from oriented strand chipboard.
The result is a chunky but definitely practical and usable take on a portable cyberdeck, with the caveat that a composite monitor will not deliver the resolution some of us might be used to. We have to admit rather liking it, there’s nothing like the curved glass of a CRT.
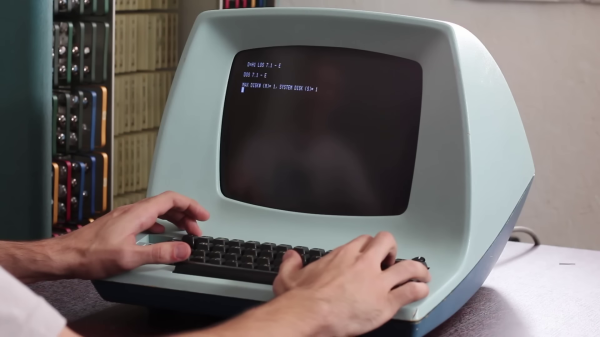
[David] at Usagi Electric ended up with an old Lear Siegler ADM-3A terminal in a trade a couple of years ago. But the CRT face was plagued with so-called cataracts, and the condition of the insides was unknown. The video ( below the break ) shows the restoration process, which went quite smoothly. [David] was relieved that the CRT repair in particular was easy, a fact he attributes to the Texas weather —
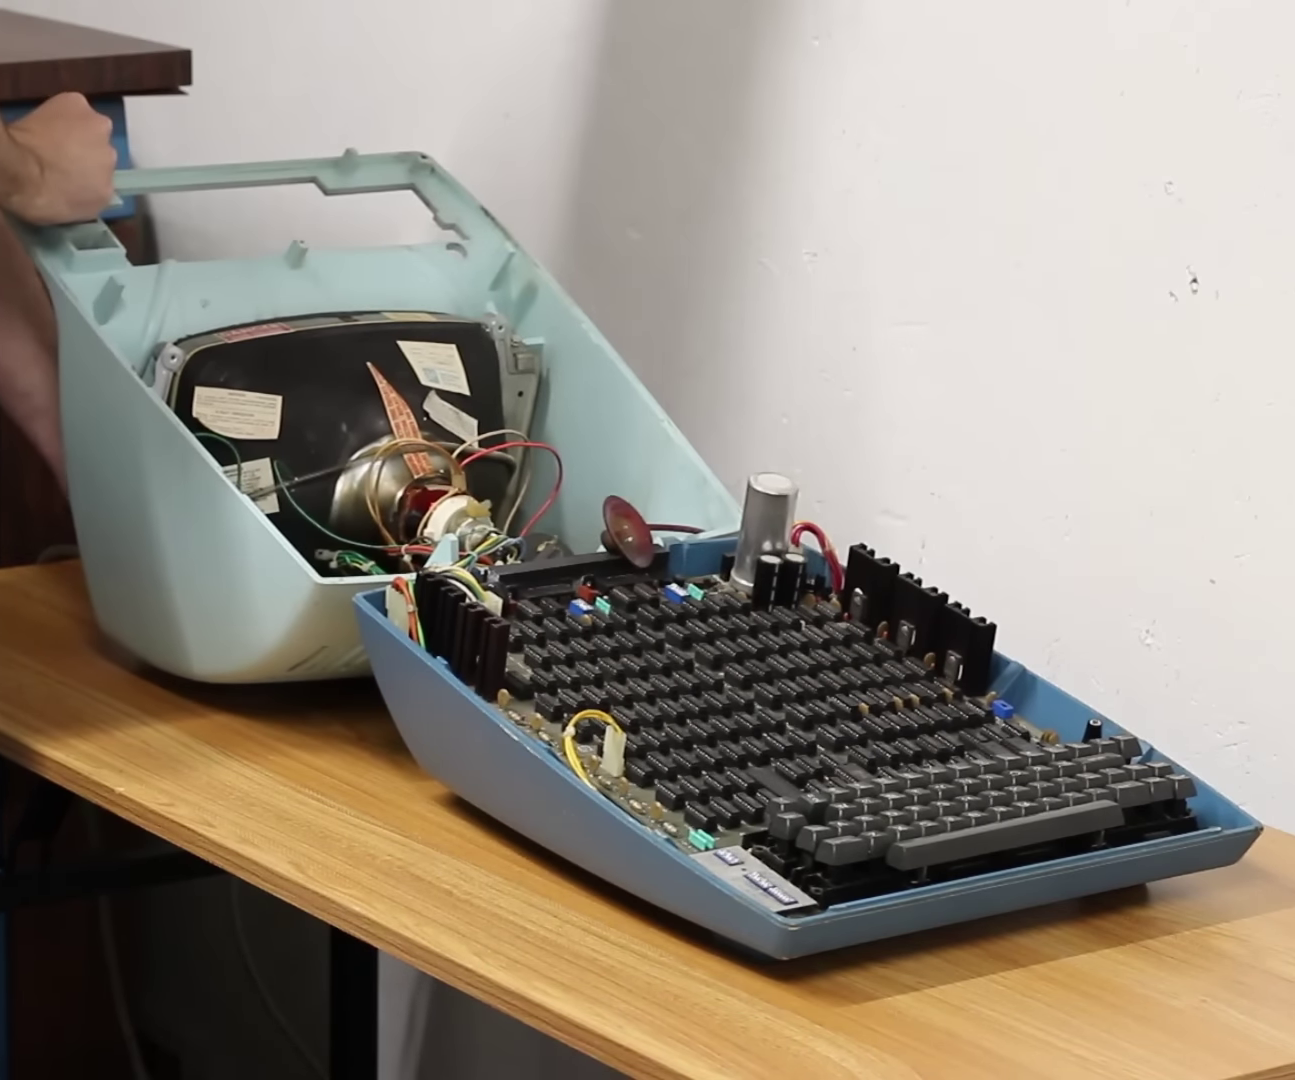
ADM-3A Under the Hood
The temperature was 110 F / 43 C when he set the CRT outside to bake in the sun for a few hours. Afterwards, removing the “integral implosion protection” plastic screen went better than expected. Everything cleaned up nicely and the screen reinstalled. Introduced in 1976, the main electronics board is chock full of TTL chips with nary a microprocessor in sight. Fortunately the board was substantially intact, and a single missing chip was found hidden underneath the board. [David] gets the terminal up and running in short order, and is confronted with an annoyance familiar to gray-haired programmers who grew up in this era. Most terminals had different sets of commands to control features such as cursor control and clearing parts or all of the screen. Programs often assumed a certain type of terminal. Some terminals could be configured to behave in different ways, and some programs offered the user a choice of terminals. Today your terminal emulator probably still has a few choices of which kind of terminal to emulate, VT-100 being the most common. And eventually some operating systems provided a terminal abstraction, like Unix’s termcap for example.
If you were around in the era where terminals like the ADM-3A were scattered everywhere, what was your favorite terminal and/or terminal feature? And today, do you have any favorite terminal emulator to recommend? Let us know in the comments below.
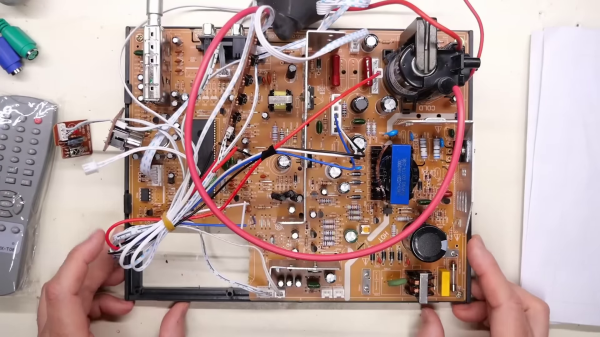
While browsing AliExpress from his digital basement, [Adrian Black] stumbled upon what seemed like a brand-new mainboard for a CRT television set. He decided to take a gamble and ordered one. It finally arrived, and was indeed a brand new product from 2023.
DIGITAL MAIN BOARD OF TV, Work ath [sic] HONGXUN products with the care and precision of a sculptor in each step, wonderful have no limits
CRT Mainboard Transplant in Progress
Dubious marketing descriptions like “High Definition Digital Color TV Driver Board” aside, this turned out to be a fairly well-designed analog TV board. [Adrian] pulls a 20-year-old Magnavox ( Philips ) color television set from storage and begins the transplant operation. One interesting observation is the Magnavox board has almost the same layout as the new board, except for the orientation of the sections. The new CRT neck board had a different connector than the Magnavox set, but was designed to accept multiple sized sockets. [Adrian] just removed the new socket and replaced it with one from the old set. The mechanical issues were a bit more complicated, but nothing that a Dremel tool and a bit of hot glue can’t fix. The 220 VAC power supply was eventually modified to accept 110 VAC, which also enabled him to reconnect the degaussing coil.
[Adrian] has collected some relevant documentation in this GitHub repository, including schematics. Why bother with this at all? Well, until now, he didn’t have any way to test / view PAL RF signals in his lab. He was gambling on the new mainboard having a PAL tuner. It does, but as an unadvertised bonus, it supports NTSC and SECAM as well — but still not “HD digital color TV”, as far as we know. If you want a multi-standard TV in your lab, this solution may be worth considering. It appears there is still a market somewhere for new CRT televisions. If you have any background on this, please let us know down below in the comments.