Have You Ever Tried Desoldering Needles?

If you are an electronics enthusiast who has a tendency to hoard junk because it Might Be Useful Someday, you may well have a significant experience when it comes to desoldering. Why order that component, when you’ve got one on this old board?

So we’ve become experts in removing old components from dead PCBs, so when it comes to desoldering techniques you might think we’ve seen it all, there’s nothing new to learn. Then along comes [fede.tft], with a tip of a desoldering tool that’s new to us. The video below the break from [MSylvain59] demonstrates the needles in action, what do you think? Have any of you used a desoldering needle?

This is a set of tools you might use to desolder a through-hole component with a wire-end poking out beneath the board. The idea is that as stainless steel needles the solder won’t adhere to them, so you can select the appropriate size and use it to push out the lead from below.

We remain to be convinced, as it seems to be a slightly more fiddly way to do what we’ve used a small screwdriver for to lever from above the board for years, but it’s always worth talking about a tool that could be a useful new weapon in our armoury.

Continue reading “Have You Ever Tried Desoldering Needles?”

Fixing Fake FTDIs

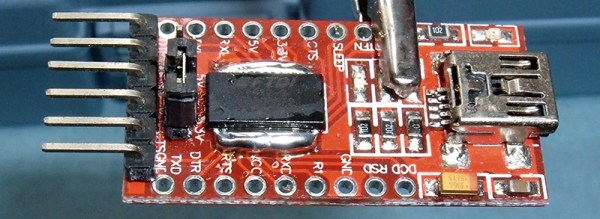
If you know where to go on the Internet, you can pick up an FTDI USB to Serial adapter for one dollar and sixty-seven cents, with free shipping worldwide. The chip on this board is an FTDI FT232RL, and costs about two dollars in quantity. This means the chips on the cheap adapters are counterfeit. While you can buy a USB to serial adapter with a legitimate chip, [Syonyk] found a cheaper solution: buy the counterfeit adapters, a few genuine chips, and rework the PCB. It’s brilliant, and an excellent display of desoldering prowess.

Why is [Syonyk] replacing non-genuine chips with the real FTDI? The best reason is FTDIgate Mk. 1, where the official FTDI driver for Windows detected non-genuine chips and set the USB PID to zero. This bricked a whole bunch of devices, and was generally regarded as a bad move. FTDIgate Mk. 2 was a variation on a theme where the FTDI driver would inject garbage data into a circuit if a non-genuine part was found. This could also brick devices. Notwithstanding driver issues, the best reason for swapping out fake chips for real ones is the performance at higher bit rates; [Syonyk] is doing work at 3 Mbps, and the fake chips just don’t work that fast.

To replace the counterfeit chip, [Syonyk] covered the pins in a nice big glob of solder, carefully heated both sides of the chip, and slid the offending chip off when everything was molten. A bit of solder braid, and the board was ready for the genuine chip.

With the new chip, the cheap USB to serial adapter board works perfectly, although anyone attempting to duplicate these efforts might want to look into replacing the USB mini port with a USB micro port.

Turn Cheap USB Soldering Irons In To Tweezers

This is 2016, and almost every hacker dabbles with SMD parts now, unlike back in the day. This means investing in at least some specialized tools and equipment to make the job easier. One handy tool is the SMD soldering tweezers – useful not only for manual soldering of parts, but also for de-soldering them quickly and without causing damage to the part or the board. Often, especially when repairing stuff, using a hot air gun can get tricky if you want to remove just one tiny part.

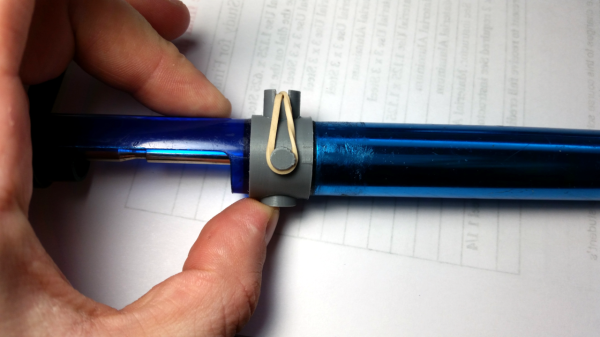
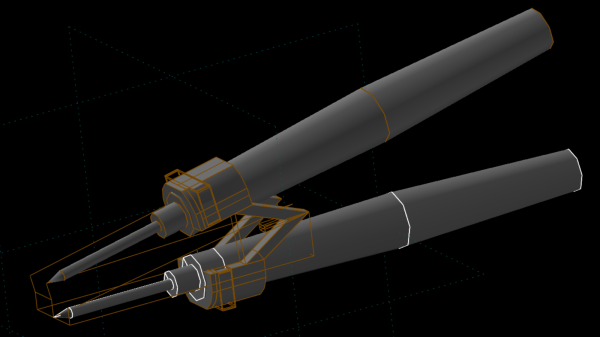
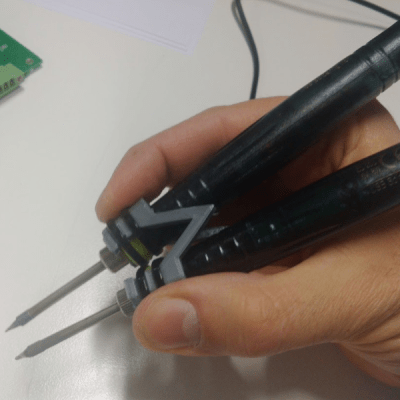
smd_tweezer_04[adria.junyent-ferre] took a pair of cheap £5 USB soldering irons and turned them into a nifty pair of SMD soldering tweezers. The two irons are coupled together using a simple, 3D printed part. [adria]’s been through a couple of iterations, so the final version ought to work quite well. The video after the break shows him quickly de-soldering a bunch of 0805 SMD resistors in quick succession.

Earlier this year, we had posted [BigClive]’s tear down of these 8 watt USB soldering irons which turned out to be surprisingly capable and this spurred [adria] to order a couple to try them out.

The 3D printed part is modeled in SolveSpace – a parametric 2D and 3D CAD software that we blogged about a while ago. Continue reading “Turn Cheap USB Soldering Irons In To Tweezers”

Ask Hackaday: Calling All 68k Experts

This is a tale of old CPUs, intensive SMD rework, and things that should work but don’t.

Released in 1994, Apple’s Powerbook 500 series of laptop computers were the top of the line. They had built-in Ethernet, a trackpad instead of a trackball, stereo sound, and a full-size keyboard. This was one of the first laptops that looked like a modern laptop.

The CPU inside these laptops — save for the high-end Japan-only Powerbook 550c — was the 68LC040. The ‘LC‘ designation inside the part name says this CPU doesn’t have a floating point unit. A few months ago, [quarterturn] was looking for a project and decided replacing the CPU would be a valuable learning experience. He pulled the CPU card from the laptop, got out some ChipQuick, and reworked a 180-pin QFP package. This did not go well. The replacement CPU was sourced from China, and even though the number lasered onto the new CPU read 68040 and not 68LC040, this laptop was still without a floating point unit. Still, it’s an impressive display of rework ability, and generated a factlet for the marginalia of the history of consumer electronics.

Faced with a laptop that was effectively unchanged after an immense amount of very, very fine soldering, [quarterturn] had two choices. He could put the Powerbook back in the parts bin, or he could source a 68040 CPU with an FPU. He chose the latter. The new chip is a Freescale MC68040FE33A. Assured by an NXP support rep this CPU did in fact have a floating point unit, [quarterturn] checked the Mac’s System Information. No FPU was listed. He installed NetBSD. There was no FPU installed. This is weird, shouldn’t happen, and now [quarterturn] is at the limits of knowledge concerning the Powerbook 500 architecture. Thus, Ask Hackaday: why doesn’t this FPU work?

Continue reading “Ask Hackaday: Calling All 68k Experts”

Hackaday Links: March 20, 2016

Western Digital introduced their second revision of the PiDrive this week. This is a native USB hard drive – formatted to 314GB – based on the WD Blue drive. The earlier version of the WD PiDrive was 1TB, and cost about $70 USD. The new, 314GB version, sells for about $35. Does Western Digital manufacture 314GB hard drives? No, that would be stupid. Who’s taking bets on the actual capacity of these drives?

[SopaXorsTaker] has introduced us to a brand new way of removing BGA chips. PCBs are usually more flexible than chips, and a few whacks with a hammer is all that’s needed.

For the last few months, [quarterturn] has been upgrading a PowerBook 520. He’s trying to replace the CPU with a 68040 that has an FPU. His first attempt failed, and his second attempt – a new Freescale part that certainly has an FPU – also failed. It’s great experience in desoldering and reworking fine-pitch QFP parts, but [quarterturn] has no idea why the Apple System Profile reports an FPU-less CPU. It might be something in the ROM that tells the PowerBook not to use the FPU, in which case the obvious upgrade would be to replace the ROM with one from a PowerBook 550c or a Sonnet upgrade card. If you have either of those, I’m sure [quarterturn] would like to have a word with you.

LIDAR! We all know what the coolest use of LIDAR is, but it’s also useful for robots, drones, and other autonomous thingamadoos. Here’s a Kickstarter for a LIDAR module, 40 meter range, 360 degree range, 500 samples per second, and UART/USB connections.

[Bill] is trying to start a Makerspace in Fort Lauderdale. Here’s the indiegogo campaign.

We launched the 2016 Hackaday Prize this week. Why should you enter? Because last year, it seemed everyone who entered early won something. There’s $300,000 worth of prizes on the line. Need an idea? [Dave Darko] has just the thing for you. It’s the Hackaday Prize Buzzword Generator, the perfect thing for spitballing a few ideas and seeing what sticks.

stupid-ideas

Upgrading And Desoldering A Fake CPU

[quarterturn] had an old Apple Powerbook 520c sitting around in his junk bin. For the time, it was a great computer but in a more modern light, it could use an upgrade. It can’t run BSD, either: you need an FPU for that, and the 520 used the low-cost, FPU-less version of the 68040 as its main processor. You can buy versions of the 68040 with FPUs direct from China, which means turning this old Powerbook into a BSD powerhouse is just a matter of desoldering and upgrading the CPU. That’s exactly what [quarterturn] did, with an unexpected but not surprising setback.

The motherboard for the Powerbook 500 series was cleverly designed, with daughter cards for the CPU itself and RAM upgrades. After pulling the CPU daughter card from his laptop, [quarterturn] faced his nemesis: a 180-pin QFP 68LC040. Removing the CPU was handled relatively easily by liberal application of ChipQuik. A few quick hits with solder braid and some flux cleaned everything up, and the daughter card was ready for a new CPU.

The new FPU-equipped CPU arrived from China, and after some very careful inspection, soldering, and testing, [quarterturn] had a new CPU for his Powerbook. Once the Powerbook was back up and running, there was a slight problem. The chip was fake. Even though the new CPU was labeled as a 68040, it didn’t have an FPU. People will counterfeit anything, including processors from the early 90s. This means no FPU, no BSD, and [quarterturn] is effectively back to square one.

That doesn’t mean this exercise was a complete loss. [quarterturn] did learn a few things from this experience. You can, in fact, desolder a dense QFP with ChipQuik, and you can solder the same chip with a regular soldering iron. Networking across 20 years of the Macintosh operating system is a mess, and caveat emptor doesn’t translate into Mandarin.

Desoldering Doesn’t Necessarily Suck

What’s your favorite way to fix soldering mistakes or get usable components off that board you found in a Dumpster? I’ve always been partial to desoldering braid, though I’ve started to come around on the vacuum pump depending on the situation. [Proto G] sent in an Instructable that outlines nine different ways to desolder components that take varying amounts of time and skill.

He starts with one that is often overlooked if you don’t have a solder pot. [Proto G] recommends this method only when you don’t want to keep the board. Cover the solder joints of the components you want to keep with flux and hold it over the solder pot while pulling out the components with pliers. The flux isn’t critical, but it makes removal faster and easier.

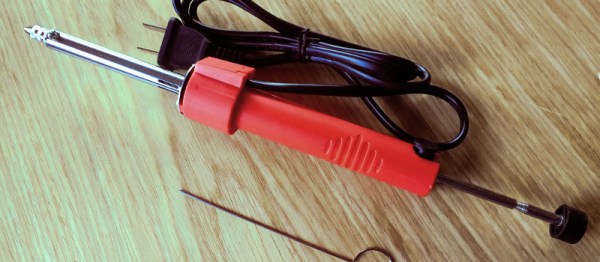
For boards in need of repair, [Proto G] uses a manual pump or copper desoldering braid that comes coated with flux. If you can afford one, a desoldering machine seems like the way to go—it combines the heat of a soldering iron with the vacuum of a manual pump. Desoldering tweezers and hot air rework stations look like great ways to remove surface mount components.

If you enjoyed this, check out [Bil Herd’s] guide on component desoldering. There are also few ways that [Proto G] doesn’t mention, like holding the board over an alcohol flame. Let us know your favorite desoldering method in the comments.

Continue reading “Desoldering Doesn’t Necessarily Suck”