Biometric Authentication With A Cheap USB Hub

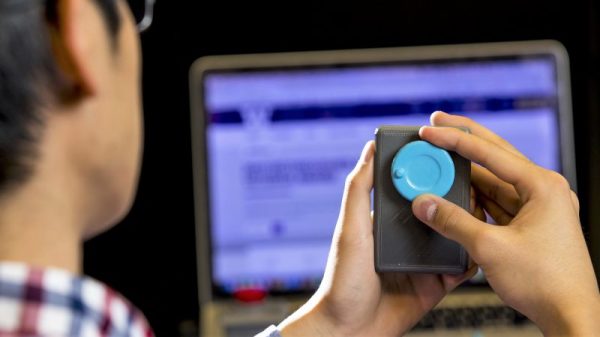
It’s fair to say that fingerprints aren’t necessarily the best idea for device authentication, after all, they’re kind of everywhere. But in some cases, such as a device that never leaves your home, fingerprints are an appealing way to speed up repetitive logins. Unfortunately, fingerprint scanners aren’t exactly ubiquitous pieces of hardware yet. We wouldn’t hold out much hope for seeing a future Raspberry Pi with a fingerprint scanner sitting on top, for example.

Looking for a cheap way to add fingerprint scanning capabilities to his devices, [Nicholas] came up with a clever solution that is not only inexpensive, but multi-functional. By combining a cheap USB hub with a fingerprint scanner that was intended as a replacement part of a Thinkpad laptop, he was able to put together a biometric USB hub for around $5 USD.

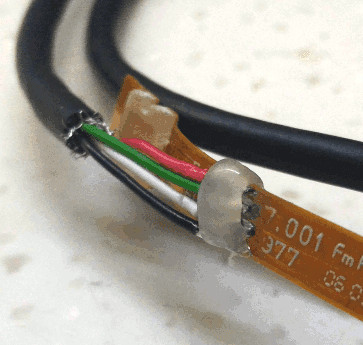
After buying the Thinkpad fingerprint scanner, he wanted to make sure it would be detected by his computer as a standard USB device. The connector and pinout on the scanner aren’t standard, so he had to scrape off the plastic coating of the ribbon cable and do some probing with his multimeter to figure out what went where. Luckily, once he found the ground wire, the order of the rest of the connections were unchanged from normal USB.

When connected to up his Ubuntu machine, the Thinkpad scanner came up as a “STMicroelectronics Fingerprint Reader”, and could be configured with libpam-fprintd.

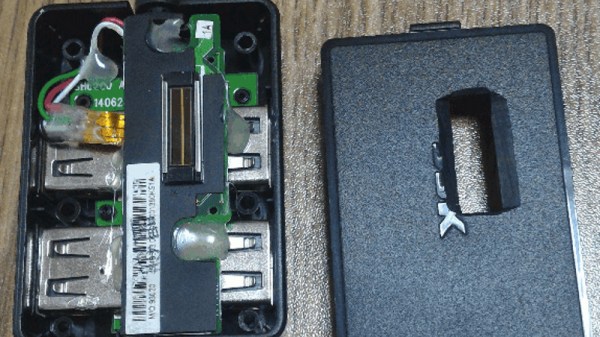
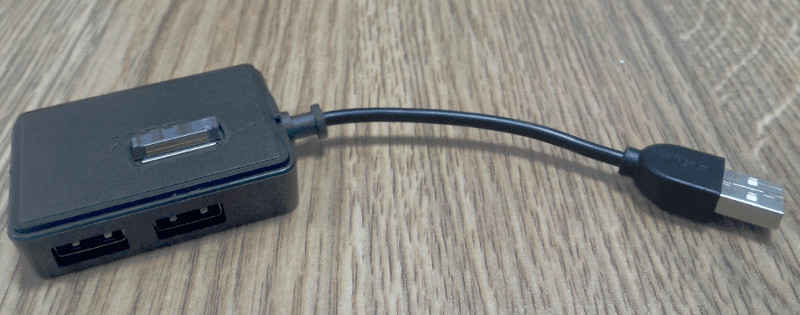
With the pintout and software configuration now known, all that was left was getting it integrated into the USB hub. One of the hub’s ports was removed and filled in with hot glue, and the fingerprint scanner connected in its place. A hole was then cut in the case of the hub for the scanner to peak out of. [Nicholas] mentions his Dremel is on loan to somebody else at the moment, and says he’ll probably try to clean the case and opening up a bit when he gets it back.

[Nicholas] was actually inspired to tackle this project based on a Hackaday post he read awhile back, so this one has truly come full circle. If you’d like to learn more about fingerprint scanning and the techniques being developed to improve it, we’ve got some excellent articles to get you started.

DIY Wooden Building Blocks

If you have access to a drill press, saw, and sander, and are looking for a great present for smaller children this holiday season, [Jonny] may have you covered. He’s come up with a pretty good how to on making some simple block and dowel building blocks similar to the Tinkertoy building sets.

This is a fairly simple build if you have the shop tools, and if you only have hand tools available, is still quite doable. The blocks consist of square wooden blocks with holes drilled into them and a bunch of wooden dowels cut to size. [Jonny] adds a wooden box with a hinged lid for storing the blocks in as an added feature of the build,.

There are no LEDs lighting up, no Arduino-powered microcontroller involved, and they don’t connect to the internet, but that doesn’t make them any less of a great toy. Even without the shop tools, these could be made pretty quickly even by someone without prior experience with woodworking. If you’re interested in building block toys, check out this write-up about a way to combine different types of building blocks together, or check out this write-up about creating the frame of a DIY CNC mill with a metal building set.

Continue reading “DIY Wooden Building Blocks”

Hands On With PocketBeagle

[Ken Shirriff] is no stranger to the pages of Hackaday. His blog posts are always interesting, and the recent one talking about the PocketBeagle is no exception. If you are old enough to remember the days when a Unix workstation set you back tens of thousands of dollars, you won’t be able to help yourself marveling at a Linux computer with 45 I/O pins, 8 analog inputs, 512M of RAM, and a 1 GHz clock, that fits in your pocket and costs $25. What’s more the board’s CPU has two 200 MHz auxiliary CPUs onboard to handle I/O without having to worry about Linux overhead.

These last parts are significant, and although the Beagles have had this feature for years ([Ken] talked about it earlier), the access and communication methods for using these slave processors has become easier. [Ken] shows a small snippet of C code that outputs a 40 MHz square wave no matter what the Linux OS is doing. In this way you can use Linux for the parts of your application that are not that critical, and use the slave processors to handle real time processing.

Continue reading “Hands On With PocketBeagle”

Another Defeat Of The Intel Management Engine

If you have a computer with an Intel processor that’s newer than about 2007, odds are high that it also contains a mystery software package known as the Intel Management Engine (ME). The ME has complete access to the computer below the operating system and can access a network, the computer’s memory, and many other parts of the computer even when the computer is powered down. If you’re thinking that this seems like an incredible security vulnerability then you’re not alone, and a team at Black Hat Europe 2017 has demonstrated yet another flaw in this black box (PDF), allowing arbitrary code execution and bypassing many of the known ME protections.

[Mark Ermolov] and [Maxim Goryachy] are the two-man team that discovered this exploit, only the second of its kind in the 12 years that the ME has been deployed. Luckily, this exploit can’t be taken advantage of (yet) unless an attacker has physical access to the device. Intel’s firmware upgrades also do not solve the problem because the patches still allow for use of older versions of the ME. [Mark] and [Maxim] speculate in their presentation that this might be fixed on the next version of the ME, but also note that these security vulnerabilities would disappear if Intel would stop shipping processors with the ME.

We won’t hold our breath on Intel doing the right thing by eliminating the ME, though. It’s only a matter of time before someone discovers a zero-day (if they haven’t already, there’s no way to know) which could cripple pretty much every computer built within the last ten years. If you’re OK with using legacy hardware, though, it is possible to eliminate the management engine and have a computer that doesn’t have crippling security vulnerabilities built into it. This post was even written from one. Good luck doing anything more resource-intensive with it, though.

Alan Yates: Introduction To Vacuum Technology

When we mention vacuum technology, it’s not impossible that many of you will instantly turn your minds to vacuum tubes, and think about triodes, or pentodes. But while there is a lot to interest the curious in the electronics of yesteryear, they are not the only facet of vacuum technology that should capture your attention.

When [Alan Yates] gave his talk at the 2017 Hackaday Superconference entitled “Introduction To Vacuum Technology”, he was speaking in a much more literal sense. Instead of a technology that happens to use a vacuum, his subject was the technologies surrounding working with vacuums; examining the equipment and terminology surrounding them while remaining within the bounds of what is possible for the experimenter. You can watch it yourself below the break, or read on for our precis.

In the first instance, he introduces us to the concept of a vacuum, starting with the work of [Evangelista Torricelli] on mercury barometers in the 17th century Italy, and continuing to explain how pressure, and thus vacuum, is quantified. Along the way, he informs us that a Pascal can be explained in layman’s terms as roughly the pressure exerted by an American dollar bill on the hand of someone holding it, and introduces us to a few legacy units of vacuum measurement.

In classifying the different types of vacuum he starts with weak vacuum sources such as a domestic vacuum cleaner and goes on to say that the vacuum he’s dealing with is classified as medium, between 3kPa and 100mPa. Higher vacuum is beyond the capabilities of the equipment available outside high-end laboratories.

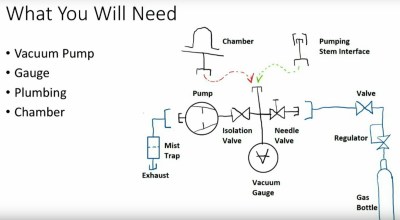
Introduction over, he starts on the subject of equipment with a quick word about safety, before giving an overview of the components a typical small-scale vacuum experimenter’s set-up. We see the different types of vacuum gauges, we’re introduced to two different types of service pumps for air conditioning engineers, and we learn about vacuum manifolds. Tips such as smelling the oil in a vacuum pump to assess its quality are mentioned, and how to make a simple mist trap for a cheaper pump. There is a fascinating description of the more exotic pumps for higher vacuums, even though these will be out of reach of the experimenter it is still of great interest to have some exposure to them. He takes us through vacuum chambers, with a warning against cheap bell jars not intended for vacuum use, but suggests that some preserving jars can make an adequate chamber.

We are then introduced to home-made gas discharge tubes, showing us a home-made one that lights up simply by proximity to a high voltage source. Something as simple as one of the cheap Tesla coil kits to be found online can be enough to excite these tubes, giving a simple project for the vacuum experimenter that delivers quick results.

Finally, we’re taken through some of the tools and sundries of the vacuum experimenter, the different types of gas torches for glass work, and consumables such as vacuum grease. Some of them aren’t cheap, but notwithstanding those, he shows us that vacuum experiments can be made within a reasonable budget.

Continue reading “Alan Yates: Introduction To Vacuum Technology”

Radio Amateuring Like It’s 1975

It was a tweet from an online friend in the world of amateur radio, featuring a transmitter design published in Sprat, the journal of the G-QRP club for British enthusiasts of low-power radio. The transmitter was very simple, but seriously flawed: keying the power supply line would cause it to exhibit key clicks and frequency instability. It would probably have been far better leaving the oscillator connected full-time and keying the supply to the amplifier, with of course a suitable key click filter.

[M0CVO]'s Tweet that started it all
[M0CVO]’s Tweet that started it all
We’ve all probably made projects that get the job done at the expense of a bit of performance and economy, and from one angle this circuit is a fantastic example of that art. But it’s not the shortcomings of direct PSU keying a small transmitter that has brought it here, but observation instead of what it represents. Perhaps my social group of radio amateurs differs from the masses, but among them the universal lament is that there is nothing new in a simple transistor transmitter that could just as well have been published in 1977 as 2017.

To explain why this represents a problem, it’s worth giving some background. Any radio amateur will tell you that amateur radio is a wonderful and diverse pastime, in fact a multitude of pastimes rolled into one. Working DX? Got you covered. Contesting? UR 599 OM QRZ? Digital modes pushing the envelope of atmospheric propagation? Satellites? SDRs? GHz radio engineering? All these and many more can be yours for a modest fee and an examination pass. There was a time when radio was electronics, to all intents and purposes, and radio amateurs were at the vanguard of technology. And though electronics has moved on from those days of purely analogue communications and now stretches far beyond anything you’d need a licence and a callsign to investigate for yourself, there are still plenty of places in which an amateur can place themselves at the cutting edge. Software defined radio, for instance, or digital data transmission modes. With an inexpensive single board computer and a few components it is now possible to create a software-defined digital radio station with an extremely low power output, that can be copied on the other side of the world. That’s progress, it’s not so long ago that you would have required a lot of dollars and a lot of watts to do that. Continue reading “Radio Amateuring Like It’s 1975”

The Internet Of Non-Electronic Things

The bill of materials for even the simplest IoT project is likely to include some kind of microcontroller with some kind of wireless module. But could the BOM for a useful IoT thing someday list only a single item? Quite possibly, if these electronics-less 3D-printed IoT devices are any indication.

While you may think that the silicon-free devices described in a paper (PDF link) by University of Washington students [Vikram Iyer] and [Justin Chan] stand no chance of getting online, they’ve actually built an array of useful IoT things, including an Amazon Dash-like button. The key to their system is backscatter, which modulates incident RF waves to encode data for a receiver. Some of the backscatter systems we’ve featured include a soil sensor network using commercial FM broadcasts and hybrid printable sensors using LoRa as the carrier. But both of these require at least some electronics, and consequently some kind of power. [Chan] and [Iyer] used conductive filament to print antennas that can be mechanically switched by rotating gears. Data can be encoded by the speed of the alternating reflection and absorption of the incident WiFi signals, or cams can encode data for buttons and similar widgets.

It’s a surprisingly simple system, and although the devices shown might need some mechanical tune-ups, the proof of concept has a lot of potential. Flowmeters, level sensors, alarm systems — what kind of sensors would you print? Sound off below.

Continue reading “The Internet Of Non-Electronic Things”