Doing MIDI With Discrete Logic Is Neat, If Not Particularly Useful

MIDI is normally baked into the chipset of a synthesizer, or something you use a microcontroller to handle. But that’s not the only way to speak the language! [Kevin] decided to have some fun doing MIDI with discrete logic instead, with some pretty neat results.

[Kevin] had previously built a control voltage step sequencer called the Baby8, which relied on 4017 counter ICs. He later realized he could repurpose three of his old Baby8 PCBs to create something that could generate MIDI using nothing more than discrete logic. The stack of three boards generate a simple MIDI message—in this case, a two-byte Program Change command. At 8 bits per byte, plus a start and stop bit, that comes out to 20 bits in total. The bits to be sent are configured via the switches on the PCBs, and clocked out through the counter ICs via a clock running at the MIDI baud rate of 31,250 Hz.

Obviously, it’s not very practical to code your MIDI commands manually via DIP switches and then clock them out in this fashion. But—it does work, and you can do it! If you wanted to build an old-school logic circuit that just spits out simple short MIDI commands, this is one way to go about it.

We’ve seen [Kevin]’s work before, too, like this neat musical rotary phone build.

Continue reading “Doing MIDI With Discrete Logic Is Neat, If Not Particularly Useful”

Time Bandit Clock Hits The Aesthetic Jackpot

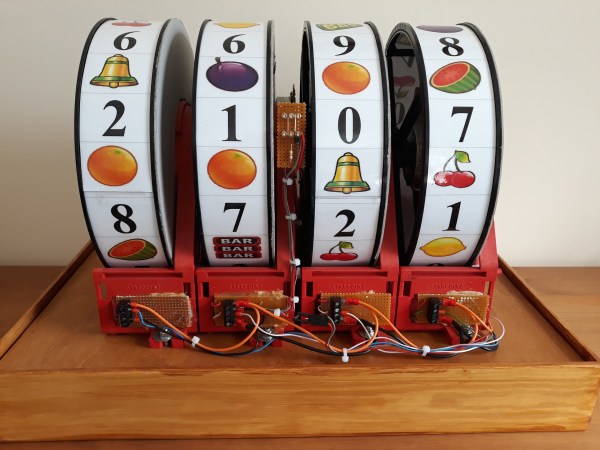
When was the last time you looked forward to looking at a clock? Not to find out the time per se — like gee, maybe it’s beer o’ clock already — but waited with bated breath to gaze upon a particular clock? Never? We don’t blame you, but only because you haven’t seen this fruit machine clock in action yet.

Every 60 seconds, the reels start spinning like some little man inside pulled the lever on a slot machine (or fruit machine, as they’re called across the pond). The reels slow down and stop one by one, left to right, settling on the four digits of time in 24-hour mode. Imagine the suspense of coming to see what time it is just as the reels start spinning!

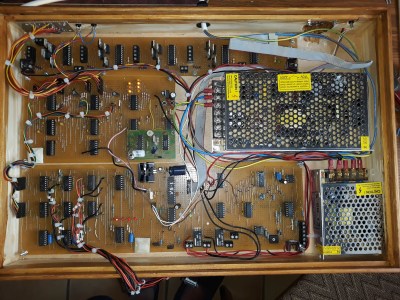
[timebanditclock] grew this fruit machine out of old-school discrete logic beautifully applied to stripboard. Each of the reels has a DIY binary encoder that uses IR transmit/receive pairs to generate a binary word. These four binary words are compared to a binary clock module using comparators.

We think this is an amazing concept already, but then [timebanditclock] worked overtime by doing it all in discrete logic. Spin past the break to see a demo and stick around for the build video.

Want a challenging clock build that’s a little less challenging? Maybe it’s time to try circuit sculpture.

Continue reading “Time Bandit Clock Hits The Aesthetic Jackpot”

Building Video Pong With Discrete Components

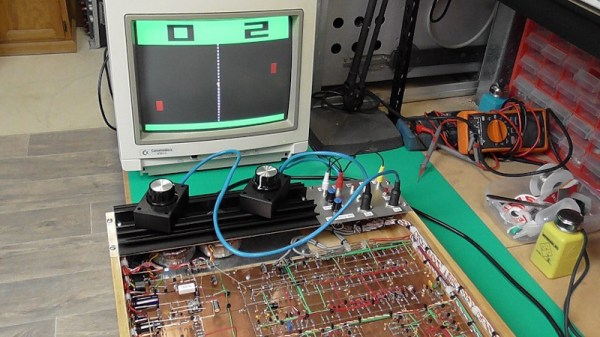
Pong is a classic from the very dawn of the video game era. Recreating it remains a popular exercise for those new to coding. However, its simple logic makes this game particularly suited to an all-hardware build; something which [Glen] tackles with aplomb.

Not content to take the easy way out, [Glen] went for a particularly hardcore method of construction. The game uses absolutely zero integrated circuits in its construction. Instead, it relies upon the services of 431 bipolar transistors, 6 JFETs and 826 diodes. Everything is laced together on protoboard, connected with a neatly organised nest of colored wires. Schematics are available for the curious.

It’s a full featured build, too. Video output is in color, scores are displayed at the top of the screen, and there’s even stereo panning for the sound effects. It just goes to show what some humble components can do when put to work in the right way. We’ve seen some of [Glen]’s work before too, for example in this op-amp bouncing ball device. Video after the break.

Continue reading “Building Video Pong With Discrete Components”

DIY Coil Gun Redux: Life Really Is Easier With Arduino

A common complaint in the comments of many a Hackaday project is: Why did they use a microcontroller? It’s easy to Monday morning quarterback someone else’s design, but it’s rare to see the OP come back and actually prove that a microcontroller was the best choice. So when [GreatScott] rebuilt his recent DIY coil gun with discrete logic, we just had to get the word out.

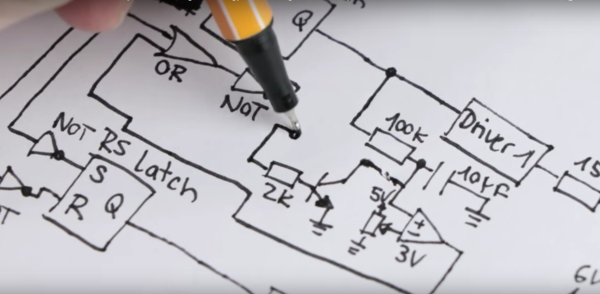
You’ll recall from the original build that [GreatScott] was not attempting to build a brick-wall blasting electromagnetic rifle. His build was more about exploring the concepts and working up a viable control mechanism for a small coil gun, and as such he chose an Arduino to rapidly prototype his control circuit. But when taken to task for that design choice, he rose to the challenge and designed a controller using discrete NAND and NOR gates, some RS latches, and a couple of comparators. The basic control circuit was simple, but too simple for safety — a projectile stuck in the barrel could leave a coil energized indefinitely, leading to damage. What took a line of code in the Arduino sketch to fix required an additional comparator stage and an RC network to build a timer to deenergize the coil automatically. In the end the breadboarded circuit did the job, but implementing it would have required twice the space of the Arduino while offering none of the flexibility.

Not every project deserves an Arduino, and sometimes it’s pretty clear the builder either took the easy way out or was using the only trick in his or her book. Hats off to [GreatScott] for not only having the guts to justify his design, but also proving that he has the discrete logic chops to pull it off.

Continue reading “DIY Coil Gun Redux: Life Really Is Easier With Arduino”