RPiTX Turns Rasberry Pi Into Versatile Radio Transmitter

Since the discovery that some USB TV tuner dongles could be used to monitor radio waves across a huge amount of spectrum, the software-defined radio world has exploded with interest. The one limiting factor, though, has been that the dongles can only receive signals; they can’t transmit them. [Evariste Okcestbon, F5OEO] (if that is his real name! Ok c’est bon = Ok this is good) has written some software that will get you transmitting using SDR with only a Raspberry Pi and a wire.

There have been projects in the past that use a Pi to broadcast radio (PiFM), but this new software (RPiTX) takes it a couple steps further. Using just an appropriately-sized wire connected to one of the GPIO pins, the Raspberry Pi is capable of broadcasting using FM, AM, SSB, SSTV, or FSQ signals. This greatly increases the potential of this simple computer-turned-transmitter and anyone should be able to get a lot of use out of it. In the video demo below the break, [Evariste] records a wireless doorbell signal and then re-transmits it using just the Rasbperry Pi.

The RPiTX code is available on GitHub if you want to try it out. And it should go without saying that you will most likely need an amateur radio license of some sort to use most of these features, depending on your locale. If you don’t have a ham radio license yet, you don’t need one to listen if you want to get started in the world of SDR. But a ham license isn’t hard to get and at this point it shouldn’t take much convincing for you to get transmitting.

Continue reading “RPiTX Turns Rasberry Pi Into Versatile Radio Transmitter”

Measuring Filters And VSWR With RTL-SDR

Once again the ubiquitous USB TV tuner dongle has proved itself more than capable of doing far more than just receiving broadcast TV. Over on the RTL-SDR blog, there’s a tutorial covering the measurement of filter characteristics using a cheap eBay noise source and an RTL-SDR dongle.

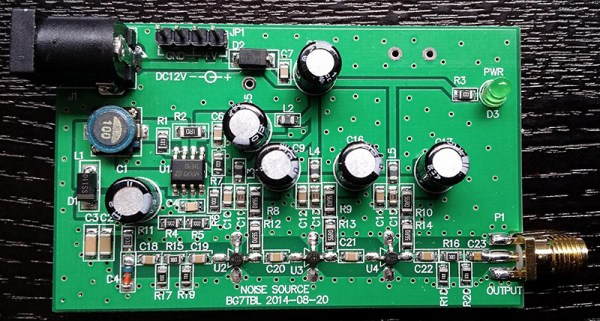
For this tutorial, the key piece of equipment is a BG7TBL noise source, acquired from the usual online retailers. With a few connectors, a filter can be plugged in between this noise source and the RTL-SDR dongle. With the hardware out of the way, the only thing remaining is the software. That’s just rtl_power and this wonderful GUI. The tutorial is using a cheap FM filter, and the resulting plot shows a clear dip between 50 and 150 MHz. Of course this isn’t very accurate; there’s no comparison to the noise source and dongle without any attenuation. That’s just a simple matter of saving some scans as .csv files and plugging some numbers in Excel.

The same hardware can be used to determine the VSWR of an antenna, replacing the filter with a directional coupler; just put the coupler between the noise source and the dongle measure the attenuation through the range of the dongle. Repeat with the antenna connected, and jump back into Excel.

SLDongle: The Microcontroller Gift That Keeps On Giving

It must be nice to be one of [kiu]’s colleagues. Some people pass out chocolates or stress balls at work as Christmas gifts, but [kiu] made a bunch of SL dongles to introduce his colleagues to the world of microcontrollers.
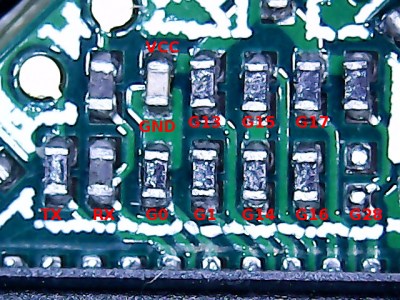
The dongles are based on the ATMega88PA and work on three levels to provide something for everyone. The no-experience-necessary option is to plug it in to a USB port and admire the light show sequences. If you know enough to be dangerous, you can remotely control the LEDs from a USB host using [kiu]’s sldtool for Linux or Mac. He originally included examples that visualize CPU utilization and ultimately added a Ruby-based departure countdown for the next outbound train at the nearby station.

If you’re 1337 enough you can flash your own C or assembly code via USB. Holding down the button during power-up lets you use the dongle as a USBasp so it can be flashed with avrdude. [kiu] says the bootloader can’t be unlocked through software and is theoretically unbrickable. Stick around after the break to see the full demo.

Continue reading “SLDongle: The Microcontroller Gift That Keeps On Giving”

Pair Of MIDI Dongles To Inspire Some Weekend Music Hacking

pair-of-midi-dongles

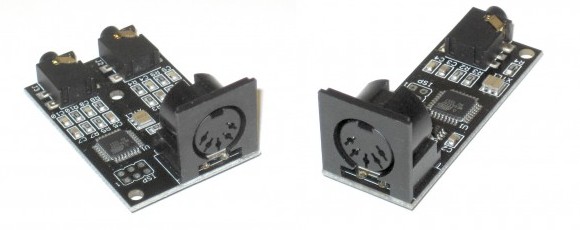
This pair of dongles is a fun way to get your feet wet working with MIDI hardware. They’re called MIDIvampire-I and MIDIvampire-II. Just plug one end into your MIDI-ready instrument and the other into a pair of speakers and you’re off and running. Mark I is a polyphonic synth, and Mark II is a drum machine, but both use basically the same hardware which you may already have on hand.

The single chip on each board is an ATmega328 often found anchoring Arduino boards. The other silicon component is an S1112B30MC voltage regulator. The rest of the components are passives, with MIDI and headphone jacks for connectivity. They’re selling these if you want the easy way out, but we thought we’d bring them to your attention in case you needed a breadboarding project this weekend. The firmware, BOM, schematic, and board artwork are all available on the Wiki pages linked in the articles above. After the break you can see a couple of demo videos which walk through all of the features.

Continue reading “Pair Of MIDI Dongles To Inspire Some Weekend Music Hacking”

Injecting Power Into A WiFi Dongle For The Raspberry Pi

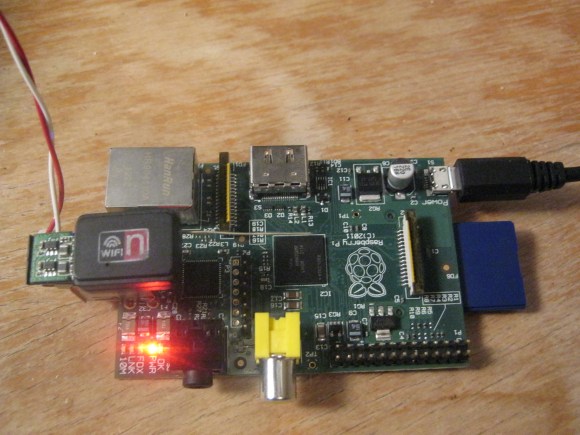
So the Raspberry Pi sometimes doesn’t have the juice needed to run power-hungry USB dongles. The most common issue is with WiFi adapters. The solution has long been to use a powered USB hub, but [Mike Worth] didn’t want to take up that much extra space. The solution he worked out injects power directly into the dongle itself.

The red and white wires coming out of the side provide the 5V source. This is coming from the same USB mains power adapter that supplies the RPi board itself. To connect the wires to the dongle he made an adapter out of some strip board and the shielding from the dongle. The end of the strip board pokes out of the shielding far enough for him to solder on some wire, which is then soldered to the traces on the dongle’s PCB.

You can just plug this in and get down to business. But while he was at it [Mike] added an improvised antenna for better reception. It’s the same type of hack we saw him use for a Bluetooth dongle in this links post.


USB Dongle For Unmodified NES Controllers

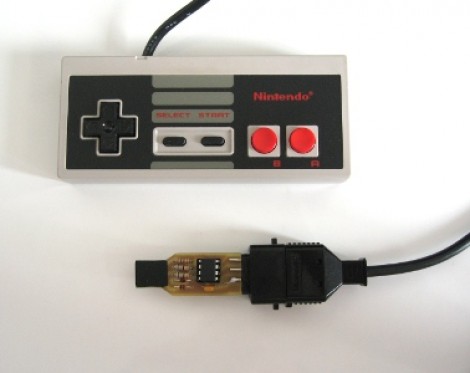
This USB dongle will let you use your unmodified NES controllers on a computer. That’s because it includes the same socket you’d find on the classic console.

The image above shows the prototype. Instead of etching the copper clad board, each trace was milled by hand (presumably with a rotary tool). To the left the black square is made of several layers of electrical tape that builds the substrate up enough to fit snugly in a USB port.

An ATtiny45 running the V-USB stack has no problem reading the controller data and formatting it for use as a USB device. This is actually the second iteration of the project. The first attempt used an ATtiny44 and a free-formed circuit housed inside the controller. It worked quite well, but required alterations to the circuit board, and you needed to replace the stock connector with a USB plug. This dongle allows the controller to go unaltered so it can be used with an NES console again in the future.

Those USB TV Tuners Used For SDR Can Also Grab GPS Data

Talk about versatile hardware. These inexpensive TV tuner dongles can also grab GPS data. You may remember seeing this same hardware used as a $20 option for software defined radio. But [Michele Bavaro] decided to see what other tricks they could pull off.

Would it surprise you that he can get location data accurate to about 20 centimeters? That figure doesn’t tell the whole story, as readings were taken while the dongle was stationary for three hours, then averaged to achieve that type of accuracy. But depending on what you need the data for this might not be a problem. And [Michele] does plan to implement real-time GPS data in his next iteration of the project. He plans to use an SDR acquisition algorithm to measure doppler shift in accounting for the slow clock speed of the dongles compared to standard GPS receivers. We can understand how that would work, but we’re glad he has the skills to actually make it happen because we’re at a loss on how the concept could be implemented.

[via Reddit]