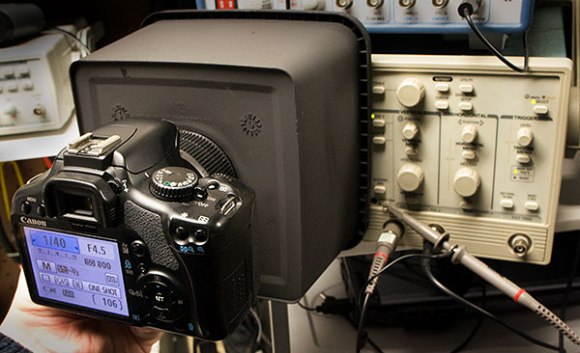
Ghostly Images Captured Only On Camera

is that a logo

A while back our good buddy [Ch00f] built a QR code clock, unreadable to both humans and computers. A human couldn’t read the clock because of the digital nature of a QR code, and because the clock used persistence of vision in driving the LEDs, a digital camera can’t capture all the pixels in the QR code at the same time. It’s a highly useless but impressive art piece. Now, [Ch00f] is turning that build on its head. He created a rudimentary display that is invisible to the human eye, but easily detected with a digital camera.

This build exploits a basic property of CMOS digital cameras – the rolling shutter. Because it takes time to get pixels off a modern digital image sensor, each picture is actual a composite of many different strips, each taken slightly out of sequence. You can see this for yourself by taking a picture of something rotating very fast with your camera phone; a picture of an airplane propeller will make the blades appear curved, or look like [Dr. Seuss] has an aeronautical engineering degree.

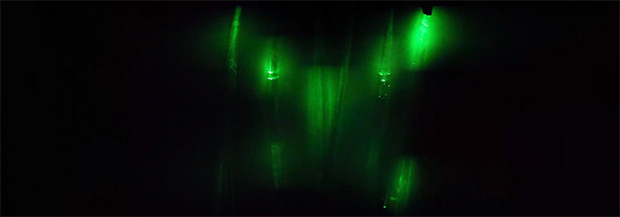
To create his display, [Ch00f] found a few inexpensive fiber optic lights. By aligning a few of these into columns and lighting them up in a precise sequence, he can exploit the rolling shutter and make an image appear. To the human eye, it looks like a solid wall of illuminated fiber optics.

As for how practical this build is, [Ch00f] says not much. For cell phone cameras, you’d need to have a very, very short exposure time for this to work. The only way to do that is to make this display unbelievably bright, or just put it out in the sun. We can’t see that being practical for any potential use case, but we’d be more than happy to see a large-scale attempt at displaying images with this technique.

High Speed Photography With Friggin’ Lasers

[Bruce] built his own high-speed photography equipment for a fraction of the price it would have cost him to purchase it. He was inspired by a friend who showed him some example images. He headed into his shop and built an Arduino-based high-speed flash controller.

To capture an image like this one the camera is placed in a dark room and set for a long exposure. At just the right instant the flash is activating, capturing the image. In this case [Bruce] used an infrared laser diode pointed at a phototransistor to trigger the flash. When the droplet breaks the laser beam the Arduino triggers the flash after a calculated delay. It’s not specifically covered in his guide, but [Bruce] also mentions that this can be modified to use sound as a trigger. Here’s another sound-activated flash controller if you need inspiration.

The image at the top was made by dropping dye from a pipette into a pool of water. If you don’t have a pipette on hand you can head over to our LIFE blog to make one out of heat shrink tubing.

3D Scanner With Remarkable Resolution

Modeling simple objects in 3D can take some time. Modeling complex items… well you can get your college degree in that sort of thing. This method side-steps the artistic skill necessary to make the real virtual by using a laser and camera to map a three-dimensional object.

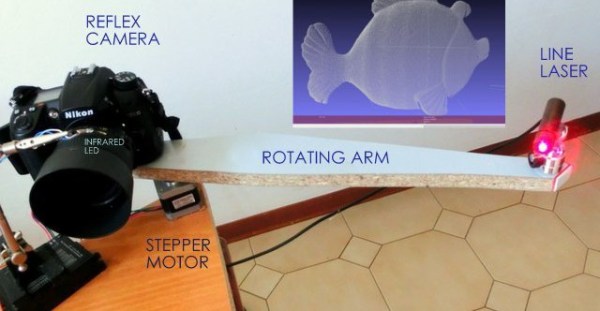
[Alessandro Grossi] is breaking the rules by using a 100mW laser for the project. He thinks that the Italian government prohibits anything over 5mW, but also mentions that the lens used to turn the laser dot into a vertical line drops the power dramatically. The beefy diode does still pay off, providing an incredibly intense line of light on the subject being mapped. The high-end DSLR camera mounted on the same arm as the laser captures a detailed image, which can be processed to dump everything other than the laser line itself. Because the two are mounted on different axes, the image provides plenty of perspective.  That translates to the 3D coordinates used in the captured model shown in the inlaid image.

We’ve seen 3D scanners that move the subject; they usually rotate it to map every side. This method only captures one side, but the stepper motor moves in such small increments that the final resolution is astounding. See for yourself in the video after the break.

Continue reading “3D Scanner With Remarkable Resolution”

Versatile Motion Dolly For Time Lapse Photography

time-lapse-motion-system

This beautiful build is a motion dolly for making time-lapse videos. It is at a point where you could consider it complete. After all, the segments featured in the video after the break look marvelous. But [Scottpotamas] has a few additions planned and it sounds like it won’t belong before he accomplishes his goals.

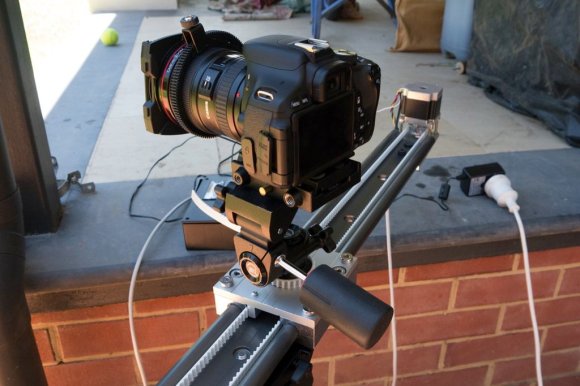
The build is a linear rail on which the camera rides. In the image above you can see the stepper motor which moves the camera mounted at the far end of the rig. This is controlled by an Arduino. Currently the camera is responsible for timing the capture of the images, but [Scottpotamas] says the firmware is nearly ready to hand this responsiblity over to the Arduino. The system is modular, with a simple setting for the length of the track. This way he can swap out for a longer or shorter rail which only takes about five minutes. He also included support for a panning mount for the camera. It allows the control box can be programmed to keep the subject centered in the frame as the camera slides along the track.

Continue reading “Versatile Motion Dolly For Time Lapse Photography”

DSLR Trick Lets You Change Focus After Taking The Picture

Here’s two photographic takes on the same subject, each with a different depth of focus. [Chaos Collective] came up with a way to make interactive still images that allow a user to adjust the depth of focus by clicking on different objects in the image.

This was inspired by the Lytro camera which uses an array of lenses to take multiple pictures at once. Each of those images has a slightly different depth of focus. The technique used here doesn’t require that you buy one of those $400+ cameras. But it’s not a cheap hack unless you already own a camera that can shoot video and has manual focus.

The technique used by the [Chaos Collective] is to move the camera’s manual focus setting from the nearest to the furthest target while capturing a video. That file can then be processed using their browser-based tool which turns it into an embedded HTML5 image.

Bluetooth Control For Your DSLR Or Just About Any Other IR Operated Device

Just the other day we were reading a Reddit thread asking about how to control a television with a smartphone. The conversation started by talking about adding an IR LED to the phone.  Then it was suggested that there should be standalone Bluetooth devices that convert commands to IR, and came around to the ideas that TV’s should ship with native Bluetooth hardware. We couldn’t agree more but we’re also not about to replace our TV just for this option. That’s why we were delighted to find this project waiting on our tip line. It’s a method of controlling a camera shutter from a smartphone using Bluetooth. But the technique will work for any device which uses an infrared remote control.

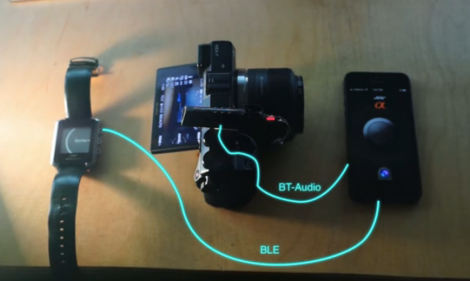
The video after the break shows two different devices controlling the camera shutter. As you can see in the diagram above, the iPhone is the master controller, connecting to a Bluetooth headset mounted on the camera. That headset was altered to feed the speaker connections into an IR LED pointed at the camera’s receiver. The iPhone plays an encoded audio track matching the IR remote command, resulting in the properly formatted message flashing on the LED. The watch doesn’t have the ability to playback audio, but it can send a message to the phone, which then plays the proper audio track through the headset.

Continue reading “Bluetooth Control For Your DSLR Or Just About Any Other IR Operated Device”

How To Add Audio In To The Sony NEX-5 Line Of DSLR Cameras

[Tynan] loves his Sony NEX-5 camera but he’s fed up with not being able to choose any external microphone when recording video. Recently he set out to remedy that, and managed to add an audio in jack without modify the camera itself.

The real trick here is to modify how a microphone accessory connects to the camera. In [Tynan’s] tutorial video (embedded after the break) he uses the enclosure from a flash module as a connector. After removing the electronics he’s left with plenty of room for the guts of a Sony microphone accessory. Those include the PCB and wiring, but not the microphone element itself. A 3.5mm audio jack is added to the flash case, and soldered to the microphone cable. Now he has a modular audio-in jack. The only problem is that his tinkering resulted in mono only. If you don’t mind spending a bit more time reverse engineering the scrapped microphone we bet you can parlay that into a true stereo option.

Continue reading “How To Add Audio In To The Sony NEX-5 Line Of DSLR Cameras”