How To Grow Your Own EL Wire DNA Helix Lamp

el-wire-helix-lamp

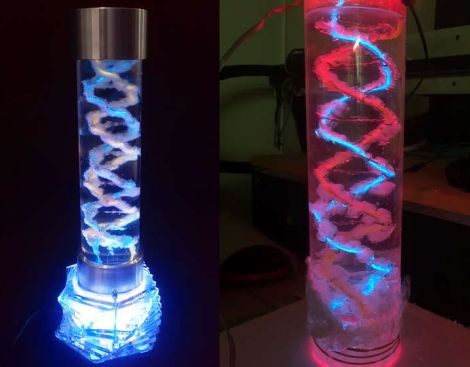
[LucidMovement] was looking for some crystal-based artwork and just couldn’t seem to find anything that fit the bill, so he decided to build something himself.

The inspiration for his desk lamp came from something we’re all familiar with, a DNA double-helix. To grow the crystals he built a helix-shaped growing substrate out of nichrome and EL wires, submerging them in a warm alum solution. Once he had a nice set of crystals, he mounted it in an acrylic tube, filling the air space with clear silicone to seal off the display. He then mounted the silicone-filled tube on top of a rotating acrylic stand that he had cut for the project. The stand is made from several sheets of acrylic and contains both the gearing for movement as well as RGB LEDs to light the display from the bottom.

The lamp looks great when sitting idle, but when he powers it on it really shines (no pun intended). [LucidMovement] put a ton of work into the lamp, and offers up all sorts of tips, tricks, and considerations for anyone looking to build their own. Be sure to check out his writeup for plenty more details, and stick around to see a short video of the lamp in action.

Continue reading “How To Grow Your Own EL Wire DNA Helix Lamp”

Halloween Hacks: Diorama-rama

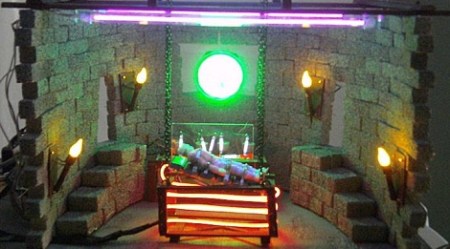
The folks down at LVL1, the Louisville hackerspace, are throwing a Halloween party. To showcase his building skills, LVL1 member [JAC_101] put together a Halloween diorama featuring the inner workings of Doctor Frankenstein’s laboratory.

There’s a bunch of really neat pieces that make this build great. First up is the LVL1 plasma sign. This sign is four circuits pumping a high voltage charge through Xenon flash tubes. Instead of a bright flash, a very Halloweeny Xenon plasma shoots though the tubes. The sign is constructed from four disposable camera flash circuits.

A few flickering-LED torches light Dr. Franenstein’s lair while the monster is a McDonalds happy meal toy wrapped in surgical tape and painted with UV reactive paint.

In the interests of repurposing existing materials, a plasma disc belt buckle was taken from [Seven of Nine]’s regeneration chamber LVL1’s rave supply cabinet and provides a suitable ‘mad scientist’ aesthetic. A bit of EL wire was thrown in for good measure along with some black lights to activate the UV paint.

While Frankenstein’s lab is missing a hilariously oversize knife switch on the wall, [JAC_101] still pulled off a great build.

Light Up Biking Vest Shows Impatient Drivers How Fast You Are Going

nighttime_bike_speed_vest

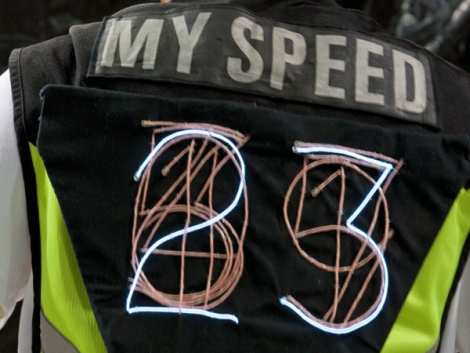
[Mykle Hansen] is an avid cyclist, and safety is a big concern for him. He says that bicyclists often receive a lot of honks and grief from passing motorists because they perceive them as moving far slower than they really are. According to [Mykle], this misjudgment can result in “right hook” collisions, which kill several bicyclists each year. To increase his nighttime visibility and to give drivers a better idea of how fast he’s traveling, he constructed a bicycling vest that displays his current speed in large 7-inch tall numbers.

He uses an off-the-shelf speedometer to get his current speed, feeding that data to an Arduino tucked inside his vest. The Arduino then lights the appropriate EL wire digits to relay his speed to motorists behind him.

It seems to work pretty well if the video below is any indication, and there’s no denying that it will catch a driver’s attention at night. If you’re thinking of making one for yourself, check out his Make:Projects page for a complete look at how it was put together.

Continue reading “Light Up Biking Vest Shows Impatient Drivers How Fast You Are Going”

Color Changing EL Wire

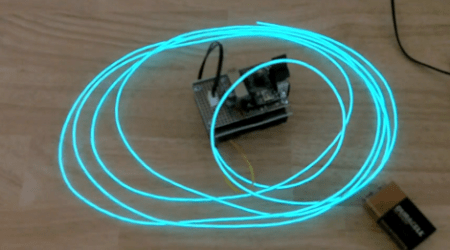
All EL wire drivers use a resonator circuit to supply power to the EL wire. It’s an efficient system, but [Paul] noticed that there was some color change when powering different lengths of wire off of the same driver. He realized that this is because of the changing frequency of the resonator circuit, so the only reasonable thing for [Paul] to do was to build a color fading EL wire driver.

The circuit used to drive the wire is very simple. [Paul] used a Teensy board to switch two transistors and produce AC current. This is sent through a step-up transformer which powers the EL wire. It was necessary to use aqua or ‘Tron blue’ EL wire for this build because of the clear wire jacket. Many colors of EL wire have a fluorescent jacket – much like a fluorescent light bulb – that changes the color produced inside the wire to something different. [Paul] says the color change is subtle, but unique.

Of course the build is nothing without a video of the color changing EL wire. Check it out after the break.

Continue reading “Color Changing EL Wire”

Computer-controlled EL Wire Light Show

starlight_parade_float_el_wire

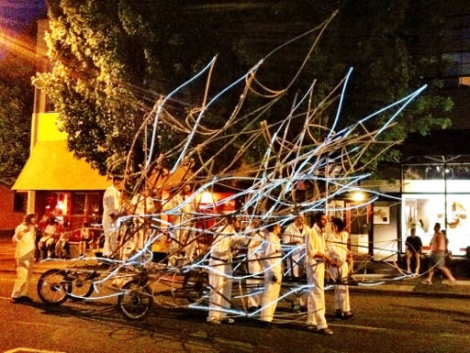
[Paul] wrote in to share a project he recently helped assemble, a huge rolling light sculpture with a ton of computer-controlled EL wire circuits. The sculpture recently featured as a float at the Starlight Parade held in Portland, Oregon.

Working alongside the folks from Hand Eye Supply, [Paul] helped design and build all 114 of the float’s electronic circuits. Almost 1000 feet of EL wire was used to light the massive float, all of which was controlled by 15 Sparkfun sequencer boards. The boards ran custom firmware he created in order to communicate with the lighting software that was chosen to run the show.

In the end, the float came out quite nicely, but it was not without its problems during the construction phase. [Paul] ran into tons of issues when using Sparkfun’s EL wire sequencers, and has put together a detailed list of corrections he made to the boards in order to get them working properly.

If you are interested in learning more about the project, you can check out this behind-the-scenes look at the float’s construction.

Pinewood Derby Cars Have Come A Long Way

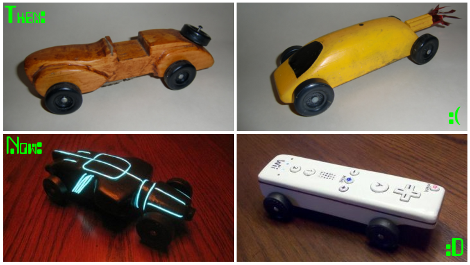
Get your graphite and hike a wheel, [Aron Hoekstra] writes in to completely embarrass us with some excellent pinewood derby cars.    In the pursuit of that extra something [Aron] consulted with his sons who came up with some cool ideas for cars, one Tron themed and the other basically a Wiimote with wheels! The official Pinewood derby rules say nothing about electronics, so as long as nothing helps the block-o-wood travel down the track faster, anything goes. This means you are free to load up whatever cool lights you want, but will have to earn your robotics merit badge some other way.

[Aron] Starts the builds by carving out the shape of the cars, each feature a hollowed out cavity underneath to accommodate the batteries and electronics. For the Tron Light Runner car, one continuous EL strip weaves in and out of the derby car’s body, and a single AAA battery runs the driver. [Aron] notes that it took around five feet of EL wire to cover the little car, which is two more than the driver is rated for. Fortunately the extra little bit of additional wire had little effect on its brightness.

The Wiimote car has detailed 3d buttons, a breadboard with a linear regulator,  and PIC 16F628 driving  blue LEDs.  For the majority of the time the PIC simply runs a chase routine for the four LEDs, but [Aron] went through the trouble to program in the Wiimote’s start-up sequence!

Shown above the [Hokestra]’s work is my older brother’s pinewood derby car (top left) and my… potato rocket… thing… (top right)  from many many years ago. I now seriously regret not considering LEDs! Although I think all that existed then was red,  green and IR.

Check out videos of the [Hoekstra] bros’ cars after the jump!

Continue reading “Pinewood Derby Cars Have Come A Long Way”

Pedal Powered EL Wire Bike

el_wire_bike

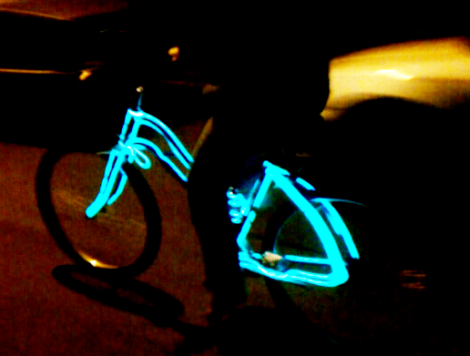
Instructables user [samsmith17] wanted to cover his bike with EL wire for this year’s Burning Man, but he didn’t want to mess with the hassle of using batteries as a power source. Instead, he decided that his EL wire bike would be powered solely by the rider. In the interest of keeping things green, the entire build is made up of re-purposed parts, aside from the EL wire itself.

If you are not familiar, EL wire only lights up when AC current is supplied, so he decided to use a stepper motor to generate the current required. The stepper motor was mounted against his bike’s wheel, and wired backwards through the AC transformer portion of an old cell phone charger in order to step up to the required voltage. A rheostat was also added to the circuit in order to help prevent an over voltage condition, which could potentially damage or destroy the EL wire.

The end result is pretty cool to watch, and costs very little to boot. It would be nice to see someone expand on his project, adding additional wire colors and perhaps a few capacitors to keep the wire from going dark immediately after the wheels stop turning.

Continue reading to see a quick video of the completed project.

Continue reading “Pedal Powered EL Wire Bike”