This Hurricane Uses A Novel Technique

You’ve probably heard of the brave pilots, the so-called ‘few’, that took to the air in their Supermarine Spitfires and saved the day during the Battle of Britain. It’s a story that contains a lot of truth, but as is so often the case, it masks a story with a bit more complexity. Those pilots did scramble across the airfields of Southern England back in the summer of 1940, but more of them went into battle behind the controls of a Hawker Hurricane than its more glamorous stablemate.

The Hurricane might have been eclipsed by the Spitfire in the public’s eye, but not for [Marius Taciuc], who’s made a fully-functional RC model of one. Normally that wouldn’t be worthy of our attention, but in this case he’s employed a rather fascinating construction technique. He’s recreated the doped-fabric skin of the original by 3D-printing the frame of the aircraft and covering it in heat-shrink film, making this a very rare bird indeed.

The video below takes us through the steps including the development of the frame in a CAD package based on a tracing of a 2D aircraft picture, fitting the film, and finally attempts at flight that are unfortunately foiled by inappropriate wheel choice. But the short flight and crash does demonstrate that this construction method is durable, which leads on to our interest in it. While it evidently makes a functional aircraft, there are other applications that could benefit from such a lightweight and strong combination of materials.

[Marius] actually created a model of the somewhat more photogenic Spitfire using a similar technique, though as far as we can tell, that one has remained grounded. Incidentally, these pages have been previously graced by Hurricanes of the non-PLA variety. Continue reading “This Hurricane Uses A Novel Technique”

Tracking Ants And Zapping Them With Lasers

Thanks to the wonders of neural networks and machine learning algorithms, it’s now possible to do things that were once thought to be inordinately difficult to achieve with computers. It’s a combination of the right techniques and piles of computing power that make such feats doable, and [Robert Bond’s] ant zapping project is a great example.

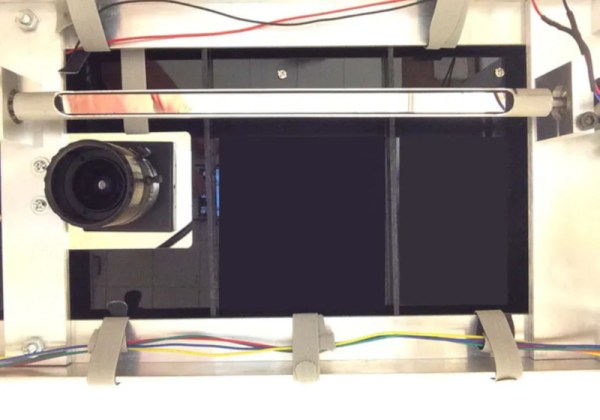
The project is based around an NVIDIA Jetson TK1, a system that brings the processing power of a modern GPU to an embedded platform. It’s fitted with a USB camera, that is used to scan its field of view for ants. Once detected, thanks to a little OpenCV magic, the coordinates of the insect are passed to the laser system. Twin stepper motors are used to spin mirrors that direct the light from a 5 mW red laser, which is shined on the target. If you’re thinking of working on something like this we highly recommend using galvos to direct the laser.

Such a system could readily vaporize ants if fitted with a more powerful laser, but [Robert] decided to avoid this for safety reasons. Plus, the smell wouldn’t be great, and nobody wants charred insect residue all over the kitchen floor anyway. We’ve seen AIs do similar work, too – like detecting naughty cats for security reasons.

Continue reading “Tracking Ants And Zapping Them With Lasers”

A Cyberdeck Built With Ergonomics In Mind

With a new decade looming over us, the hot new thing for hackers and makers everywhere is to build cyberdecks to go with the flashy black-and-neon clothing that the sci-fi films of old predicted we’d all be wearing come next year. [Phil Hagelberg] has been designing one based on his own ergonomic keyboard, prioritizing not only form but also function.

The Atreus mechanical keyboard has a split layout that foregoes the traditional typewriter-inherited staggered arrangement in favor of one that better fits the user’s hands. The reduced number of keys limits hand movement for a more comfortable writing experience, however if you use function keys often, the trade-off is that you’ll need to use an auxiliary key to access them.

The deck [Phil] documents for us here is built from the ground up around that same design and aims to be small enough for travel, yet pleasant enough for serious use. It’s gone through four revisions so far, including an interesting one where the keyboard is laid out on the sides for using while standing up. As for the brains of the machine, the past revisions have used different flavors of Raspberry Pi and even a Samsung Galaxy S4 phone, though the latest model has a Pine64 running the show. How much has changed between each finished prototype really goes to show that you don’t have to get it right the first time, and it’s always good to experiment with a new idea to see what works.

[Phil] is now moving onto a fifth prototype, and hopes to eventually sell kits for building the whole cyberdeck along with the kits already available for the standalone keyboard. We’ve been struck by the creativity shown in these cyberdeck builds, which range from reusing retro computer shells to completely printing out a whole new one for a unique look. We can’t say for sure if this custom form-factor will eventually surpass mass-produced laptops, but it sure would be hella cool if it did.

Building A Wind Power Generator In Your Backyard

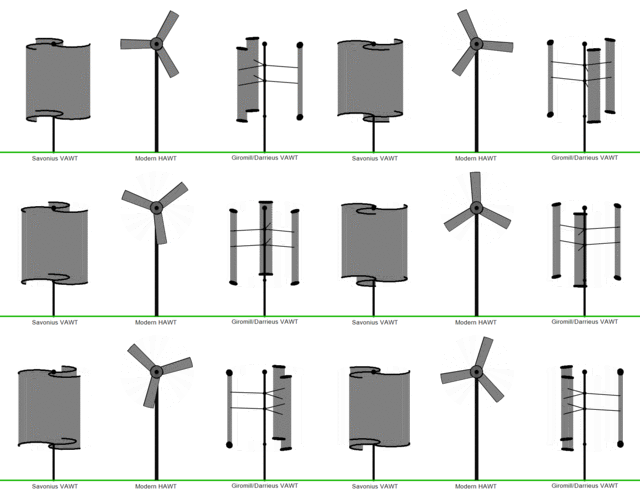
For many environmental enthusiasts, horizontal-axis wind turbines (HAWTs) — the kind that look like windmills slowly spinning in the distance — are a pretty familiar sight. Unfortunately, there are quite a few caveats that make them harder to adopt despite the fact that harvesting renewable energy sources is more sustainable than relying on natural gas and fuels that can be depleted. Since they face in one axis, they need to be able to track the wind, or else trade off the ability to maximize energy output. In turbulent and gusty conditions, as well, HAWTs face accelerated fatigue when harvesting.

The development of the vertical-axis wind turbine (VAWT) solves several of these issues. In addition, the turbines are typically closer to the ground and the gearbox replacement is simpler and more efficient. Maintenance is more accessible due to the size of the turbines, so no heavy machinery is typically necessary to access crucial components on-site. In addition, the gearbox by nature of its operation takes on less fatigue and is able to function in turbulent winds, which reduces the rate of failure.

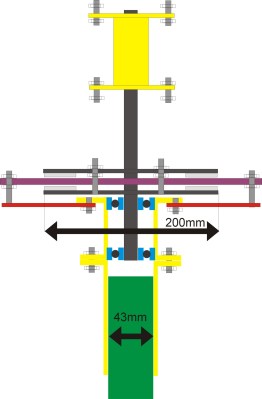
For a simple version of a VAWT that you can build yourself, [BlueFlower] has published several mechanical drawings that detail the layout of the design. The wind power generator uses 24 magnets, copper wire fashioned into coils, and a metal plate for the main generator. The coils are arranged in a circular formation on a static plate, while the magnets are equally spaced on a moving circular plate. As the magnets pass over coils, the flux induces a current, which increases as the plates spin faster.

The blades of the generator are made from blue foam with a metal bar running through it for structure. Three of the blades are attached with triangular bars to a central rod, which also holds the spinning magnetic plate.

In [BlueFlower]’s initial trials using the VAWT for charging a battery they were able to generate a max power of 15W on boost mode and 30-70W when charging in PWM mode. Not bad for a home-made wind power generator!

There aren’t only pros to the design, however. While VAWTs may be cheaper, more mobile, and more resistant to wear and tear, there are some design features that prevent the generators from functioning as well as HAWTs at harvesting energy. The blades don’t produce torque at the same time, with some blades simply being pushed along. This produces more drag on the blades when they rotate, limiting the efficiency of the entire system. In addition, higher wind speeds are typically found at higher altitudes, so the VAWTs will perform better if installed on a towering structure. Vibration forces close to the ground can also wear out the bearings, resulting in more maintenance and costs.


Continue reading “Building A Wind Power Generator In Your Backyard”

This Home-Etched ARM Dev Board Is A Work Of Art

One of the step changes in electronic construction at our level over the last ten or fifteen years has been the availability of cheap high-quality printed circuit boards. What used to cost hundreds of dollars is now essentially an impulse buy, allowing the most intricate of devices to be easily worked with. Many of us have put away our etching baths for good, often with a sigh of relief.

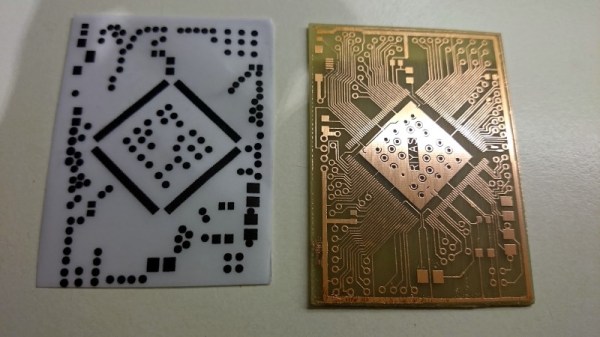
We’re pleased that [Riyas] hasn’t though, because they’ve etched an STM32 dev board that if we didn’t know otherwise we’d swear had been produced professionally. It sports a 176-pin variant of an STM32F4 on a single-sided board, seemingly without the annoying extra copper or lack-of-copper that we remember from home etching. We applaud the etching skill that went into it, and we’ll ignore the one or two boards that didn’t go entirely to plan. A coat of green solder mask and some tinning, and it looks for all the world as though it might have emerged from a commercial plant. All the board files are available to download along with firmware samples should you wish to try making one yourself, though we won’t blame you for ordering it from a board house instead.

It’s always nice to see that single board computers are not the sole preserve of manufacturers. If the RC2014 Micro doesn’t isn’t quite your style, there’s always the Blueberry Pi which features a considerably higher penguin quotient.

How To Get Started With Fadecandy And LEDs

The internet is awash with millions of stunning LED projects, and for that, we are all very thankful. For those outside the hacker/maker matrix, it can be difficult to know how to approach such a build. Never fear, for [Amy Goodchild] has put together a beginner’s guide to building pretty glowables, using Fadecandy and Processing.

Fadecandy is a platform specifically designed to drive WS2812B LEDs for artistic purposes. This allows users to focus on the visual side of things without getting bogged down with the hassle of selecting the right microcontroller and choosing the applicable libraries. It works great in combination with Processing, a piece of software designed for coders experimenting with visual arts. Through a USB link, any graphics drawn by processing can be mapped to the LEDs attached to the Fadecandy controller.

[Amy] does a great job of explaining how to do everything required, from purchasing the right equipment, through wiring everything up, and then getting it all humming along with the correct software. If you’ve ever wanted to build a big flashy project with a ton of LEDs, this would be a great place to start.

We’ve seen Fadecandy put to good use before, too. Video after the break.

Continue reading “How To Get Started With Fadecandy And LEDs”

The Monotron, A Rusty Retrocomputer

For many people, a retrocomputer is a classic machine from the past lovingly brought back to working order. But for some, the idea of a retrocomputer is wider than that, encompassing modern hardware that delivers to feel like a device from the past.

The Monotron from [Jonathan Pallant] is one such computer. It’s definitely a retrocomputer such as you might have found in the 1980s, but it’s running on a much more modern Tiva-C TI Launchpad dev board sporting an ARM Cortex M4.

The platform has been created entirely in Rust, and emulates what would have been a rather desirable machine in the early 1980s. With an 800×600 pixel 8-colour VGA display interface, 32k of RAM, and mono 8-bit audio, it already has a few simple demos and games running upon it. [Jonathan Pallant] has given more than one talk on its design and capabilities, we’ve placed one of them as a video below the break. There is even a PCB available which adds all the ports as well as a micro SD card slot for program storage.

We like the Monotron, and we look forward to seeing it develop. It’s an exciting time for retrocomputig with projects such as the RC2014 Z80 machine and the Gigatron TTL RISC processor, but is there space for an emulated one such as this? We hope so.

Continue reading “The Monotron, A Rusty Retrocomputer”