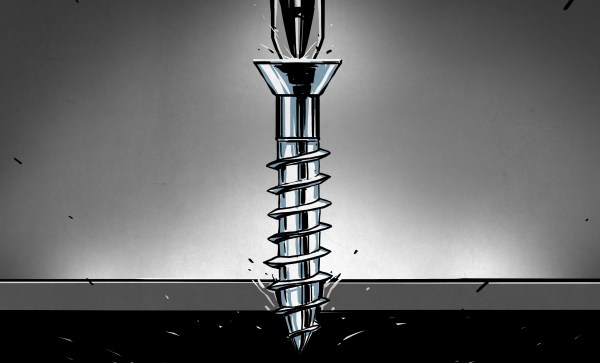
As the art of 3D printing has refined itself over the years, a few accessories have emerged to take prints to the next level. One of them is the threaded insert, a a piece of machined brass designed to be heat-set into a printed hole in the part. They can be placed by hand with a soldering iron, or for the really cool kids, with a purpose-built press. They look great and they can certainly make assembly of a 3D printed structure very easy, but I’m here to tell you they are not as necessary as they might seem. There’s an alternative I have been using for years which does essentially the same job without the drama. Continue reading “No Need For Inserts If You’re Prepared To Use Self-Tappers”
fasteners10 Articles
Fastener Fusion: Automating The Art Of Counting
Counting objects is an ideal task for automation, and when focusing on a single type of object, there are many effective solutions. But what if you need to count hundreds of different objects? That’s the challenge [Christopher] tackled with his latest addition to his impressive automation projects. (Video, embedded below.)
[Christopher] has released a series of videos showcasing a containerized counting system for various fasteners, available on his YouTube channel. Previously, he built remarkable devices to count and sort fastener hardware for automated packaging, but those systems were designed for a single fastener type. He effectively highlights the vast complexity of the fastener ecosystem, where each diameter has dozens of lengths, multiple finishes, various head shapes, and more.
To address this, he developed a machine that accepts standardized containers of fastener hardware. These uniform boxes can hold anything from a small M2 countersunk screw to a large M8 cap head bolt and everything in between. To identify the loaded box and determine the appropriate operations, the machine features an RFID reader that scans each box’s unique tag.
Once a box is loaded, the machine tilts it to begin counting fasteners using a clever combination of moving platforms, an optical sensor, and gravity. A shelf first pushes a random number of fasteners onto an adjustable ledge. A second moving platform then sweeps excess fasteners off, leaving only those properly aligned. It’s no surprise this system has nine degrees of freedom. The ledge then moves into view of a sensor from a flatbed scanner, which detects object locations with an impressive 0.04 mm resolution across its length—remarkable for such an affordable sensor. At this point, the system knows how many fasteners are on the ledge. If the count exceeds the desired number, a sloped opening allows the ledge to lift just high enough to release the correct amount, ensuring precision.
The ingenuity continues after the initial count. A secondary counting method uses weight, with a load cell connected to the bin where fasteners drop. A clever over-center mechanism decouples the tilting system from the load cell to ensure accurate readings. We love automation projects, and this one incorporates so many ingenious design elements that it’s sure to inspire others for their future endeavors.
Continue reading “Fastener Fusion: Automating The Art Of Counting”
Handy Online Metric Screw, Nut, And Washer Generator
For those times when you could really use a quick 3D model, this metric screw generator will do the trick for screws between M2 and M16 with matching nuts and washers. Fastener hardware is pretty accessible, but one never knows when a 3D printed piece will hit the spot. One might even be surprised what can be usefully printed on a decent 3D printer at something like 0.08 mm layer height.
 Behind the scenes, [Jason]’s tool is an OpenSCAD script with a very slick web-based interface that allows easy customization of just about any element one might need to adjust, including fine-tuning the thread sizing. We’re fans of OpenSCAD here and appreciate what’s going on behind the scenes, but one doesn’t need to know anything about it to use the online tool.
Generated models can be downloaded as .3mf or .stl, but if you really need a CAD model you’re probably best off looking up a part and downloading the matching 3D model from a supplier like McMaster-Carr.
Prefer to just use the OpenSCAD script yourself, instead of the web interface? Select “Download STL/CAD Files” from the dropdown of the project page to download ScrewGenerator.scad for local use, and you’re off to the races.
Embed Hardware Into 3D Prints, But Not In The Way You’re Thinking
[Christopher Helmke] is doing fantastic work in DIY systems for handling small hardware like fasteners, and that includes robotic placement of hardware into 3D prints. Usually this means dropping nuts into parts in mid-print so that the hardware is captive, but that’s not really the story here.
The really inventive part we want to highlight is the concept of reducing packaging and labor. Instead of including a zip-lock bag of a few bolts, how about embedding the bolts into a void in the 3D print, covered with a little snip-out retainer? Skip ahead to 1:54 in the video to see exactly what we mean. It’s a pretty compelling concept that we hope sparks a few ideas in others.
As clever as that concept is, the rest of the video is also worth a watch because [Christopher] shows off a DIY system that sits on top of his 3D printer and takes care of robotically placing the hardware in mid-print. He talks all about the challenges of such a system. It’s not perfect (yet), but seeing it in action is very cool.
We’ve recently seen a lot of fascinating stuff when it comes to [Christopher Helmke]’s automated handling of fasteners and similar hardware. His system makes rapid and accurate dispensing of bolts look easy, and his work on using compressed air to zip pieces around seems effective.
Continue reading “Embed Hardware Into 3D Prints, But Not In The Way You’re Thinking”
Tech In Plain Sight: Tough As Nails
When you think of machines you see around you every day, you probably think about your car, computer, or household appliances. However, the world is full of simple machines. One simple machine in particular, the inclined plane, shows up a lot. For example, think of the humble nail. If you are a woodworker or even a homeowner you probably have bags of them. They certainly are all around you if you are indoors and maybe even if you are outdoors right now. Nails have been the fastener of choice for a very long time and they are a form of a wedge which is a type of inclined plane.
What else can you say about nails? Turns out, there is a lot to know. Like other fasteners, there are nails for very specific purposes. There are even nails with two heads and — no kidding — nails with two points. Exactly what kind of nail you need depends on what you are doing and what’s important to you.
Ask Hackaday: What’s In Your Fastener Bin?
A Saturday afternoon. The work week was done, the household chores were wrapped up, and with almost a week left until Christmas, there was just enough wiggle room to deny that there was still a ton of work left to prepare for that event. It seemed like the perfect time to escape into the shop and knock out a quick project, one that has been on the back burner since at least March. I’m nothing if not skilled in the ways of procrastination.
This was to be a simple project — adding an aluminum plate to a plastic enclosure that would serve as an antenna entry point into my shack. Easy as pie — cut out an rectangle of aluminum, cut and drill a few holes, call it a day. Almost all of my projects start out that way, and almost every time I forget that pretty much every one of those builds goes off the rails at exactly the same point: when I realize that I don’t have the fasteners needed. That’s what happened with this build, which had been going swimmingly up to that point — no major screw-ups, no blood drawn. And so it was off to the hardware store I trundled, looking for the right fasteners to finish the job.
Finding hardware has long been where my productivity goes to die. Even though I live a stone’s throw from at least half a dozen stores, each with a vast selection of hardware and most open weekends and nights, the loss of momentum that results from changing from build-mode to procure-mode has historically been deadly to my projects. I’m sure I’m not the only one who has run into this issue, so the question is: what can a hacker do to prevent having to run out for just the right fasteners?
Continue reading “Ask Hackaday: What’s In Your Fastener Bin?”
Locking Up Lock Washers
We’ll admit most of us are more comfortable with solder and software than mechanical things. However, between robots, 3D printers, and various other mechanical devices, we sometimes have to dig into springs, belleville washers, and linear actuators. Unless you are a mechanical engineer, you might not realize there’s a lot of nuances to something even as simple as a nut and bolt. How many threads do you need to engage? Do lock washers work? [Engineer Dog] has a post that answers these and many other questions.
The top ten list starts off with something controversial: split ring lock washers don’t work. The original post cites a paper that claims they don’t except in very special circumstances. However, he updated the post later to say that some people disagree with his cited study. In the end, you’ll have to decide, but given there are other options, maybe we’ll start using those more often.


