Clockety Uses Phone Flash For Projection Clock

[Gaurav Taneja] was showing off his projection clock add-on for iPhone called Clockety at this year’s Consumer Electronics Show. The concept is pretty neat, a clip-on clock which uses the iPhone flash LED as the light source. It may sound a little gimmicky until you see the functionality of the accompanying app which is shown off in the video after the break. Once clipped onto the phone, you lay it face down on your night stand and a gentle tap on the furniture will turn the projection on or off. This is a killer feature when you’re staying some place without an illuminated bedside clock.

Continue reading “Clockety Uses Phone Flash For Projection Clock”

Holiday Cheer From The ATtiny13

There are smaller microcontrollers than the ATtiny13. Some ARM chips will fit on the head of a large pin, and even in Atmel world, the ATtiny10 comes in a tiny SOT-23-6 package – a size normally reserved for surface mount transistors. The ‘tiny13, though, can be programmed with just about any ISP and comes in an 8-pin DIP. It’s the bare minimum if you’re looking to break out of the world of Arduino, and you can do some pretty cool things with it, like playing some holiday audio with an SPI Flash chip.

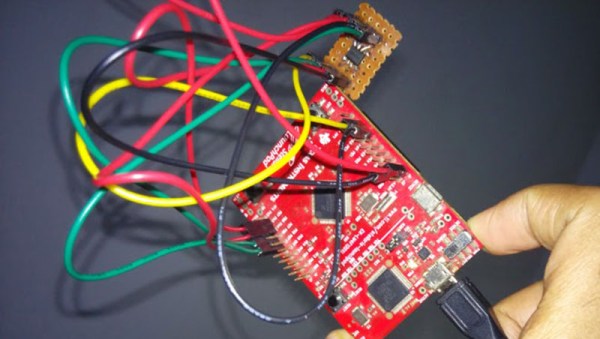
[Vinod] tried opening up a cheap camera pen, but in the course of disassembly a few traces broke. He was now left with a 4Mbit SPI Flash chip. This was obviously the time to investigate what could be done with a small microcontroller and a huge amount of Flash. and the Attiny13 audio player was born.

The circuit uses one PWM for audio out, and reads audio directly from the Flash chip. The UART on board the ‘tiny13 is used to update the Flash, and there’s also a switch to select between play and record. If you’re counting, that means there are 4 pins for the Flash, 2 pins for the UART, 1 for the switch, one for the audio output, and the power and ground rails, all in an 8-pin package. That’s a pretty cool way to use one pin for two different functions.

You can check out a video of the project in action below.

Continue reading “Holiday Cheer From The ATtiny13”

Flash Memory Endurance Testing

[Gene] has a project that writes a lot of settings to a PIC microcontroller’s Flash memory. Flash has limited read/erase cycles, and although the obvious problem can be mitigated with error correction codes, it’s a good idea to figure out how Flash fails before picking a certain ECC. This now became a problem of banging on PICs until they puked, and mapping out the failure pattern of the Flash memory in these chips.

The chip on the chopping block for this experiment was a PIC32MX150, with 128K of NOR Flash and 3K of extra Flash for a bootloader. There’s hardware support for erasing all the Flash, erasing one page, programming one row, and programming one word. Because [Gene] expected one bit to work after it had failed and vice versa, the testing protocol used RAM buffers to compare the last state and new state for each bit tested in the Flash. 2K of RAM was tested at a time, with a total of 16K of Flash testable. The code basically cycles through a loop that erases all the pages (should set all bits to ‘1’), read the pages to check if all bits were ‘1’, writes ‘0’ to all pages, and reads pages to check if all bits were ‘0’. The output of the test was a 4.6 GB text file that looked something like this:
Continue reading “Flash Memory Endurance Testing”

Phoenard, A Prototyping Gadget

The Hackaday Prize party wasn’t just about the five finalists; actually, there were more THP entries in attendance – All Yarns Are Beautiful, OpenExposer, M.A.R.S., a 3D scanner, and a few more that I’m forgetting – than actual finalists. In addition, a number of people brought projects that had never seen the light of day, like [Ralf] and [Pamungkas]’ Phoenard.

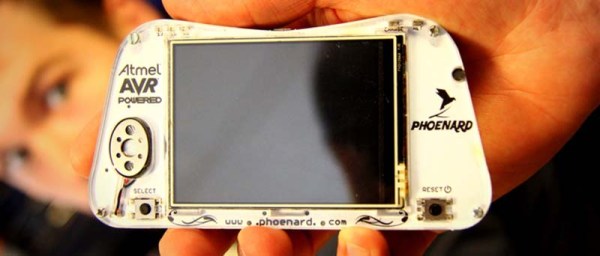
Phoenard is a Kickstarter project the guys launched at the prize party, something they could attend as a little side trip after manning the ‘maker’ part of the Atmel booth at Electronica. They’ve come up with a tiny handheld device that can only be described as a ‘gadget’. It has a touchscreen, a battery, an MegaAVR, a few connectors, and not much else. What makes this project cool is how they’re running their applications. A bootloader sits on the AVR, but all the applications – everything from a GSM phone to an MP3 player – lives on a microSD card.

The Phoenard guys have come up with a few expansion modules for Bluetooth LE, GSM, GPS, and all the usual cool modules. Plugging one of these modules into the back of the device adds capability, and if that isn’t enough, there’s an old 30-pin iPhone connector on the bottom ready to accept a prototyping board.

Video of these guys below.

Continue reading “Phoenard, A Prototyping Gadget”

Simple Photo Flash Trigger For Water Balloon Photography

Water Balloon Photography

There have been countless projects to make custom photo flash trigger circuits. Usually the circuits react to sound, triggering the camera flash at the moment a certain sound is triggered. That type of trigger can be used to detect the popping of a balloon or shattering of glass. Other triggers detect motion, like a projectile crossing a laser beam for example. [Udo’s] friend had a fun idea to take photos of water balloons popping. Unfortunately neither of those trigger methods would be well suited for this situation. That’s when [Udo] had to get creative.

[Udo] built a unique trigger circuit that uses the water inside the balloon as the trigger. The core component of the circuit is an Arduino. One of the Arduino’s analog pins is configured to enable the internal pull-up resistor. If nothing else is connected to the pin, the Arduino will read 5 volts there. The pin is connected to a needle on the end of a stick. There is a second needle on the same stick, just a short distance away from the first. When these needles pierce the balloon’s skin, the water inside allows for a brief moment of conductivity between the two pins. The voltage on the analog pin then drops slightly, and the Arduino can detect that the balloon has popped.

[Udo] already had a flash controller circuit. He was able to trigger it with the Arduino by simply trying the flash controller’s trigger pin to one of the Arduino’s pins. If the Arduino pulls the pin to ground, it closes the switch on the flash controller and the flash is triggered. Both circuits must share a common ground in order for this to work.

All of the code for [Udo’s] project is freely available. With such spectacular photographs, it’s only a matter of time before we see more of these floating around.

Faster Benchmarks With Slower Hardware

hardware

The Bus Pirate is a cheap, simple, Swiss army knife of electronic prototyping, capable of programming FPGAs, and writing to Flash memory. The uISP is possibly the most minimal way of programming Atmel chips over USB, using less than $5 in components. Although the uISP is using a slower chip and bit-banging the USB protocol, it turns out it’s actually faster when operating as a programmer for SPI Flash memories.

Most of [Necromancer]’s work involves flashing routers and the like, and he found the Bus Pirate was far too slow for his liking – he was spending the better part of four minutes to write a 2 MiB SPI Flash. Figuring he couldn’t do much worse, he wrote two firmwares for the uISP to put some data on a Flash chip, one a serial programmer, the other a much more optimized version.

Although the ATMega in the uISP is running at about half the speed as the PIC in the Bus Pirate, [Necromancer] found the optimized firmware takes nearly half the time to write to an 8 MiB Flash chip than the Bus Pirate.

It’s an impressive accomplishment, considering the Bus Pirate has a dedicated USB to serial chip, the uISP is bitbanging its USB connection, and the BP is running with a much faster clock. [Necro] thinks the problem with the Bus Pirate is the fact the bandwidth is capped to 115200 bps, or a maximum throughput of 14 kiB/s. Getting rid of this handicap and optimizing the delay loop makes the cheaper device faster.

The Flaming Yinlips

furan-yinlips

No, that’s not a Playstation Vita up there, it’s a “Yinlips YDPG18A” portable game system. [Ian] found that his Yinlips was lacking in the flash memory department, so he fired up his soldering iron. The Yinlips is based on an Allwinner Sunxi series processor, and uses a standard TSOP48 footprint flash. There is some standardization in flash pin out and packages, so [Ian] picked up the largest pin compatible chips he could find – a pair of 256 gigabit (32 gigabyte) chips from Micron. Desoldering the existing flash proved to be a bit of an adventure as the flash was glued down. [Ian] also didn’t have his hot air gun handy, making things even more interesting. Careful work with a razor blade broke the glue bond.

It turns out that the soldering was the easy part. All flash chips have geometry, die count, page size, block count, sector size, etc. The geometry is similar to the geometry in a hard drive. In fact, just like in modern hard drives, a system will read some basic information before accessing the full storage array. In the case of NAND flash, the processor can access the first page of memory, and query the flash for its part number. Once the part number is known, the geometry can be determined via a lookup table. [Ian] checked the NAND table on github, so he knew going in that his flash chips were not supported. Due to the complexities of booting Allwinner processors into Linux or Android, the table and the NAND driver that uses it exist in several places. The bootloader’s axf file, U-Boot, and several flash application binaries sent from the PC based LiveSuit flash app all required modification. Most of these files were packed into a single flash image. [Ian] used imgrepacker to unpack the image, then opened the hex files. The fact that he knew what the original flash parameter tables looked like was key. He searched for an existing Micron flash table entry, and replaced the parameters with those of his new chips.

With all the files modified, [Ian] re-packed his flash image and sent it over. The Yinlips rewarded his hard work by continually resetting in a bootloop. [Ian] wasn’t going to give up though. He wired into the boot console, and discovered that a CRC check failure on one of his modified files was causing the reset. He then disassembled binary issuing the reset. Changing the return value of the CRC to always pass fixed the issue. [Ian’s] now has a collagen infused Yinlips with 58GB of internal storage. Pretty good for a device that only started with 2GB.