SENSEation Shows The Importance Of Good Physical Design

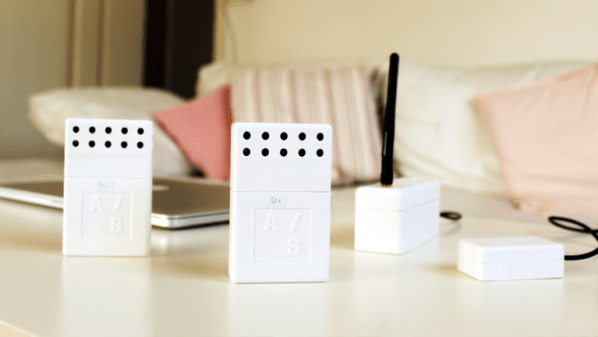
Sensor network projects often focus primarily on electronic design elements, such as architecture and wireless transmission methods for sensors and gateways. Equally important, however, are physical and practical design elements such as installation, usability, and maintainability. The SENSEation project by [Mario Frei] is a sensor network intended for use indoors in a variety of buildings, and it showcases the deep importance of physical design elements in order to create hardware that is easy to install, easy to maintain, and effective. The project logs have an excellent overview of past versions and an analysis of what worked well, and where they fell short.

One example is the power supply for the sensor nodes. Past designs used wall adapters to provide constant and reliable power, but there are practical considerations around doing so. Not only do power adapters mean each sensor requires some amount of cable management, but one never really knows what one will find when installing a node somewhere in a building; a power outlet may not be nearby, or it may not have any unoccupied sockets. [Mario] found that installations could take up to 45 minutes per node as a result of these issues. The solution was to move to battery power for the sensor nodes. With careful power management, a node can operate for almost a year before needing a recharge, and removing any cable management or power adapter meant that installation time dropped to an average of only seven minutes.

That’s just one example of the practical issues discovered in the deployment of a sensor network in a real-world situation, and the positive impact of some thoughtful design changes in response. The GitHub repository for SENSEation has all the details needed to reproduce the modular design, so check it out.

Classic American Dial Phone Gets A GSM Makeover

For sturdy utilitarianism, there were few designs better than the Western Electric Model 500 desk phone. The 500 did one thing and did it well, and remained essentially unchanged from the mid-1940s until Touch Tone phones started appearing in the early 70s. That doesn’t mean it can’t have a place in the modern phone system, though, as long as you’re willing to convert it into a cellphone.

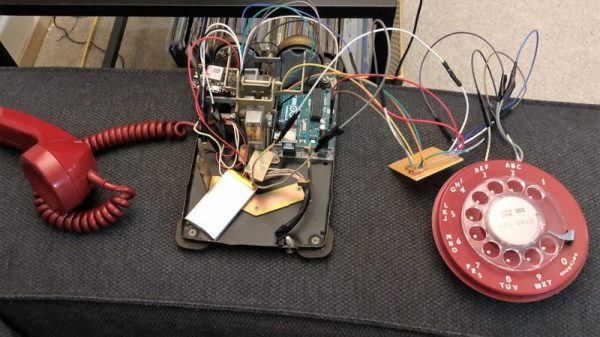
Luckily for [bicapitate], the Model 500 has plenty of room inside the case once the network interface is removed, because the new electronics take up a fair bit of space. There’s no build log per se, but the photo album makes it clear what’s going on. An Arduino reads the hook switch and dial pulses, while a Fona GSM module takes care of the cellular side of things. It looks like a small electret mic and a speaker replace the original transmitter and receiver. As a nice touch, the original ringer is used, but instead of trying to drive it electrically, [bicapitate] came up with a simple cam mechanism on a small motor. Driven at the right speed, the cam hooks the clapper arm, rings one bell, then releases it to let the clapper spring back to hit the other bell. Everything is powered by a LiPo, so it could be taken to the local coffee shop for some hipster hijinks.

We’ve seen similar retro-mods like this before using phones from all over the world; here’s a British take and one from Belgium, both using phones with equally classic lines.

[via r/arduino]

ProxyGambit Better Than ProxyHam; Takes Coffee Shop WiFi Global

Last weekend saw the announcement of ProxyHam, a device that anonymizes Internet activity by jumping on WiFi from public libraries and cafes over a 900MHz radio link. The project mysteriously disappeared and was stricken from the DEFCON schedule. No one knows why, but we spent some time speculating on that and on what hardware was actually used in the undisclosed build.

[Samy Kamkar] has just improved on the ProxyHam concept with ProxyGambit, a device that decouples your location from your IP address. But [Samy]’s build isn’t limited to ProxyHam’s claimed two-mile range. ProxyGambit can work anywhere on the planet over a 2G connection, or up to 10km (6 miles) away through a line-of-sight point to point wireless link.

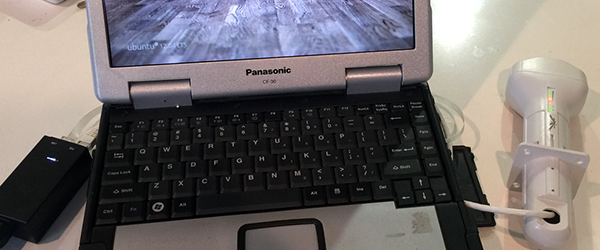
The more GSM version of ProxyGambit uses two Adafruit FONA GSM breakout boards, two Arduinos, and two Raspberry Pis. The FONA board produces an outbound TCP connection over 2G. The Arduino serves as a serial connection over a reverse TCP tunnel and connects directly to the UART of a Raspberry Pi. The Pi is simply a network bridge at either end of the connection. By reverse tunneling a TCP connection through the ‘throwaway’ part of the build, [Samy] can get an Internet connection anywhere that has 2G service.

Although it’s just a proof of concept and should not be used by anyone who actually needs anonymity, the ProxyGambit does have a few advantages over the ProxyHam. It’s usable just about everywhere on the planet, and not just within two miles of the public WiFi access point. The source for ProxyGambit is also available, something that will never be said of the ProxyHam.

Raspberry Pi GSM Hat

The Spark Electron was released a few days ago, giving anyone with the Arduino IDE the ability to send data out over a GSM network. Of course, the Electron is just a GSM module tied to a microcontroller, and you can do the same thing with a Pi, some components, and a bit of wire.

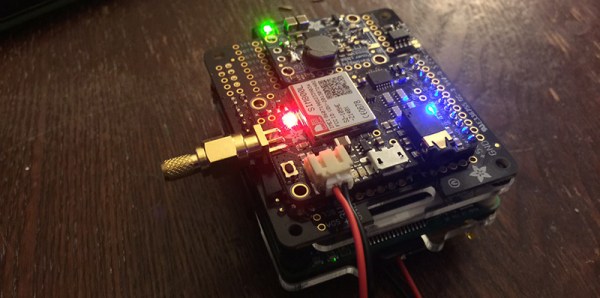
The build is fairly basic – just an Adafruit Fona, a 2000 mah LiPo battery, a charge controller, and a fancy Hackaday Perma-Proto Hat, although a piece of perf board would work just as well in the case of the perma-proto board. Connections were as simple as power, ground, TX and RX. With a few libraries, you can access a Pi over the Internet anywhere that has cell service, or send data from the Pi without a WiFi connection.

If you decide to replicate this project, be aware you have an option of soldering the Fona module right side up or upside down. The former gives you pretty blinking LEDs, while the latter allows you to access the SIM. Tough choices, indeed.