The Trials And Tribulations Of SLA Printing A Portable Wii Handheld

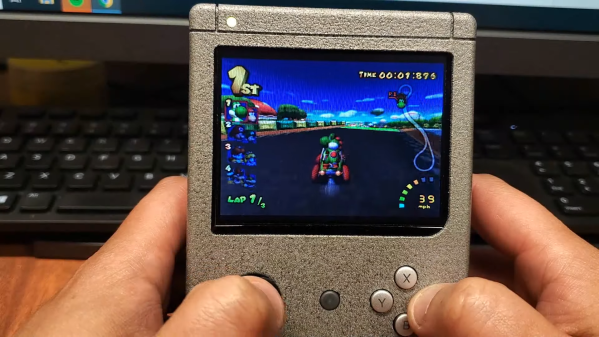
The G-Boy kit revolutionized the subculture around building portable home consoles, allowing an entire Wii to be crammed into a form factor the size of a original Game Boy. [Chris Downing] is no stranger to the field, and sourced a G-Boy kit of his own to build it to the best of his abilities. (Video embedded after the break.)

However, he wanted to step up above the FDM-printed parts of the original kit. Thus, he contacted the kit developer Gman, who provided him with the 3D model files so he could attempt a higher-quality SLA print himself. [Downing] had some experience with SLA printing in the past with the Form 2, but found some unique challenges on this build with the Form 3.

The benefits of SLA printing are the finer detail and surface finish it delivers. This is particularly nice on things like enclosures and buttons which are handled regularly by the user. However, the standard resin that ships with the Form 3 had issues with warping, particularly on thin flat walls which make up the majority of the G-Boy case.

Other issues included the fact that the standard cured SLA resin is much harder to thread screws into than softer FDM plastic, something which frustrated assembly of the design. It’s also brittle, too, which leads to easy breakages.

As a fan of a properly finished product, [Downing] decided to sand and paint the enclosure regardless. Tragedy struck when the spray cans started to spit chunks due to being over a year old. However, it serendipitously turned into a win, producing an attractive granite stone-like finish which actually looks pretty good.

The G-Boy kit took Wii portable builds mainstream, and drew many new builders into the subculture. [Downing] may be a stalwart of the scene, but still learned new skills along the way of the build.

We can’t wait to see what happens next in the scene, though we’d suspect someone’s already out there chopping up a rare PlayStation 5 as we speak.

Continue reading “The Trials And Tribulations Of SLA Printing A Portable Wii Handheld”

Printing Nintendo Portables With SLA

Downing] is no stranger to building portable consoles, employing all manner of techniques in the process. However, when it came time to start on this commission, [Downing] decided to take a different tack – employing a Form 2 SLA printer in this Nintendo 64 portable build.

Modifying home consoles to become portables often involves tricks like Frankencasing – hacking together original factory parts such as controllers, cases, and accessories, and using body filler and a lot of sanding to create a template for vacuum moulding, which then results in a seamless final product. It’s possible to get some really impressive results, but it does limit the builder to relying on existing parts.

By using the Form 2, [Downing] was able to take advantage of the SLA printer’s ability to create parts with good surface finish that would normally require a lot of post-print finishing when 3D printed with more common FDM technology. This was particularly useful as it allowed the creation of custom buttons and small parts that “just fit” – normally such parts are made from stock pieces that are then modified.

The build also features a few other cool features – there’s a breakout box which allows the connection of extra controllers, as well as hosting AV out for hooking up to a television. The breakout box connects to the portable over an HDMI cable. It’s a tidy choice – it’s a standard cable that has an abundance of conductors available so you don’t have to be particularly tricky to get 3 controllers and a few analog signals talking over it.

In the end, [Downing] wouldn’t use SLA printing again for the case itself – the process was too slow and expensive. In this respect, FDM may require more work after printing but it still comes out ahead in terms of time and money. But for small custom parts like buttons and structural brackets, the Form 2 is the machine for the job.

Video after the break.

Continue reading “Printing Nintendo Portables With SLA”

Super-small Robotic Joints Don’t Exist? They Do Now!

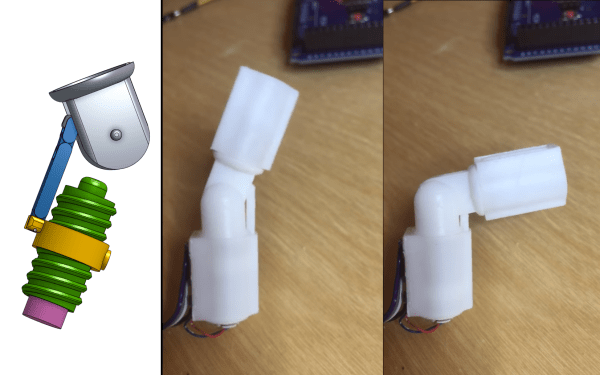
[Tim] needed very small, motorized joints for a robot. Unable to find anything to fit the bill, he designed his own tiny, robotic joints. Not only are these articulated and motorized, they are designed to be independent – each containing their own driver and microcontroller.

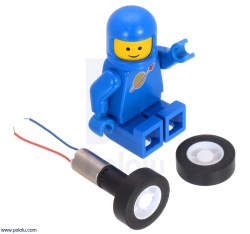
6mm geared motor next to LEGO [Source: Pololu]
None of the photos or video really give a good sense of just how small [Tim]’s design is. The motor (purple in the 3D render above, and pictured to the left) is a sub-micro planetary geared motor with a D shaped shaft. It is 6mm in diameter and 19mm long. One of these motors is almost entirely encapsulated within the screw it drives (green), forming a type of worm gear. As the motor turns the screw, a threaded ring moves up or down – which in turn moves the articulated shaft attached to the joint. A video is embedded below that shows the joint in action.

[Tim] originally tried 3D printing the pieces on his Lulzbot but it wasn’t up to the task. He’s currently using a Form 2 with white resin, which is able to make the tiny pieces just the way he needs them.

Continue reading “Super-small Robotic Joints Don’t Exist? They Do Now!”

A 3D Printed Camera (Including The Lens)

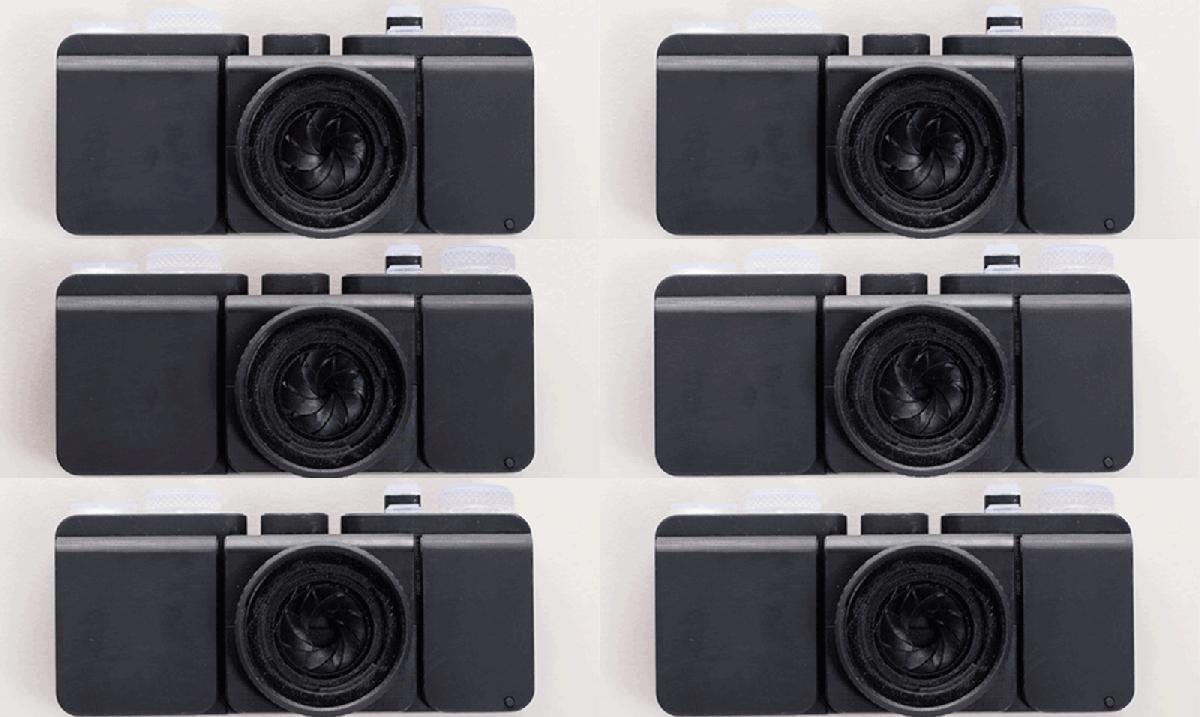
Barring the RepRap project, we usually see 3D printers make either replacement parts or small assemblies, not an entire finished product. [Amos] is the exception to this rule with his entirely 3D-printed camera. Everything in this camera is 3D printed, from the shutter to the lightproof box to the lens itself. It’s an amazing piece of engineering, and a testament to how far 3D printing has come in just a few short years.

35mm film is the most common film by far, and the only one that’s still easy to get and have developed at a reasonable price. This 3D-printed camera is based on that standard, making most of the guts extremely similar to the millions of film cameras that have been produced over the years. There’s a film cartridge, a few gears, a film takeup spool, and a lightproof box. So far, this really isn’t a challenge for any 3D printer.

The fun starts with the lens. We’ve seen 3D printers used for lens making before, starting with a 3D print used to create a silicone mold where a lens is cast in clear acrylic, 3D printed tools used to grind glass, and an experiment from FormLabs to 3D print a lens. All of these techniques require some surface finishing, and [Amos]’ lens is no different. He printed a lens on his Form 2 printer, and started polishing with 400 grit sandpaper. After working up to 12000 grit, the image was still a bit blurry, revealing microscopic grooves that wouldn’t polish out. This led him to build a tool to mechanically polish the lens. This tool was, of course, 3D printed. After polishing, the lens was ‘dip polished’ in a vat of uncured resin.

The shutter was the next challenge, and for this [Amos] couldn’t rely on the usual mechanisms found in film cameras. he did find a shutter mechanism from 1885 that didn’t take up a lot of depth, and after modeling the movement in Blender, designed a reasonable shutter system.

Building an entire camera in a 3D printer is a challenge, but how are the pictures? Not bad, actually. There’s a weird vignetting, and everything’s a little bit blurry. It’s hip, trendy, and lomo, and basically amazing that it works at all.