Hackaday Prize Entry: Alarm Detection For The Hearing Impaired

A few years ago, [K.C. Lee] woke up in the middle of the night to the smell of smoke. He was drying a futon next to the heater and it caught on fire. A smoke detector would have helped in that situation, but wouldn’t have for anyone who was hearing impaired. Since we’re in the Assistive Technologies portion of the Hackaday Prize, [KC] decided to build on his previous work and build an alarm alarm – a device that would tell anyone when an alarm is going off

Smoke detectors and other alarms are surprisingly standardized – loud, somewhere around 3kHz. (Not coincidentally around the resonant frequency of a 3/4″ piezo disc.) Some modern alarms use a 520 Hz alarm, but in either case, you’re looking at something very loud with a very narrow peak when viewing the audio spectrum.

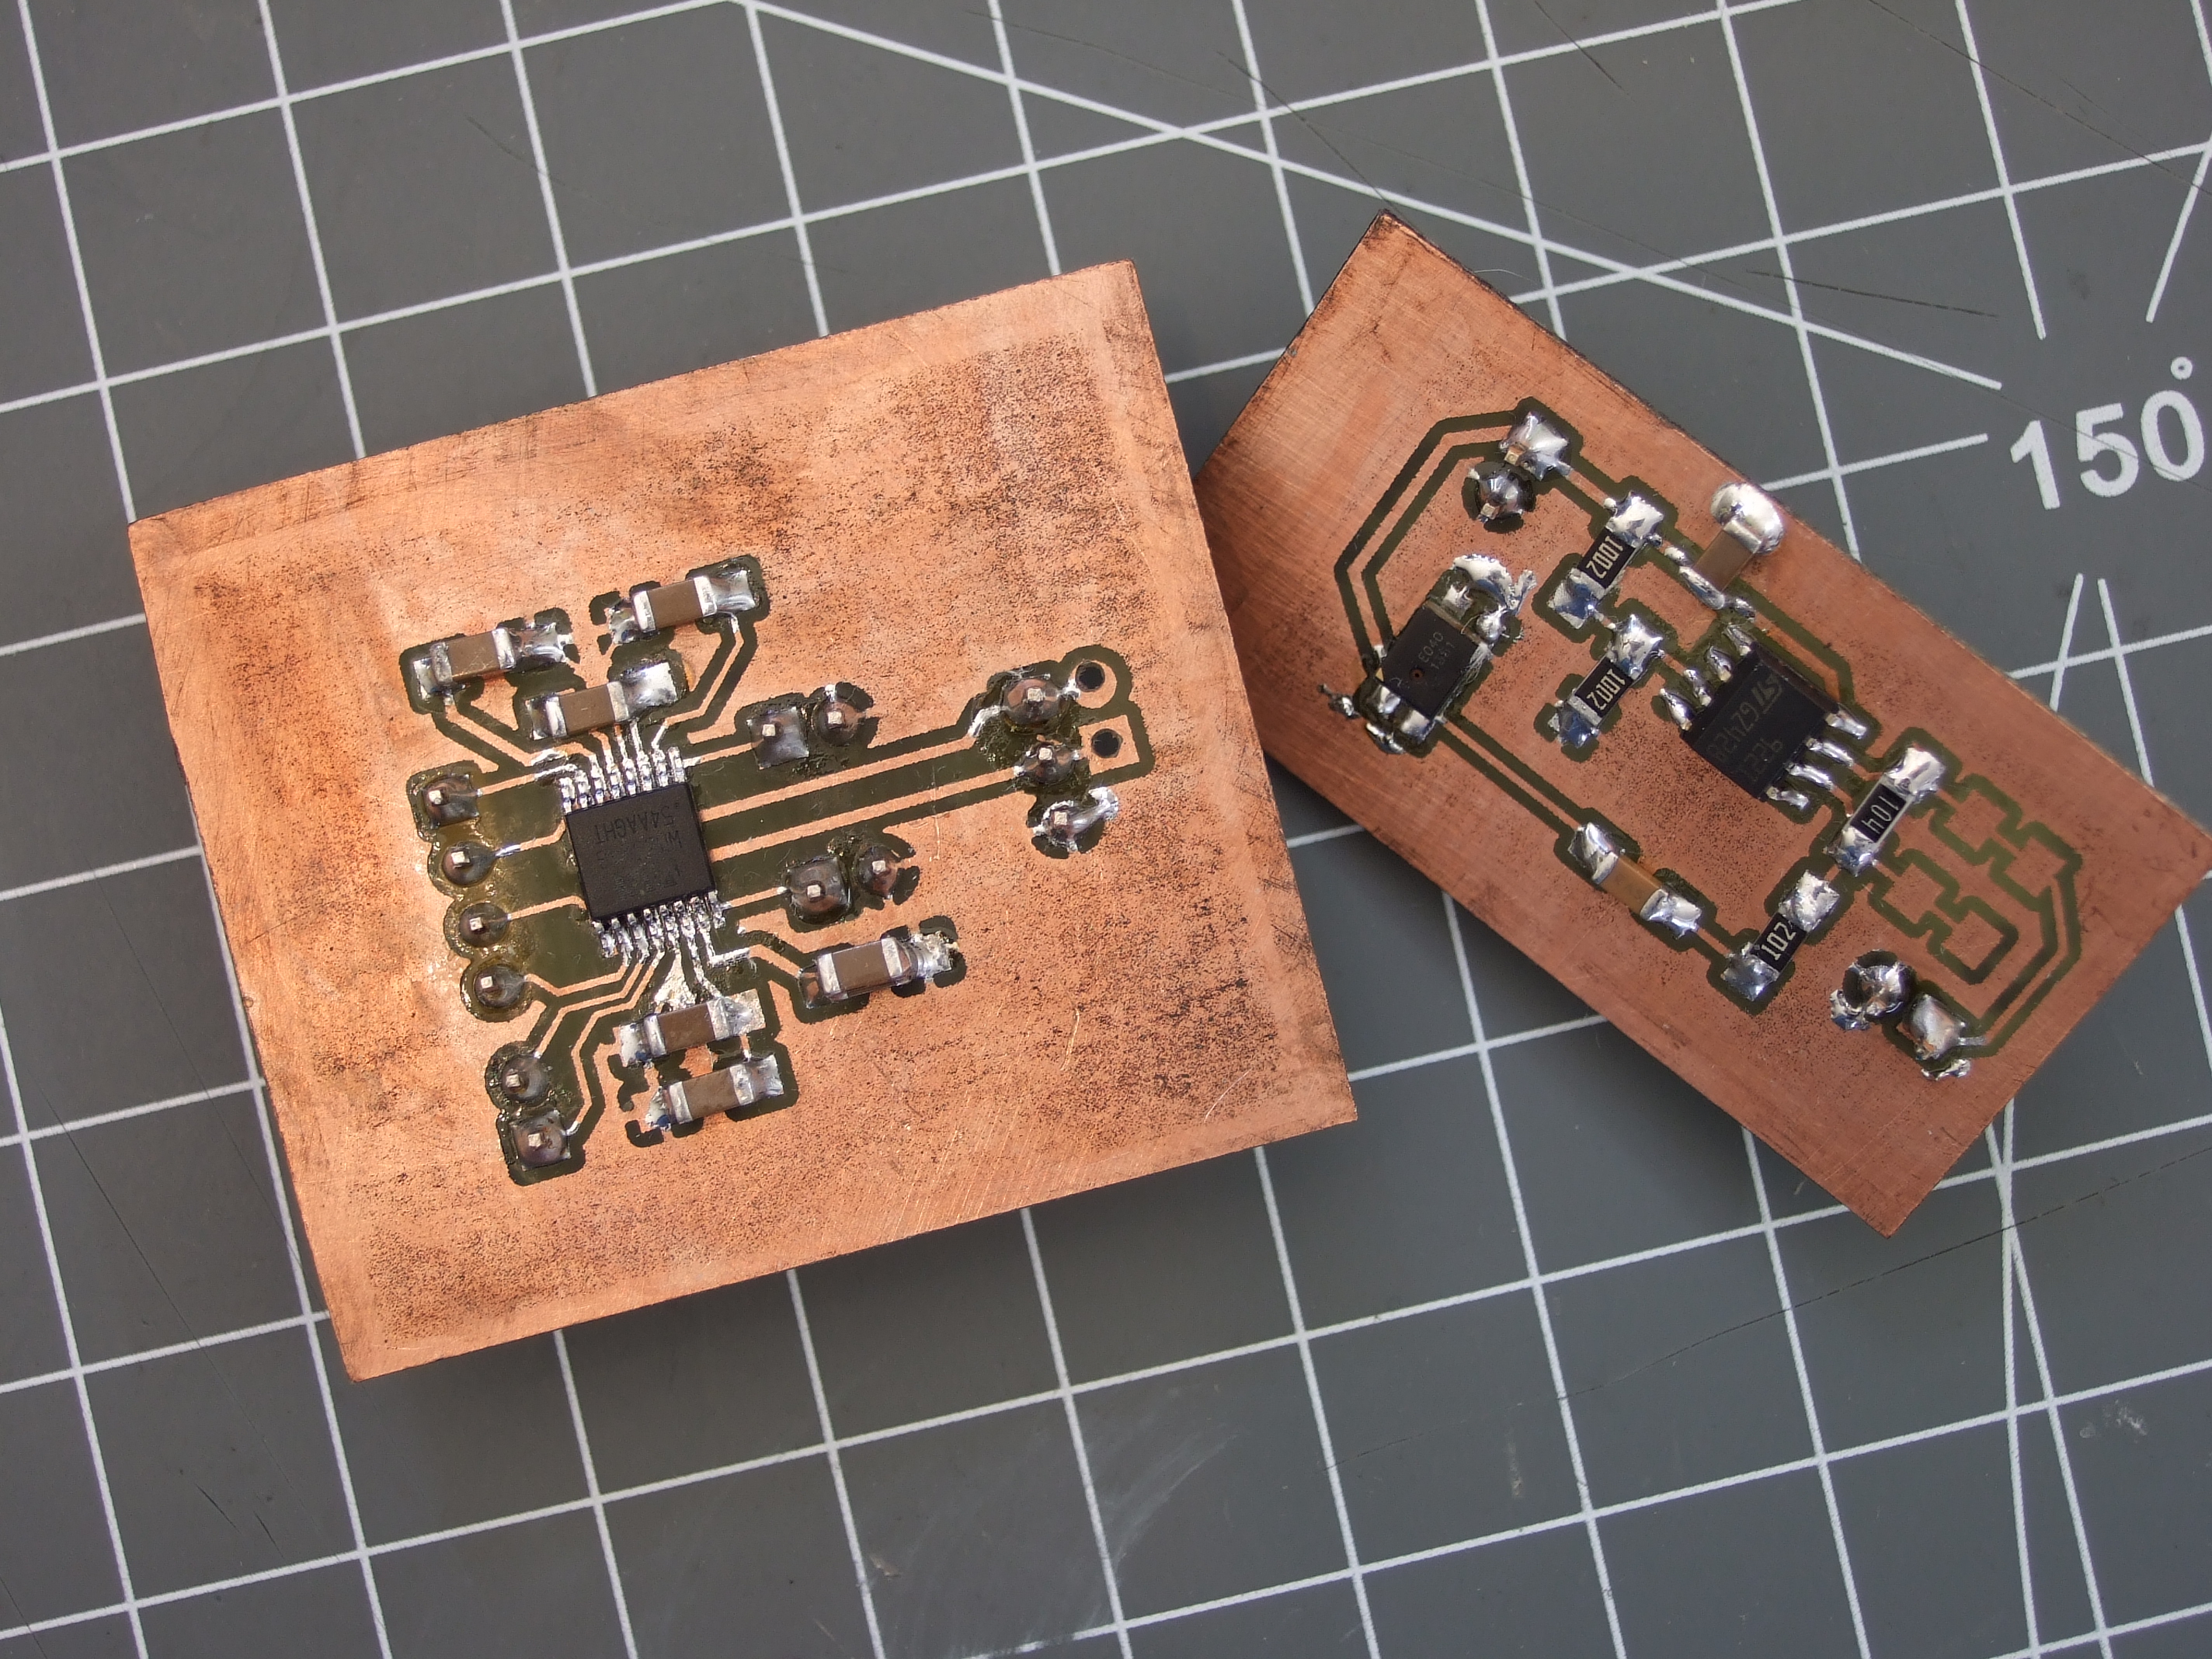
[KC]’s Alarm Detector relies on this one property to detect alarms and light up, vibrate, or really do anything else that can be controlled electronically. Right now the device is a tiny STM32F0-based device with an old Nokia LCD working as a spectrum analyzer, with the entire device lighting up whenever an alarm is detected. It’s simple, it works, and it’s a great entry for the Assistive Technology portion of the Hackaday Prize.

Diodes With Hats: Zener And Schottky

For beginners, diode types can sometimes be a bit of mental gymnastics. If all it does is act like a magic pixie check valve, why are there so many kinds? Schottky diodes are typically  hard to mentally set apart from the standard when described by a data sheet. Zener diodes can be downright baffling for beginners, especially when mistakenly thrown in a circuit in place of a regular 1N4001. [Afrotechmods] put together a great video explaining their difference and use cases.

In both videos he does an excellent job of describing the pros and cons while setting up experiments to exhibit each. For the Schottky it’s the faster switching and lower voltage drop. For Zener it’s less about the cons and more about exploiting its strange configuration for voltage clamps, regulators, and making expensive guitars sound bad with audio distortion circuits.

He finishes both videos with good design tips for selecting and using the parts as a burgeoning circuit designer. Diode data sheets should be less of a mystery afterwards.

Continue reading “Diodes With Hats: Zener And Schottky”

Build Your Own Import Variable Lab Bench Power Supply

Does it ever just kill you that someone in a factory somewhere got to have all the fun of assembling your bench tools? There are a lot of questionable circuit boards floating around the Internet, and they can replicate practically any section of a circuit. When it comes to putting a prototype these days you can pretty much just buy each block of your system’s overview flowchart and string them together. [GreattScott!] combines a few of these into a relatively useful variable power supply with current limiting.

Admittedly, this is more of academic exercise if your only metric for success is monetary savings. Comparable power supplies can be purchased for the same amount of local currency as the parts in this build. However, there is something to be said for making it yourself.

The core of this build is based around the LTC3780, a bit of silicon from LT that offers both buck and boost converting along with a current control mode. It’s useful for a lot of things. The here is rated for up to 130 watts of power, which makes is a decent amount of power for a bench supply.

With a few modifications, like replacing the world’s most untrustworthy potentiometers and adding a nice ABS box, the build is completed. Along the way, [GreatScott!] offers a few tricks for testing and some reminders of how not to make yourself dead when playing with electricity.

The end is a working lab bench supply project that can easily keep a hacker entertained on a lazy Sunday afternoon.

Continue reading “Build Your Own Import Variable Lab Bench Power Supply”

Wazer: The Waterjet For Your Garage

Most hobbyists don’t have waterjets in their garage, but they would if they could! A Waterjet (or Water Jet Cutter) is a marvelous tool. Simply mount a high-pressure stream of grit and water on an x-y gantry, and the pressure generates enough erosion to cut through just about any thin material. Unfortunately, claiming your own waterjet will erode away a nice big hole in your pocketbook too. Machines up to this point start at about $75K, not to mention that they’d claim the better part of your workspace in a two-car garage.

Most of us everyday hackers that want to play with the benefits of this tool send their parts out to a professional shop. Consequently, we don’t often hear about everyday hackers using waterjets, or waterjet-cut parts all that often, with one exception. Back in 2014, a crew of students from UPENN built a functional waterjet with a parts-list that could make it affordable for about $5000. Now that same team is back. This time, they’ve spun together not just a one-off, but a fully-featured product called Wazer, which just launched its Kickstarter campaign minutes ago and has already nearly quadrupled the $100k goal. How could it do that? The full package starts at modest $3599-$4499. This is crowd-funding, after all, but a 20x undercutting of price is a powerful motivator.

Continue reading “Wazer: The Waterjet For Your Garage”

Licorice Launcher Locks On To Your Voice

As the red licorice wars rage on inextinguishably, it appears that Team Red Vines has a new advantage over Team Twizzlers—[TVMiller]’s voice activated, room-tracking, catapult-launching, magazine reloading Arduino licorice launcher.

Hacking and snacking often go hand in hand. They go together even better if you have a robot that can throw a tasty treat to you on command. That’s the dream behind this candy catapult. We’ve featured quite a few of [TVMiller]’s projects in the past, so we know he spends a lot of time hacking. So, how does this licorice launcher work to him keep going?

Continue reading “Licorice Launcher Locks On To Your Voice”

Decapsulation Reveals Fake Chips

A while back, [heypete] needed to get a GPS timing receiver talking to a Raspberry Pi. The receiver only spoke RS-232, and the Pi is TTL level serial. [Pete] picked up a few RS-232 to TTL conversion boards from an online vendor in China. These boards were supposedly based on the Max3232, a wonderchip that converts the TTL serial to the positive and negative voltages of RS-232 serial. The converters worked fine for a few weeks, before failing, passing a bunch of current, and overheating.

On Mouser and Digikey, the Max3232 costs about $1.80 in quantity one, and shipping is extra. You can pick up a ‘Max3232 converter board’ from the usual online marketplaces for seventy five cents with free shipping. Of course the Chinese version is fake. [Pete] had some nitric acid, and decided to compare the die of the real and fake Max3232s.

After desoldering two fake chips from their respective converter boards, and acquiring a legitimate chip straight from Maxim, [Pete] took a look at the chips under the microscope. The laser markings on the fakes are inconsistent, but there was something interesting to be found in the date code markings. It took two to four weeks for the fake chips to be etched with a date code, assembled into a converter board, shipped across the planet, put into [Pete]’s project, run for a little bit, and fail spectacularly. That’s an astonishing display of manufacturing, logistics, and shipping times. Update: The date codes on the fakes had 2013 laser etched on the plastic package, and 2009 on the die. The real chips had a date code just a few weeks before [Pete] decapped them — a remarkably short life but they gave in to a good cause.

Following the Zeptobars and CCC (PDF) guides to dropping acid, [Pete] turned his problem into solution and took a look at the dies under a microscope. The legitimate die was significantly larger, and the fake dies were identical. The official die used gold bond wires, but the fake ones didn’t.

Unfortunately, [Pete] isn’t an expert in VLSI, chip design, failure analysis, or making semiconductors out of sand. Anything that should be obvious to the layman is not, and [Pete] has no idea why these chips would work for a week, then overheat and fail. If anyone has an idea, hit [Pete] up and drop a note in the comments.

Take Your PCBs From Good To Great: Toner Transfer

dscf8697
One-offs that I never would have gotten professionally made, but that were infinitely handy during development

A lot of us make circuit boards at home. I find it a useful skill to have in my bag of tricks for intermediate steps along the way to a finished project, even if the finished version is going to be sent out to a PCB fab. When I need a breakout board that meshes with other development tools, for instance, there’s nothing like being able to whip something up that plugs right in. Doing it quickly, and getting on with the rest of the project instead of placing an order and waiting for delivery, helps keep me in the flow.

Toner transfer is by far the fastest way to make a circuit board at home — simply print the circuit out on a laser printer, iron it onto the copper, and etch. When it works, it’s awesome. When it doesn’t, it can be a hair-pulling exercise in figuring out which of myriad factors are misaligned.

For a long time now, I’ve been using a method that’s very reliable and repeatable. Recently, I’ve been tweaking a bit on the performance of the system, and I thought I’d share what I’ve got. At the moment, I’m able to very reliably produce boards with 6 mil (0.15 mm) traces and 8 mil (0.20 mm) spacing. With a little care in post-production, 4 mil / 6 mil is entirely plausible.

Continue reading “Take Your PCBs From Good To Great: Toner Transfer”